4D-Nucleofector™ Manual –
Bioscience Solutions
29
2.12.2
Results
This menu will display a list of result files and allows you to manage
them. Result files are listed in chronological order with newest results
at the top. To open existing result files just select the file you’d like
to open and press
“VIEW”
. To erase result files that are no longer required,
select the file from the list and press
“CLR”
. To store result files on a USB
stick, insert the USB device into the USB port on the front of the Core
Unit and press
“SAVE”
. Pressing “i” displays further information related
to the result file (figure 2.27, D).
2.12.3
Custom Programs
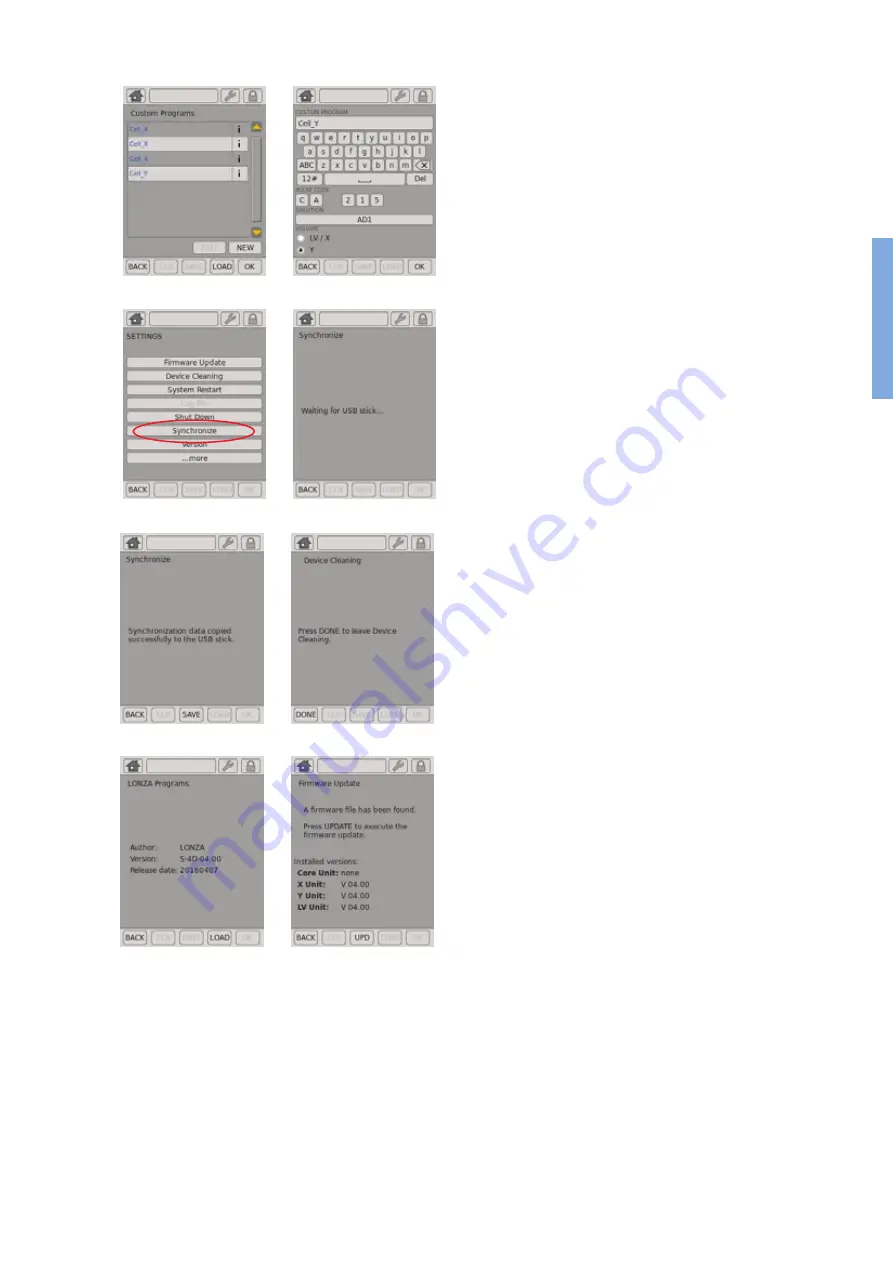
The software offers the possibility to add custom program codes for
choosing a defined combination of a Nucleofector™ Program and Solution,
e.g., after an optimization. Custom program codes are included in
alphabetical order into the “Cell Type Program” list and can be differentiated
from Lonza defined code by color:
Blue:
Lonza defined cell type program codes
Black:
Customer defined codes. You can create new custom programs
by pressing the
“NEW”
field. Edit existing programs by pressing
“EDIT”
or
save your programs onto a USB stick by pressing
“SAVE”
(figure 2.27, E).
To create a new custom program or to edit an existing program:
– Press
“NEW”
or select an existing program and press
“EDIT”
.
– A screen will open comprising a keyboard, “PULSE CODE” setting, a
“SOLUTION” field and a “VOLUME” selection (figure 2.27, F).
– Define a name for your custom program by typing, e.g., the cell name.
– Press
“SOLUTION”
to display a list of available solutions.
– Select the solution most suited for your cell from the list and confirm
your selection with
“OK”
.
– Define the Nucleofection program by typing in the
“PULSE CODE”
— you
can determine the best program by using one of our optimization kits
or simply use the code from an existing optimized protocol.
– Select functional units for which the code should apply (either X and
LV Unit or Y Unit).
– Confirm the setting for your custom program by pressing
“OK”
.
– The custom program can now be selected for an experiment by
pressing the
“CELL TYPE LIST”
field.
Custom program codes won’t be overwritten in case an updated program
definition file is installed (see chapter 2.12.6).
E Menu “Custom Programs”
F Menu “Custom Programs”
H Menu “ Synchronization”
G Menu “ Synchronization”
Figure 2.27:
Continued
J
L
I
K
2


