


USB BOOT CLIENT
Logicube SuperSonix-
NG™ User’s Manual
85
8.4 Using the USB Boot Client
Drives connected to the computer can be used by the SuperSonix-NG as a Master drive over a network
connection if the USB Boot Client is used to boot computer. The USB Boot Client is set to DHCP.
1.
Make sure the SuperSonix-NG is connected to the same network the USB Boot Client will be used
on (or directly connected to the computer using a network cable). Boot the computer with the
bootable flash drive.
Please contact the computer manufacturer if you do not
know how to change the boot sequence to boot from a USB
drive or to find out if the computer supports this function.
2.
The USB flash drive’s boot menu will appear, and It should auto
-
select “iSCSI Target (64
-
bit)” after
a few
seconds. If not, select “iSCSI Target (64
-
bit)”.
The default (64-bit) should work with most computers. If it
does not work, use the connected keyboard’s DOWN arrow
to select iSCSI Target (32-bit) to boot with the 32-bit version.
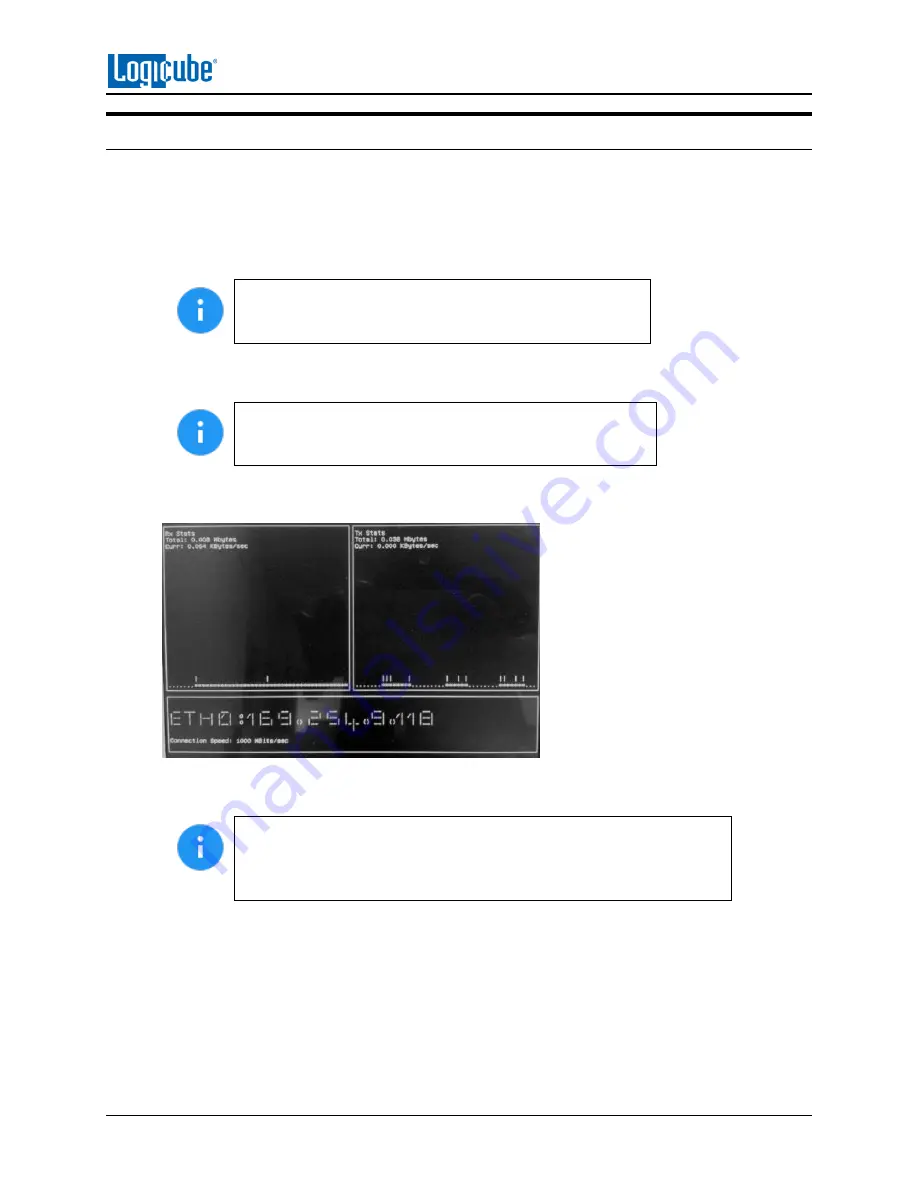
3.
After about 30-180 seconds (depending on the speed of the computer), the USB Boot Client
should finish booting up and a screen like the one below will be seen on the computer’s screen:
4.
Turn the SuperSonix-NG on. After the unit boots up, you should see additional drives appear on
the Master position depending on the Imaging mode chosen.
The Logicube device will show the last two segments of the IP address.
For example,
I:9.118.
The connected drive will show as
SDA
. If there are
any additional connected drives, they will show as
SDB
,
SDC
, etc. For
example, if there is one drive connected, it will show as:
I:9.118/SDA
.
From here you can clone using the SuperSonix-NG using the normal imaging steps. Please keep in mind
that cloning speeds may be slower than normal, as the imaging is being performed over a network.


