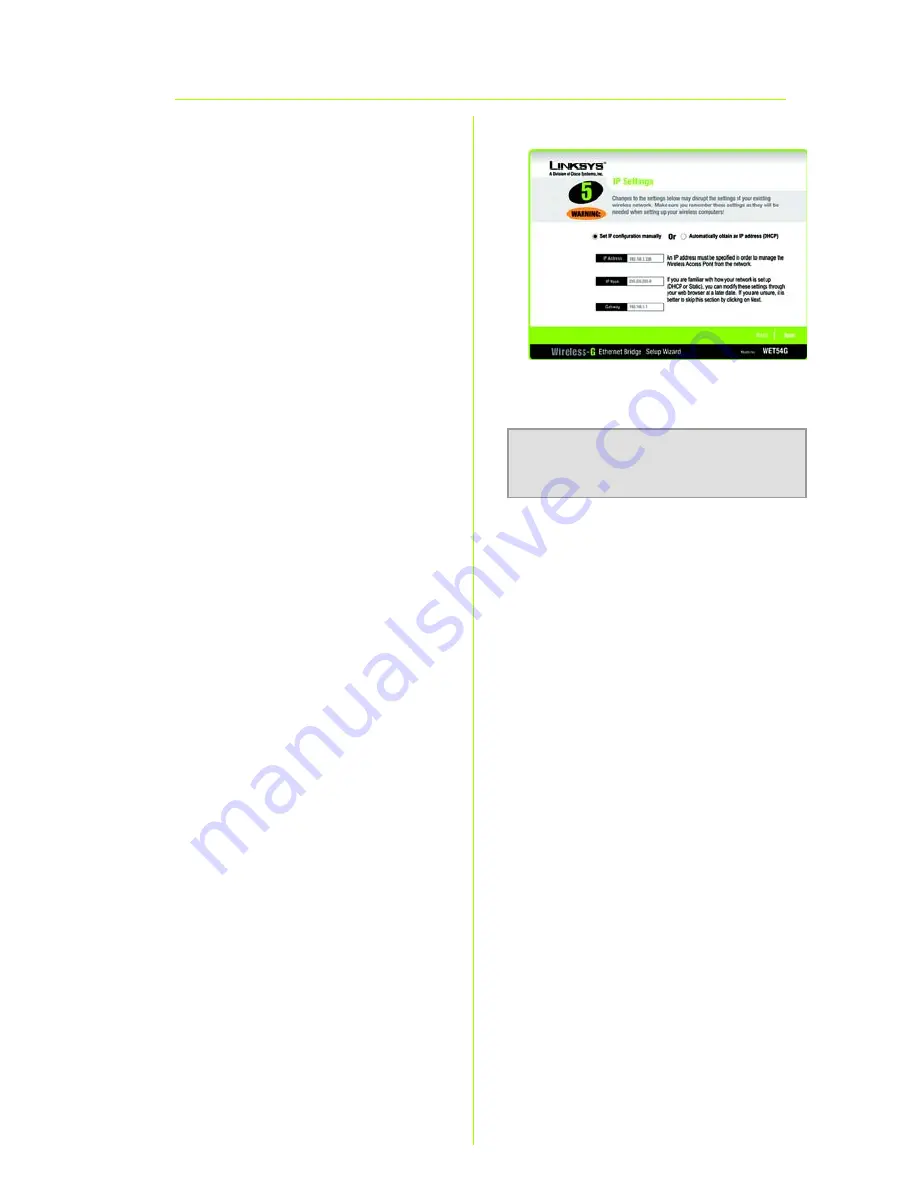
background image

5

H

The 

IP Settings

 screen will 

appear. If your network has a 

DHCP server, select 

Automatically obtain an IP 

address (DHCP)

. Click 

Next


and proceed to step I.

If your network does not have a 

DHCP server, select 

Set IP 

configuration manually

. Enter 

an IP Address, IP Mask (also 

known as Subnet Mask), and 

Gateway. 

You must specify an IP address. 

If you are unsure about the IP 

Mask and Gateway, leave 

these two fields blank. Click 

Next

.

NOTE:

The default IP address of 

the Bridge is 

192.168.1.226

.

H

Summary of Contents for WET54G - Wireless-G EN Bridge

Page 1: ...ireless 1 Quick Installation Guide Model No WET54G UK EU LA v2 Ethernet Bridge Wireless G Package Contents Wireless G Ethernet Bridge Setup CD ROM User s Guide on CD Quick Installation Guide Detachabl...

Page 2: ...ge C Plug the other end of the Ethernet network cable into the RJ 45 port of the hub switch or PC you wish to use to configure the Bridge D Plug the supplied power adapter into the Power port on the b...

Page 3: ...ter D setup exe if D is the letter of your CD ROM drive B Click Setup to begin the setup process C Make sure the Bridge is correctly connected to your wired network Click Next D The screen displays a...

Page 4: ...Select Ad Hoc if you want wireless computers to communicate directly with each other In the WB Name field enter a unique name for the Bridge Click Next G On the Wireless Settings screen enter your wi...

Page 5: ...ed to step I If your network does not have a DHCP server select Set IP configuration manually Enter an IP Address IP Mask also known as Subnet Mask and Gateway You must specify an IP address If you ar...

Page 6: ...AES with dynamic encryption keys Select the type of algorithm TKIP or AES Enter a WPA Shared Key of 8 32 characters The WEP key can consist of the letters A through F and the numbers 0 through 9 and...

Page 7: ...your settings on the Confirmation screen Write down the Bridge s IP Address if you want to access the Bridge s Web based Utility Click Yes to save these settings K On the Congratulations screen click...

Page 8: ...from the PC B Plug the Ethernet network cable into the RJ 45 port on the Ethernet ready network device you wish to add to the wireless network C Plug the power adapter into a local electrical outlet C...

Reviews: