background image

3

2

A

A

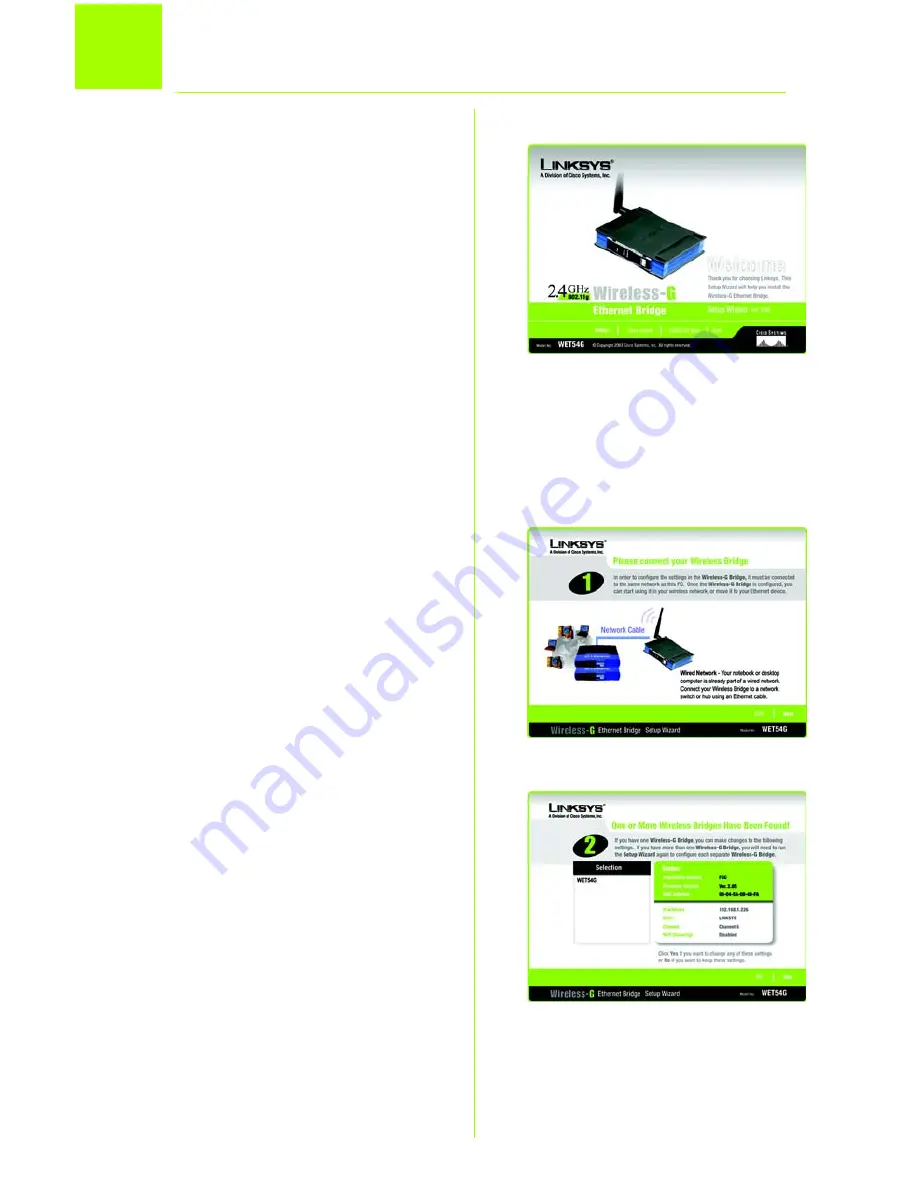
Insert the Setup CD-ROM into 

your PC’s CD-ROM drive. The 

Setup Utility should run 

automatically, and the 

Welcome

 screen should 

appear. If it does not appear, 

click the 

Start

 button and 

choose 

Run

. In the field that 

appears, enter 

D:\setup.exe

 (if 

“D” is the letter of your CD-ROM 

drive).

B

Click 

Setup

 to begin the setup 

process.

C

Make sure the Bridge is 

correctly connected to your 

wired network. Click 

Next

.

D

The screen displays a list of 

Wireless-G Ethernet Bridges on 

your network, along with their 

status information. Select the 

Bridge you are currently 

installing by clicking its name in 

the 

Selection

 box. Click 

Yes

.

C

D

Set up the Wireless-G 
Ethernet Bridge

Summary of Contents for WET54G - Wireless-G EN Bridge

Page 1: ...ireless 1 Quick Installation Guide Model No WET54G UK EU LA v2 Ethernet Bridge Wireless G Package Contents Wireless G Ethernet Bridge Setup CD ROM User s Guide on CD Quick Installation Guide Detachabl...

Page 2: ...ge C Plug the other end of the Ethernet network cable into the RJ 45 port of the hub switch or PC you wish to use to configure the Bridge D Plug the supplied power adapter into the Power port on the b...

Page 3: ...ter D setup exe if D is the letter of your CD ROM drive B Click Setup to begin the setup process C Make sure the Bridge is correctly connected to your wired network Click Next D The screen displays a...

Page 4: ...Select Ad Hoc if you want wireless computers to communicate directly with each other In the WB Name field enter a unique name for the Bridge Click Next G On the Wireless Settings screen enter your wi...

Page 5: ...ed to step I If your network does not have a DHCP server select Set IP configuration manually Enter an IP Address IP Mask also known as Subnet Mask and Gateway You must specify an IP address If you ar...

Page 6: ...AES with dynamic encryption keys Select the type of algorithm TKIP or AES Enter a WPA Shared Key of 8 32 characters The WEP key can consist of the letters A through F and the numbers 0 through 9 and...

Page 7: ...your settings on the Confirmation screen Write down the Bridge s IP Address if you want to access the Bridge s Web based Utility Click Yes to save these settings K On the Congratulations screen click...

Page 8: ...from the PC B Plug the Ethernet network cable into the RJ 45 port on the Ethernet ready network device you wish to add to the wireless network C Plug the power adapter into a local electrical outlet C...

Reviews: