9. REPLACEMENT OF THE
BRUSH ROLLER
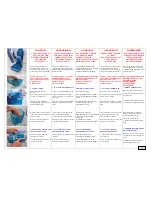
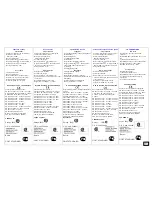
REMOVE THE TANK
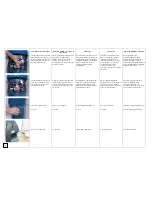
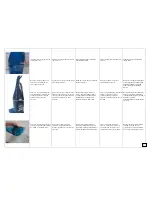
Put the machine on the left side.
Rotate the side support
counterclockwise.
Push the brush roll up against the
support and remove the support.
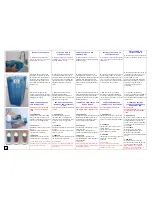
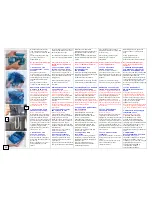
Put back the brush roll in to the
brush housing and pull it out from
underneath.
To remount the brush roll insert it
from underneath with the white
drive joint of the brush roll on the
same side as the white drive joint
of the base.
Rotate it until it gets in the right
position. Remount the lateral
support and hook it by rotating it
clockwise until it blocks.
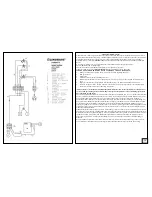
10. CLOGGING
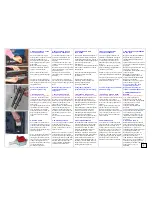
In case of clogging it is easy to
check the whole suction circuit:
a.
remove the tank
and check that
the motor protection filter is clean.
If it’s dirty, wash it under running
water , wring it and let it dry
completely before remounting it.
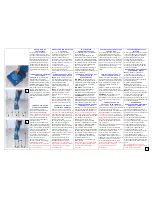
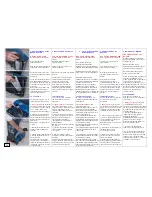
b. rotate the red clip and remove
the transparent converter cover.
Check inside the suction converter
making sure it is completely free
from debris.
Remount the cover and hook the
red clip.
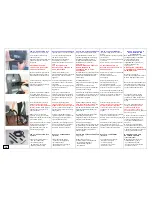
c. unhook the suction connector
rotating first the hooking lever
upwards.
d. unhook the hose from the nozzle
group and check that the hose is
free from debris.
Should the hose be completely
clogged, insert a small flexible
tube with rounded point and let it
run through until it comes out on
the opposite side.
9. SOSTITUZIONE DEL RULLO
TOGLIERE IL SERBATOIO
Stendere l’apparecchio sul lato
sinistro.
Ruotare in senso anti orario il
supporto laterale.
Sfilare il rullo verso il supporto e
togliere il supporto.
Riportare in sede il rullo e poi sfilarlo
da sotto.
Per rimontare il rullo, inserirlo da
sotto mantenendo il trascinatore
bianco nello stesso lato del
trascinatore bianco della base.
Farlo ruotare fino a portarlo in
posizione. Rimontare il supporto
laterale ed agganciarlo facendolo
ruotare in senso orario fino al blocco
sui fermi.
10. OSTRUZIONI
In caso di ostruzioni, è semplice
controllare l'intero circuito di
aspirazione:
a.
togliere il serbatoio
e controllare
che il filtro protezione motore sia
pulito. Se è sporco, lavarlo sotto acqua
corrente, strizzarlo e poi farlo
asciugare completamente prima di
rimontarlo.
b. ruotare la clip rossa e smontare il
coperchio convogliatore trasparente
dal gruppo bocchette aspiranti e
controllare che l’interno del
convogliatore sia completamente
libero da detriti.
Rimontare il coperchio ed agganciare
la clip rossa.
c. sganciare il bocchettone aspirante
ruotando prima la leva di aggancio
verso l’alto.
d. sganciare il tubo dal gruppo
bocchette e controllare che sia libero
da detriti.
Se il tubo risultasse completamente
ostruito, infilare un tubetto flessibile a
punta arrotondata e farlo scorrere fino
a farlo uscire dal lato opposto.
9.
AUSWECHSLUNG DER
BÜRSTENROLLE
DEN TANK ABNEHMEN
Die Maschine auf die linke Seite
stellen.
Die seitliche Halterung im
Gegenuhrzeigersinn drehen.
Die Bürstenrolle gegen die Halterung
abdrehen und die Halterung entfernen.
Die Bürstenrolle wieder in ihren Sitz
bringen und von unten herausnehmen.
Um die Bürstenrolle wieder
aufzumontieren wird sie von unten mit
dem weissen Mitnehmer der Rolle auf
derselben Seite des weissen
Mitnehmers des Fusses eingefügt.
Abdrehen bis sie in die richtige
Position gebracht wird. Die seitliche
Halterung wieder aufmontieren und
zuhaken, indem sie bis zur Blockierung
im Gegenuhrzeigersinn gedreht wird.
10. VERSTOPFUNGEN
Im Falle von Verstopfungen ist es
einfach den ganzen Saugkreislauf zu
kontrollieren:
a.
den Tank abnehmen
und
kontrollieren, dass der
Motorschutzfilter sauber ist. Falls er
schmutzig ist, unter fliessendem
Wasser auswaschen, auswinden und
vollkommen trocknen lassen, bevor er
wieder aufmontiert wird.
b. den roten Klipp drehen und den
durchsichtigen Konverterdeckel
herausnehmen. Kontrollieren dass der
Saugkonverter innen vollkommen frei
ist von Trümmerstücken.
Den Deckel wieder aufmontieren und
den roten Klipp zuhaken.
c. den Saugrohrstutzen loslösen indem
zuerst der Einhakhebel nach oben
gedreht wird.
d. den Schlauch von der Düsengruppe
loslösen und kontrollieren, dass er frei
ist von Trümmerstücken.
Sollte der Schlauch völlig verstopft
sein, kann ein flexibles Schläuchen mit
abgerundeter Spitze eingefügt werden
und entlanglaufen lassen, bis er auf der
Gegenseite wieder rauskommt.
9. REMPLACEMENT DU
ROULEAU
ENLEVER LE RESERVOIR
Poser l’appareil sur le coté gauche.
Tourner en sens anti-horaire le
support latéral.
Faire glisser le rouleau vers le
support et ôter le support.
Remettre le rouleau dans son
logement et ensuite le ôter par-
dessous
Pour réinstaller le rouleau,
l’introduire par dessous par
l’entraîneur blanc du rouleau, du
même coté de l’entraîneur blanc de la
base.Le faire tourner jusqu’à ce qu’il
soit en place. Remonter le support
latéral et l’accrocher en le faisant
tourner en sens horaire jusqu’au
blocage.
10. OBSTRUCTIONS
En cas d’obstructions, il est simple
de contrôler le circuit entier
d’aspiration.
a.
Enlever le réservoir
et vérifier
que le filtre de protection moteur soit
propre. S’il est sale, le laver à l’eau
courante et ensuite le faire sécher
complètement avant de le remonter.
b. tourner la clips rouge et démonter
le couvercle transparent du groupe
suceurs aspirants et vérifier qu’ils
soient libres de détritus.
Remonter le couvercle et accrocher
les clips rouges.
c. Décrocher le raccord aspirant en
tournant d’abord le levier
d’accrochage vers le haut.
d. Décrocher le tube du groupe de
suceurs et vérifier que le tube soit
libre de tout détritus.
Si le tube apparaît complètement
bouché, enfiler un petit tube flexible
à pointe arrondie et le faire glisser
jusqu’à le faire sortir de l’autre côté
9.
ЗАМЕНА
ВАЛА
ЩЕТКИ
УБЕРИТЕ
РЕЗЕРВУАР
С
ВОДОЙ
Положите
машину
на
левый
бок
.
Поверните
боковую
опору
против
часовой
стрелки
.
Вытолкните
вал
щетки
в
противоположном
направлении
от
крепления
и
выньте
крепление
.
Поставьте
вал
щетки
обратно
в
корпус
и
выньте
вал
снизу
.
Чтобы
поставить
вал
щетки
на
место
поставьте
его
нижнюю
часть
с
белым
управляющим
соединением
с
той
же
стороны
,
что
и
белое
управляющее
соединение
корпуса
.
Поворачивайте
вал
щетки
,
пока
она
не
станет
в
правильное
положение
.
Поставьте
на
место
боковую
опору
и
закрепите
ее
,
поворачивая
по
часовой
стрелке
.
10.
ЗАСОРЕНИЕ
Если
пылесос
засорился
,
то
проверить
все
систему
всасывания
очень
просто
.
а
.
Выньте
резервуар
и
убедитесь
,
что
защитный
фильтр
мотора
чистый
.
Если
он
загрязнен
,
промойте
его
под
проточной
водой
,
выкрутите
и
хорошо
высушите
перед
тем
,
как
поставить
на
место
.
б
.
Поверните
красный
зажим
,
и
снимите
прозрачную
крышку
конвертера
.
Проверьте
всасывающий
конвертер
изнутри
,
убедитесь
,
что
он
не
засорен
.
Установте
прозрачную
крышку
на
место
и
поверните
зажим
.
в
.
отстегните
всасывающий
коннектор
,
повернув
вверх
рычаг
.
г
.
Отстегните
шланг
от
форсунок
и
проверьте
,
не
засорен
ли
он
.
Если
шланг
засорен
,
вставьте
небольшую
гибкую
трубку
с
заокругленным
кончиком
и
протолкните
ее
,
пока
она
не
выйдет
с
другого
конца
.
14
Summary of Contents for LindWash 30 Class A
Page 14: ...15...


