


4. Installation
UCX series – User's Manual
22
Applied firmware package: v1.1.0b7 | LDC software: v2.5.4b3
4.6.
Connecting Steps
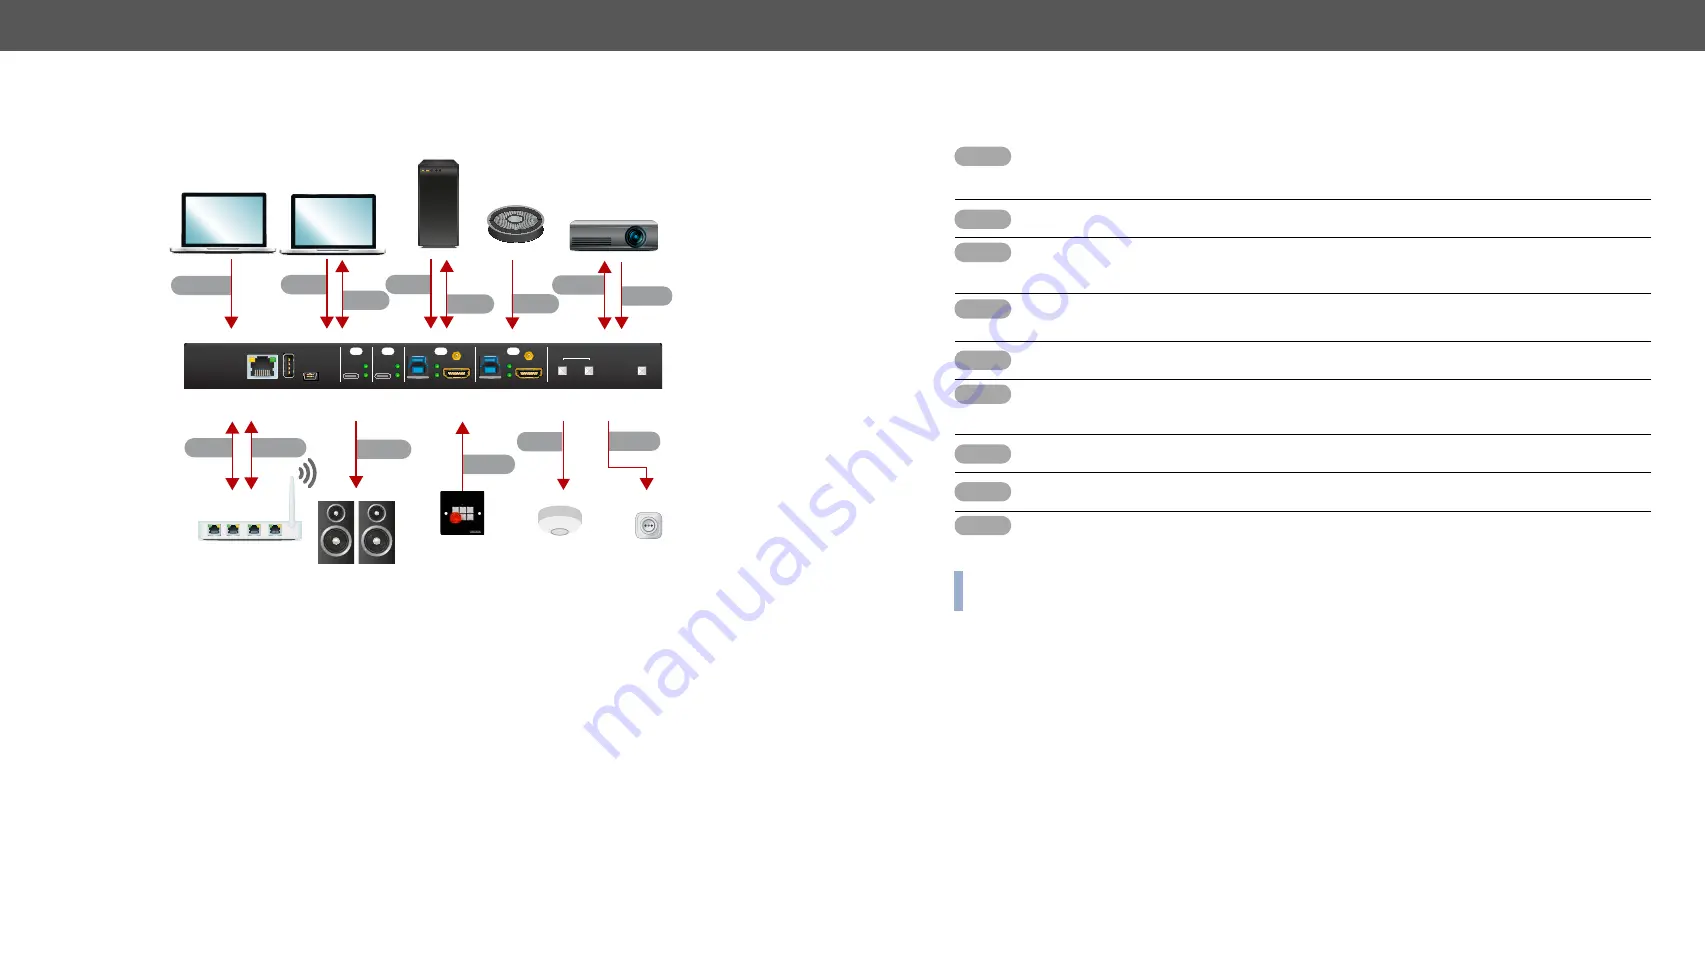
USB-C
HDMI
ETHERNET 3
USB-B
IN 1
IN 2
IN 3
IN 4
HDMI
USB-B
USB-C
AUDIO
OUT
OUT 2
OUT 1
VIDEO
SERVICE
USB
CONTROL
INPUT SELECT
CATx
HDMI
Power
outlet
Room PC
Projector
Speaker
phone
USB-C
OCS
RS-232
Occupancy
sensor
GPIO
Power
USB
HDMI
BYOD
Laptop 1.
BYOD
Laptop 2.
HDMI
CATx
CATx
Ethernet
TBP6-EU-K
UCX-4x2-HC30D
USB
Active Speakers
AUDIO
USB-C
Connect a USB-C source (e.g. BYOD laptop) to the USB-C input port.
The applied cable shall be certified for USB 3.1 Gen1 (5Gbps) and Displayport Alternate mode
HBR2 (4x5.4Gbps) applications.
HDMI
Connect an HDMI source (e.g. BYOD laptop or room PC) to the HDMI input port.
CATx
Connect a device (e.g. BYOD laptop) to the Utility Ethernet port to access the internet or local
network.
USB
USB Type-A:
Optionally connect the USB device (e.g. Speaker phone).
USB Type-B:
Optionally connect the USB host (e.g. PC).
HDMI
Connect an HDMI sink (e.g projector) to the HDMI output port.
Audio
Optionally connect an audio device (e.g. active speakers) to the analog audio output port by
an audio cable.
GPIO
Optionally connect a device (e.g. TBP6-EU-K button panel) to the GPIO port.
#new
OCS
Optionally connect an occupancy sensor to the OCS port.
#new
Power
Connect the external power supply to the AC power socket and the switcher unit.
Powering the device is recommended as the final step.
INFO:
Connecting USB B and HDMI ports to the same PC or laptop is recommended in case of IN3 and
IN4 inputs.


