background image

[email protected] 

[email protected]

Installation steps of bucket water inlet mode

Step 1: Hook up the drain hose

1.Pull out the water outlet plug

 (Not 

sewage outlet plug)

2.Insert the drain hose and install the 
snap spring 

to fix the drain hose.

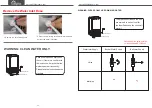
Step 2: Adjust the valve to the bucket water inlet mode

Step 3: Install the water jug

1.Adjust the valve to the direction 
parallel to the water pipe.

 (bucket 

water inlet mode)

1.Variety of water jugs are 
applicable. The diameter of the 
water jug outlet needs to be less 
than 3.2 inches. If water cannot 
enter, try lifting the jug several 
times to exhaust the air.

- 20 -

Summary of Contents for DBJ-45

Page 1: ...service E mail service lifepluspro com Choose LifePlus Choose A Plus Life DBJ 45 Commercial Ice Maker Product Use Guide...

Page 2: ...immediately Let the ice machine stand upright for 24 hours first This is because the ice machine has experienced a long time of shipping This will cause uneven distribution of refrigerant in the compr...

Page 3: ...RATION PAGES10 11 SECTION 3 PRESET DATA PRECAUTIONS PAGES17 18 SECTION 5 CONTROL PANEL OPERATION METHOD PAGES15 16 SECTION 6 ERROE CODES TROUBLESHOOTING PAGES25 26 FAULT SELF DIAGNOSIS PAGES27 30 CLEA...

Page 4: ...ion function make it easier to troubleshoot Common faults and solutions are on page 21 26 If you still can t solve the faults please contact us via service lifepluspro com We will reply you within 24...

Page 5: ...convenient to use and maintain RECEIVING AND INSPECTION Thank you for choosing our automatic ice maker to protect your legitimate rights please note the following when sign for the receiving 1 Whether...

Page 6: ...6...

Page 7: ...7...

Page 8: ...8...

Page 9: ...9...

Page 10: ...caused by inclination Please use a power supply that is specified on the ice maker s label Disconnect the main plug from the supply socket when the ice maker gets failures Continued abnormal operation...

Page 11: ...e a power supply that is specified on the ice maker s nameplate Disconnect the main plug from the supply socket when the ice maker gets failures Continued abnormal operation may cause electric shock o...

Page 12: ...ve earthing as well as the earth wire must not be connected to the water pipe or gas pipe 3 In order to protect the compressor do not start the appliance again within 5 minutes after power off 4 Do no...

Page 13: ...before installing 2 In order to protect the compressor do not start the ice maker again within 5 minutes after power off 3 Better not not plug other appliances in the same socket 4 If the power cord i...

Page 14: ...e full 9 Indicates water Absense 10 Display Ice making time Reservation time Temperature Dust cover of bucket water inlet hole Door of ice bin Control panel Hot air outlet Foot 1 2 3 4 5 6 7 8 9 10 Ti...

Page 15: ...ick this button to interrupt ice making to get ice quickly 5 Self clean button Click this button let the ice maker self clean the ice tray water tank water pipe and other internal structures Please ma...

Page 16: ...Please take out the ice for use or put them in a frozen place for storage 9 Water shortage indicator When it lights up it means that the ice maker is short of water You can t turn on the ice machine...

Page 17: ...y meant before ice making This is the ambient temperature detected by the ice maker In order to ensure the quality of the ice the ice maker will preset a default ice making duration and an adjustable...

Page 18: ...you will not use this ice maker for a long time it should be powered on for 4 6 hours every 2 months to prevent damage ENVIRONMENT This unit is designed according to the following conditions 1 Househo...

Page 19: ...hose Installation steps of tap water inlet mode 1 Wrap the sealing tape around the faucet 2 Insert the white water inlet hose 1 Adjust the direction of the valve to be perpendicular to the water pipe...

Page 20: ...e snap spring to fix the drain hose Step 2 Adjust the valve to the bucket water inlet mode Step 3 Install the water jug 1 Adjust the valve to the direction parallel to the water pipe bucket water inle...

Page 21: ...d at least 0 2 gallons of water under the sewage outlet in advance 2 Pull out the sewage outlet plug slowly 3 Plug in the sewage outlet plug again NOTE Please cut off the water source before starting...

Page 22: ...Water Supply Bucket Water Supply Please adjust the valve direction correspondingly BEFORE use Remove the Water Inlet Hose 1 Remove the small blue buckle 2 Press the white ring of the water inlet hole...

Page 23: ...FORCE ICE HARVEST During the ice making process click the ice harvest button the unit will enter the ice harvest program in advance and will continue to run the next ice making round after the ice fa...

Page 24: ...ce bin we suggest you use an ice shovel to shovel them into 45 small ice cubes to let the ice bin hold more ice 2 We suggest you keep the produced ice cubes in ice bags and put them in the freezer to...

Page 25: ...considered as pump failure 1 There is no water in the machine 2 Water level switch not reset stuck by ice or something else 1 The machine was indeed filled with ice 2 The white flap is blocked and ca...

Page 26: ...The water level float is not reset stuck by ice or other things 1 The ice bin is full of ice 2 The white flap under the ice tray was pressed by the unseparated ice 4 5 6 00 Full indicator keeps on Wa...

Page 27: ...ir to circulate Sink overflow Check the water inlet valve or mechanical float FAULT SELF DIAGNOSIS 1 Water pump You can directly observe whether the water flows down from the ice tray If not the water...

Page 28: ...T SELF DIAGNOSIS 1 Water pump You can directly observe whether water flows down from the ice tray If not the water pump may malfunction 2 Ice making After the ice making last running for 10 minutes th...

Page 29: ...irregular Improper adjustment of ice thickness Reset ice thickness Water quality is bad Ice maker water tank or the ice tray is very dirty Clean the ice maker and replace the filter Uneven water flow...

Page 30: ...set ice thickness Water quality is bad Install filter and replace filter element Ice maker water tank or the ice tray is very dirty Clean the ice maker and replace the filter Uneven water flow above t...

Page 31: ...ush to wipe the condenser fins along the direction of the fins to ensure the performance of the fins 6 If you will not use it for a long time please unplug it and empty the residual water in the water...

Page 32: ...three months Use a soft brush or a vacuum cleaner with a brush to scrub the condenser fins up and down in the direction of the fins to avoid damaging the fins and affecting the cooling performance Ove...

Page 33: ...be delivered specific recycling points for electronic and electrical products Proper handling of this product can help prevent environmental problems caused by improper handling of this product and h...

Page 34: ...fepluspro com Choose LifePlus Choose A Plus Life ICE MAKER PRODUCT USE GUIDE DBJ 45 We provide great warranty service If you encounter any difficulties please contact the above email for help We will...

Reviews: