


Network IR PTZ Camera Owner’s Manual
9
stop recording. Each path can record for at most
10 minutes.
3) Click
“
Preview
” to browse all PTZ operations.
4) Click
“
Stop
” to stop browsing.
5) Select a path and click “
Delete Records
” to
delete all records of PTZ operations under this
path.
3.3.6 Scheduled Task
Enable Scheduled Task. Set durations and tasks.
Camera will complete the tasks within the set
durations.
Steps:
1) Go
to
Settings>Camera>PTZ>Scheduled Task.
2) Check
“
Enable
”.
3) Input “
Task Recovery Time
” (5~720s). For
example, if the time is set 5s.When user performs
other operations during the scheduled task,
camera will pause scheduled task and recover
the task in 5 seconds after user stops other
operations.
4) Click “
Edit
”. In the popup interface, select
Duration, Start Time and End Time. Time of
durations of different No. cannot stack.
5) Select
Patrol Mode
from the dropdown list for the
duration.
6) If the task includes multiple patrol paths or preset
positions,
ID
is configurable. For example, Mixed
Mode includes several patrol paths, ID can be set
as the mixed path number. Another example is
Load Preset, and ID can be set as preset position
number. Otherwise, ID cannot be configured.
7) Click
“
Copy
” to copy task durations to a weekday
or the whole week.
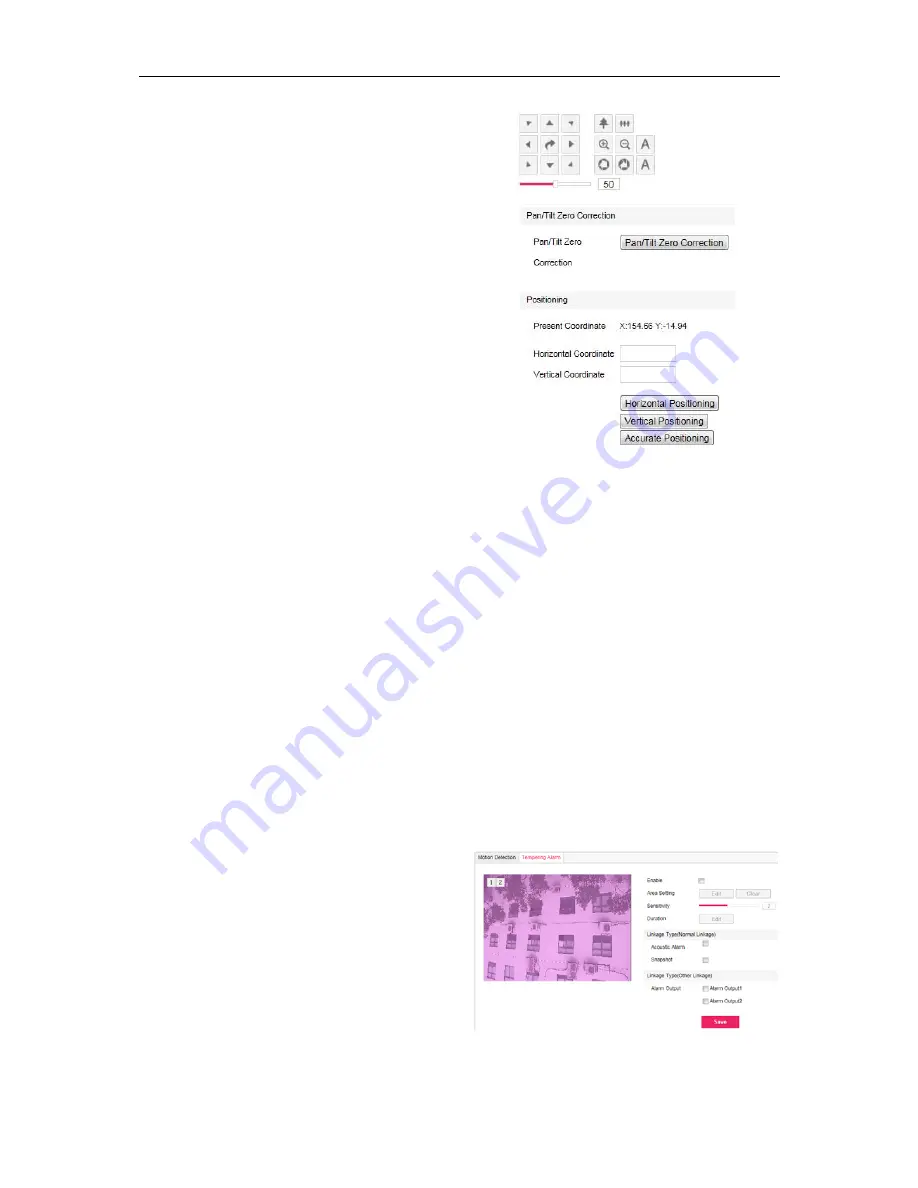
3.3.7 Positioning
Zero Correction
: When preset positions are
malposed during PTZ operations, such as when load
preset positions, user must do Zero Correction. After
Zero Correction, camera will return to Pan Zero
automatically. Click
“Zero Correction”
to make the
operation.
Picture 3-10 Positioning
Steps:
1) Go
to
Settings>Camera>PTZ>Positioning.
2) Adjust PTZ to the designated position, and its
coordinates will show.
3) According to Present Coordinate, fill the target
Horizontal Coordinate and Vertical Coordinate.
4) Click
“
Horizontal Positioning
” to make PT rotate
to the target pan position.
5) Click
“
Vertical Positioning
” to make PT rotate to
the target tilt position.
6) Click
“
Accurate Positioning
” to make PT rotate
to the target pan and tilt position.
3.4 Tempering Alarm
Go to
Settings>Event>Video Analysis> Tempering
Alarm
. Please refer to 3.2 Motion Detection for setting
steps.
Picture 3-11 Tempering Alarm
Summary of Contents for LNP3021R
Page 27: ......


