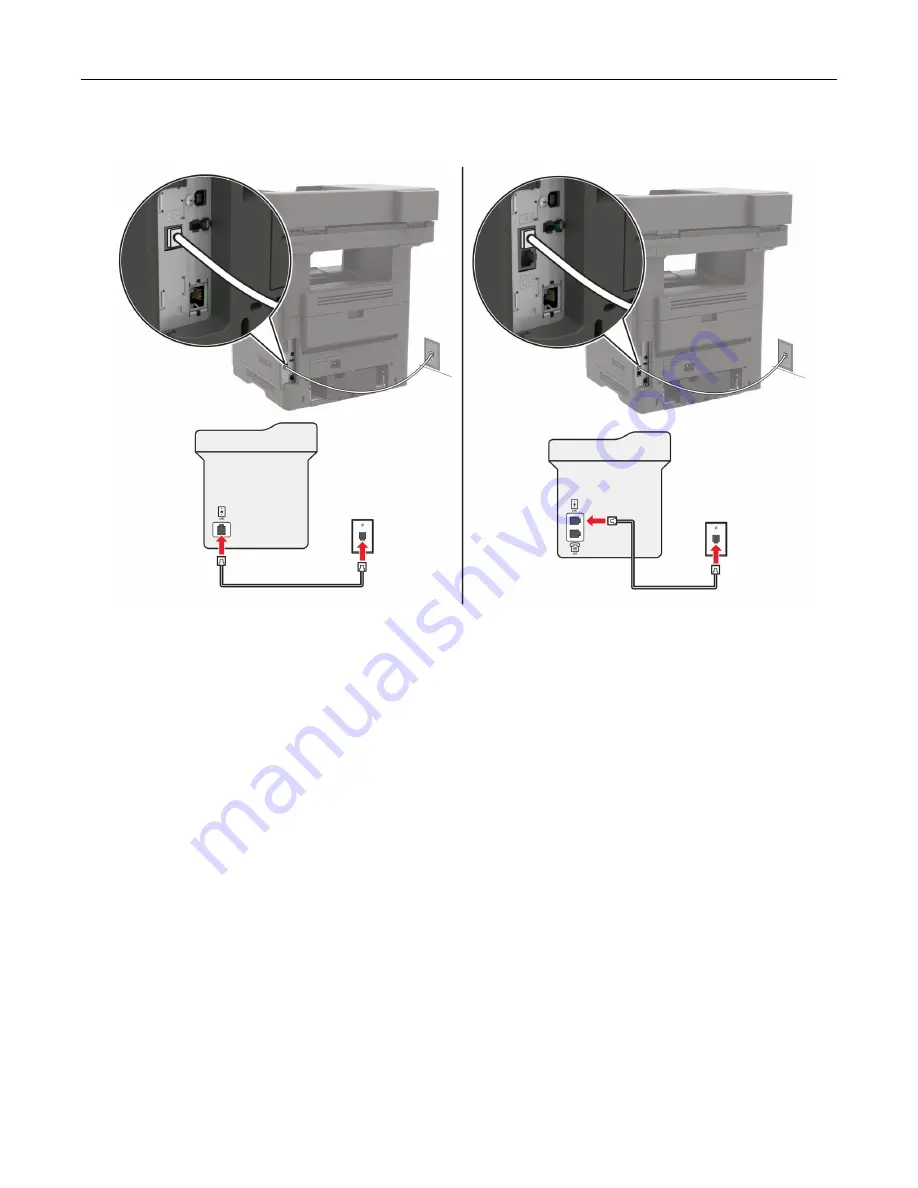
Setup 1: Printer is connected to a dedicated fax line
1
Connect one end of the telephone cable to the line port of the printer.
2
Connect the other end of the cable to an active analog telephone wall jack.
Notes:
•
You can set the printer to receive faxes automatically (set Auto Answer to
On
) or manually (set Auto
Answer to
Off
).
•
If you want to receive faxes automatically, then set the printer to pick up on a specified number of rings.
Setup 2: Printer is sharing the line with an answering machine
Note:
If you subscribe to a distinctive ring service, then make sure that you set the correct ring pattern for
the printer. Otherwise, the printer does not receive faxes even if you have set it to receive faxes
automatically.
Faxing
59
Summary of Contents for XM3250
Page 171: ...2 Remove the staple cartridge 3 Remove the spare staple cartridge Maintaining the printer 171 ...
Page 175: ...Maintaining the printer 175 ...
Page 189: ...6 Insert the imaging unit Note Use the arrows inside the printer as guides Clearing jams 189 ...
Page 262: ...b Connect the ISP extended cable to the ISP connector Upgrading and migrating 262 ...
Page 263: ...c Install the hard disk Upgrading and migrating 263 ...


