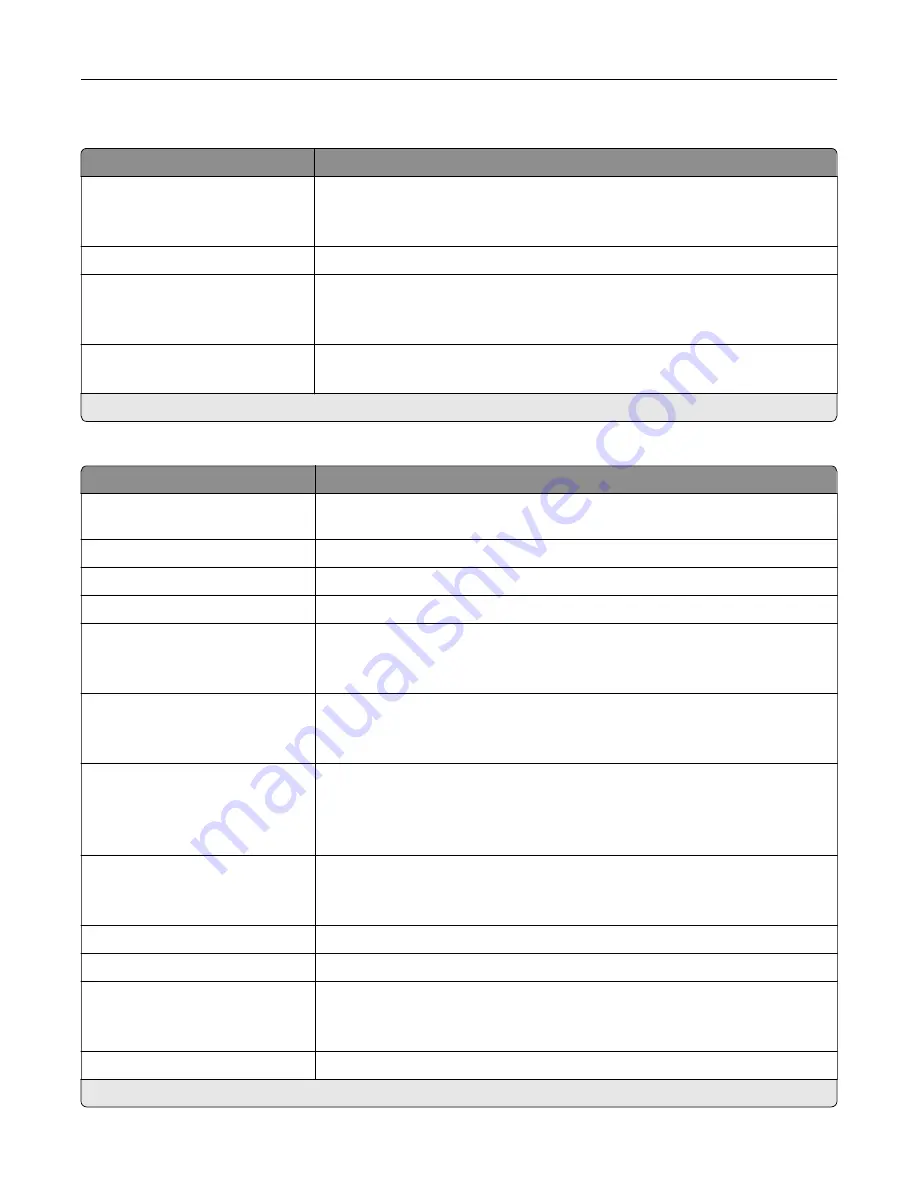
VoIP Settings
Menu item
Description
VoIP Protocol
SIP*
H.323
Set the Voice over Internet Protocol (VoIP) protocol.
STUN Server
Specify the STUN server to traverse a firewall.
Force Fax Mode
Off
On*
Switch VoIP gateway from analog to T.38 at the beginning of a fax call.
Force Fax Mode Delay
0–15 (7*)
Set the time delay in seconds when sending another invite of Force Fax Mode.
Note:
An asterisk (*) next to a value indicates the factory default setting.
SIP Settings
Menu item
Description
Proxy
Specify the IP address of the system that converts a phone number to an IP
address where the fax is sent.
Registrar
Specify a name or IP address of the system that handles SIP client registration.
User
Specify the user name for the SIP proxy server.
Password
Specify the password used in SIP Registrar.
Auth ID
Specify a user name for SIP Registrar.
Note:
If the Auth ID setting is not set, the setting uses the user name of the
User field instead.
Transport For Registration
UDP*
TCP
Set the SIP transport type for registration.
Transport For Incoming Calls
UDP*
TCP
UDP And TCP
Set the SIP transport type for incoming calls.
Transport For Outgoing Calls
UDP*
TCP
Set the SIP transport type for outgoing calls.
Outbound Proxy
Specify an outbound proxy to forward all SIP communication.
Contact
Specify a contact name for SIP.
Realm
Specify a realm name for SIP.
Note:
If the Realm setting is not set, the setting uses the name of the Contact
instead.
SIP Registration Status
Show the status of the SIP Registration.
Note:
An asterisk (*) next to a value indicates the factory default setting.
Use printer menus
219
Summary of Contents for XC9325
Page 86: ...Set up install and configure 86 ...
Page 87: ...6 Remove the standard tray Set up install and configure 87 ...
Page 90: ...11 Secure the rear part of the optional tray to the printer Set up install and configure 90 ...
Page 94: ...Set up install and configure 94 ...
Page 95: ...6 Remove the standard tray Set up install and configure 95 ...
Page 98: ...11 Secure the rear part of the optional tray to the printer Set up install and configure 98 ...
Page 102: ...Set up install and configure 102 ...
Page 103: ...6 Remove the standard tray Set up install and configure 103 ...
Page 106: ...11 Secure the rear part of the optional tray to the printer Set up install and configure 106 ...
Page 110: ...6 Install the optional tray Set up install and configure 110 ...
Page 111: ...7 Connect the tray connector to the printer Set up install and configure 111 ...
Page 125: ...Installing the working shelf 1 Turn off the printer Set up install and configure 125 ...
Page 134: ...Set up install and configure 134 ...
Page 142: ...12 Close the front door 13 Attach the finisher to the printer Set up install and configure 142 ...
Page 270: ...10 Insert the waste toner bottle until it clicks into place Maintain the printer 270 ...
Page 274: ...7 Insert the new waste toner bottle until it clicks into place Maintain the printer 274 ...
Page 278: ...Maintain the printer 278 ...
Page 282: ...11 Insert the waste toner bottle until it clicks into place Maintain the printer 282 ...
Page 283: ...12 Lock the waste toner bottle 13 Close the door Maintain the printer 283 ...
Page 285: ...3 Insert the new tray insert Maintain the printer 285 ...
Page 287: ...3 Unlock the used fuser Maintain the printer 287 ...
Page 289: ...7 Lock the new fuser 8 Close the door 9 Turn on the printer Maintain the printer 289 ...
Page 291: ...3 Remove the used transfer roller 4 Unpack the new transfer roller Maintain the printer 291 ...
Page 293: ...Replacing the transfer module 1 Turn off the printer Maintain the printer 293 ...
Page 296: ...5 Unlock and then pull out the used transfer module Maintain the printer 296 ...
Page 299: ...10 Insert the waste toner bottle until it clicks into place Maintain the printer 299 ...
Page 300: ...11 Lock the waste toner bottle 12 Turn on the printer Maintain the printer 300 ...
Page 301: ...Replacing the tray roller kit 1 Turn off the printer Maintain the printer 301 ...
Page 303: ...4 Unpack the new tray roller kit Maintain the printer 303 ...
Page 306: ...s 3 Remove the separator roller cover Maintain the printer 306 ...
Page 311: ...4 Insert the new printhead wiper 5 Close the door Maintain the printer 311 ...
Page 312: ...Replacing the 2000 sheet tray roller kit 1 Turn off the printer Maintain the printer 312 ...
Page 314: ...4 Locate and remove the used roller kit 5 Unpack the new roller kit Maintain the printer 314 ...
Page 328: ... ADF glass Scanner glass 3 Close the scanner cover Maintain the printer 328 ...
Page 329: ...Cleaning the tray roller kit 1 Turn off the printer Maintain the printer 329 ...
Page 333: ...Cleaning the ADF roller kit 1 Turn off the printer Maintain the printer 333 ...
Page 334: ...2 Open the ADF top cover 3 Remove the separator roller cover Maintain the printer 334 ...
Page 338: ...Cleaning the 2000 sheet tray roller kit 1 Turn off the printer Maintain the printer 338 ...
Page 379: ...Troubleshoot a problem 379 ...


