53
10. A message reading, “After your printer is installed, Windows can print a test page so you
can confirm that the printer is set up properly.” Select
No
and click
Finish
.
11. Double-click the newly created
Printer Name
icon.
12. Select
Printer
and
Properties
.
13. Click
Details
tab
and select
Add Port
.
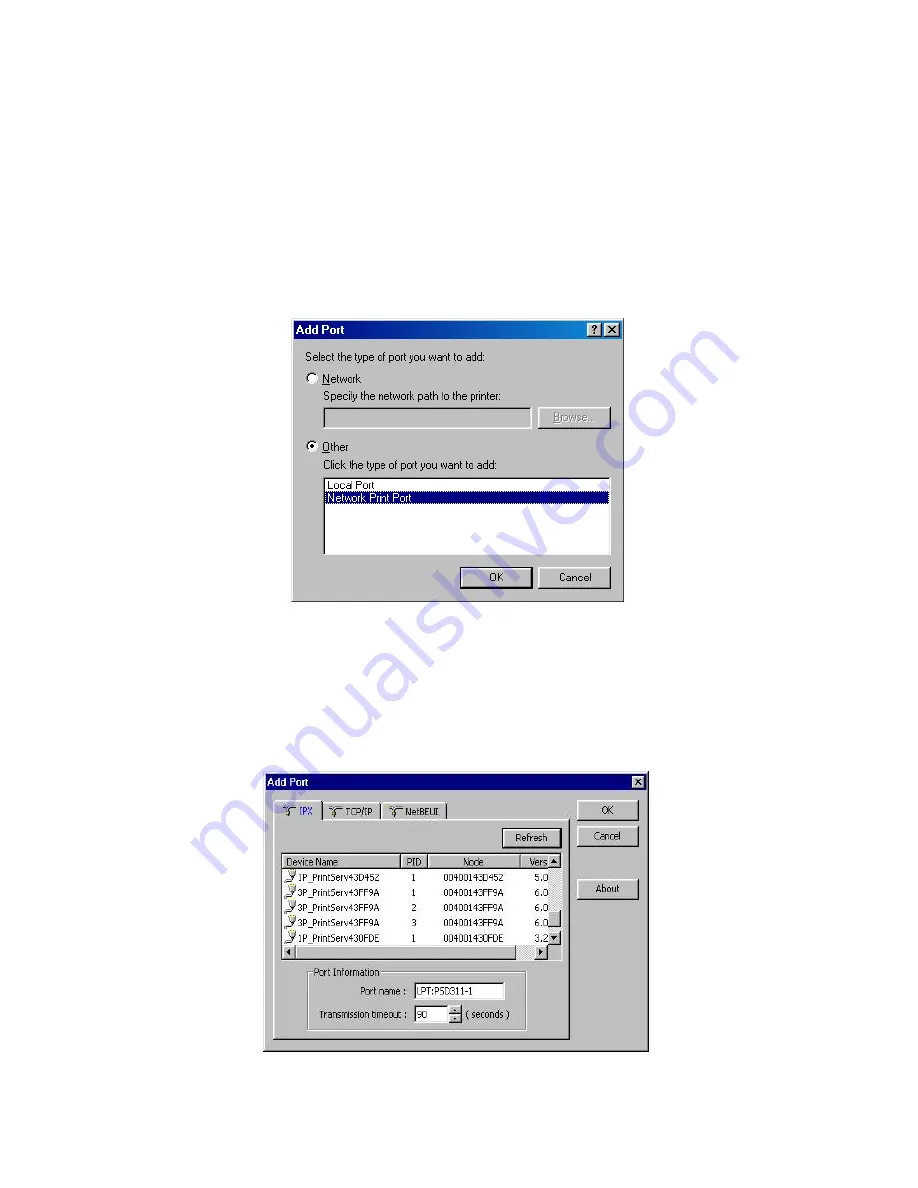
14. In the
Add Port
dialog box, select
Other,
as shown in the following picture.
15. Select the
Network Print Port
and click
OK
.
16. The Add Port box will then appear, along with the print server’s Node ID
(The last 6 digits
of the Node ID, located on the back of the print server unit)
. Select one printer server port
from the list, which is now connected to (one of) your printer(s), as shown in the following
picture.
Summary of Contents for FPS-1032
Page 1: ...1 LevelOne User Manual FPS 1032 USB Print Server Ver 1 1...
Page 13: ...13...
Page 19: ...19 16 Right click select Properties Ports and verify that the print server s port appears...
Page 62: ...62 7 Click Forward button...
Page 64: ...64 14 Choose the model of printer and click Forward 15 Done...
Page 67: ...67 4 Click Browse and select the firmware file 5 Click Upgrade 6 Done...
Page 75: ...75 3 Double click it again 4 Now you have to install the printer s driver...
Page 76: ...76 5 Choose it from the Add Printer Wizard 6 Install printer successfully...
Page 77: ...77 7 Now you can find your printer s icon and you can use the SMB printing mode...


