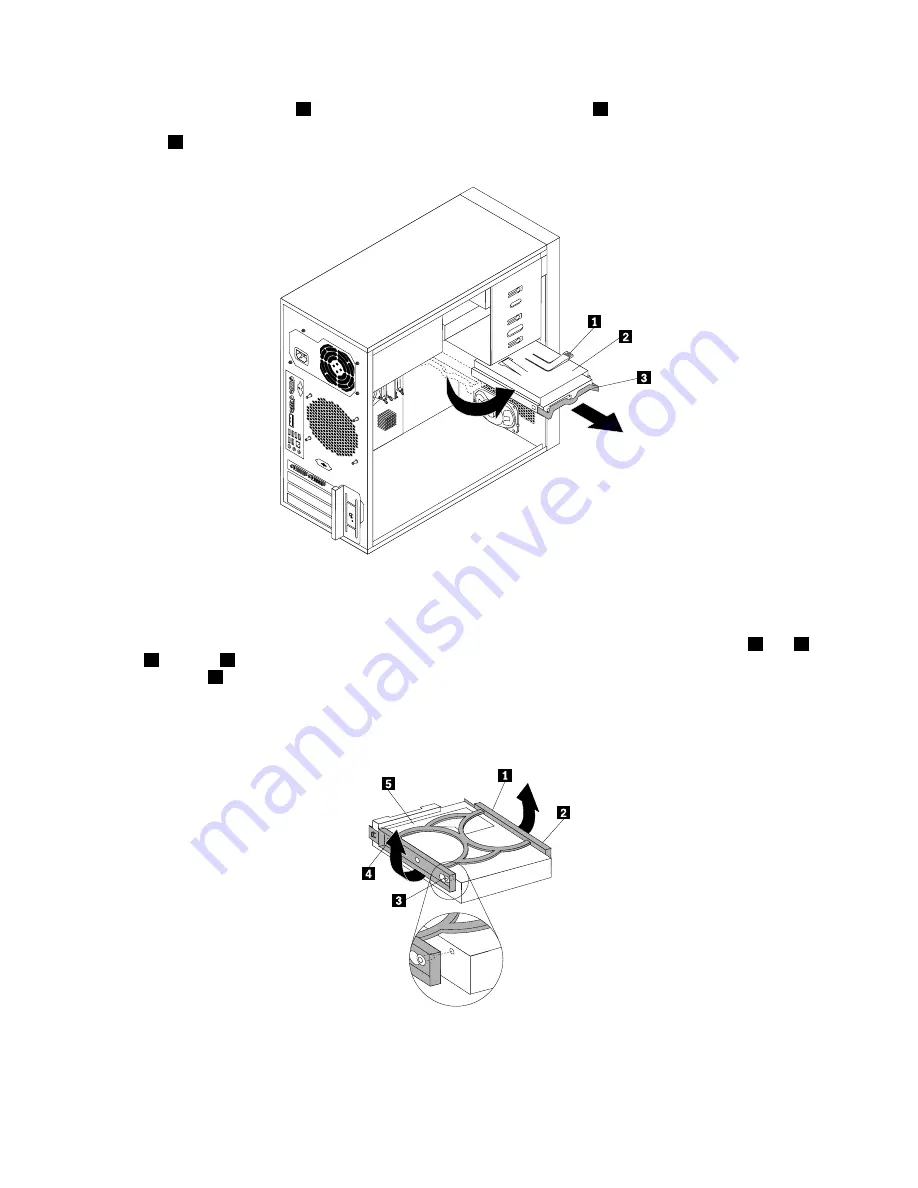
5. Press the blue release tab
1
downward, slide the hard disk drive cage
2
to the rear of the server, and
then pivot it outward to completely remove the drive cage from the chassis. Then, pull on the blue
handle
3
to remove the hard disk drive from the drive cage.
Figure 17. Removing the primary hard disk drive
6. Flex the sides of the blue bracket to remove the hard disk drive from the bracket.
7. To install a new hard disk drive into the blue bracket, flex the sides of the bracket and align pin
1
, pin
2
,
pin
3
, and pin
4
on the bracket with the corresponding holes in the hard disk drive. Do not touch the
circuit board
5
on the bottom of the hard disk drive.
Note:
If you are installing a 2.5-inch hard disk drive, install the hard disk drive into a 2.5-inch to 3.5-inch
hard disk drive tray first and then install the tray into the blue bracket.
Figure 18. Installing the hard disk drive into the bracket
42
ThinkServer TS130 Hardware Maintenance Manual
Summary of Contents for ThinkSERVER TS130
Page 1: ...ThinkServer TS130 Hardware Maintenance Manual Machine Types 1098 1100 1105 and 1106 ...
Page 16: ...12 ThinkServer TS130 Hardware Maintenance Manual ...
Page 24: ...20 ThinkServer TS130 Hardware Maintenance Manual ...
Page 30: ...26 ThinkServer TS130 Hardware Maintenance Manual ...
Page 84: ...80 ThinkServer TS130 Hardware Maintenance Manual ...
Page 108: ...104 ThinkServer TS130 Hardware Maintenance Manual ...
Page 126: ...122 ThinkServer TS130 Hardware Maintenance Manual ...
Page 127: ......


