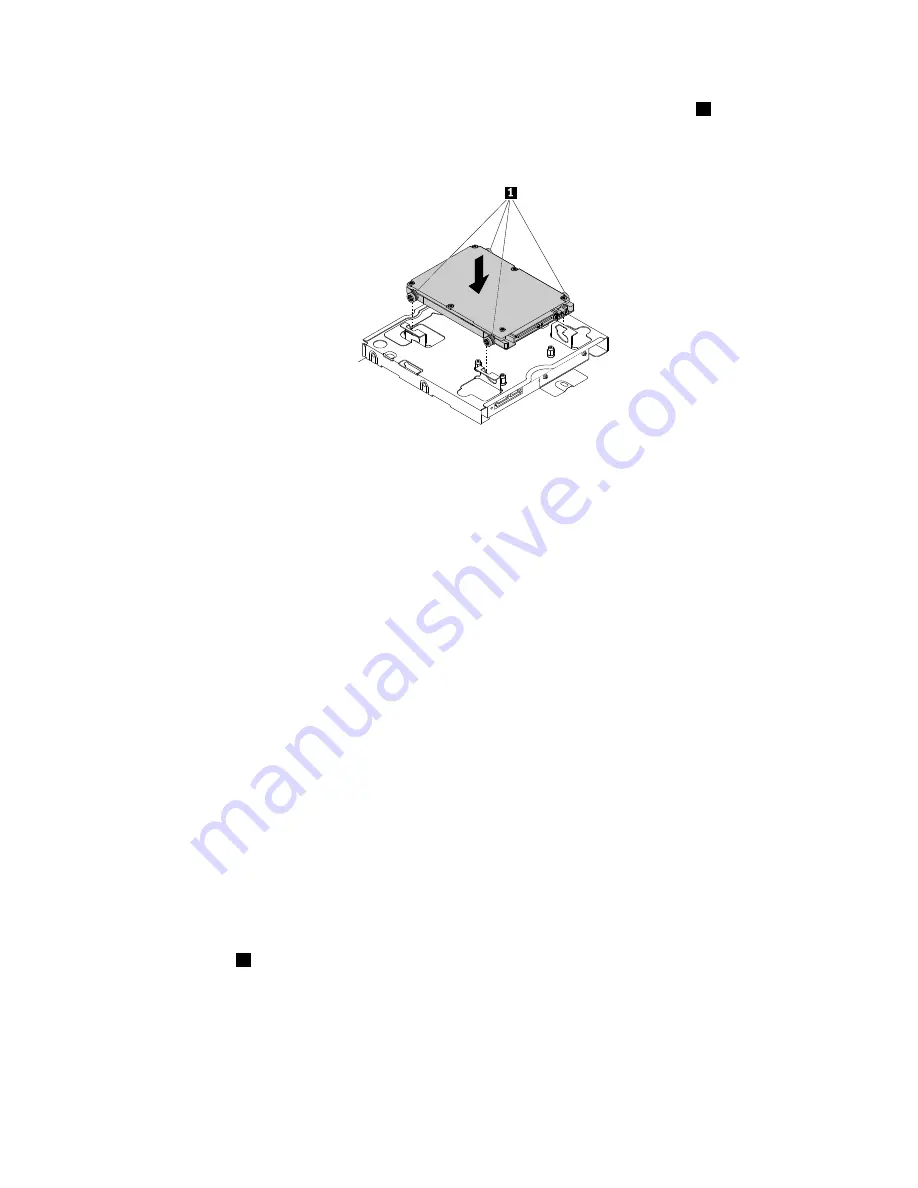
8. Position the new storage drive over the storage drive holder so that the four wheels
1
on the storage
drive align with the corresponding holes in the storage drive holder. Then, press the storage drive
downward until it snaps into position and is secured by the release tab.
Figure 37. Installing the storage drive
9. Connect the signal cable and the power cable to the storage drive.
What to do next:
• To work with another piece of hardware, go to the appropriate section.
• To complete the installation or replacement, go to “Completing the parts replacement” on page 82.
Replacing the control-button board
Attention:
Before you replace any FRU, be sure to read and understand “Read this first: Important safety
information” on page iii. These precautions and guidelines will help you work safely.
To replace the control-button board, do the following:
1. Remove all media from the drives and turn off all attached devices and the computer. Then, disconnect
all power cords from electrical outlets and disconnect all cables that are connected to the computer.
2. Place a soft, clean towel or cloth on the desk or surface. Hold the sides of your computer and gently lay
it down so that the screen is against the surface and the cover is facing up.
3. Remove the computer stand. See “Replacing the computer stand” on page 60.
4. Remove the computer cover. See “Removing the computer cover” on page 65.
5. Remove the system-board shield. See “Replacing the system-board shield” on page 66.
6. If your computer is installed with a serial connector module, remove the serial connector module. See
“Replacing the serial connector module” on page 77.
7. Locate the control-button board. See “Computer components” on page 7.
8. Disconnect the control-button board cable from the control-button board.
9. Press the tabs
1
that secure the control-button board as shown, and then lift the control-button board
out of the control-button board holder.
Chapter 7
.
Installing or replacing hardware
71
Summary of Contents for ThinkCentre M700z
Page 1: ...ThinkCentre M700z and M800z User Guide Machine Types 10ET 10EU 10EV 10EW 10EY and 10F1 ...
Page 10: ...viii ThinkCentre M700z and M800z User Guide ...
Page 44: ...34 ThinkCentre M700z and M800z User Guide ...
Page 46: ...Figure 16 Kensington style cable lock for M700z 36 ThinkCentre M700z and M800z User Guide ...
Page 50: ...40 ThinkCentre M700z and M800z User Guide ...
Page 94: ...84 ThinkCentre M700z and M800z User Guide ...
Page 98: ...88 ThinkCentre M700z and M800z User Guide ...
Page 106: ...96 ThinkCentre M700z and M800z User Guide ...
Page 109: ...Appendix D China Energy Label Copyright Lenovo 2015 99 ...
Page 110: ...100 ThinkCentre M700z and M800z User Guide ...
Page 112: ...102 ThinkCentre M700z and M800z User Guide ...
Page 115: ......
Page 116: ......


