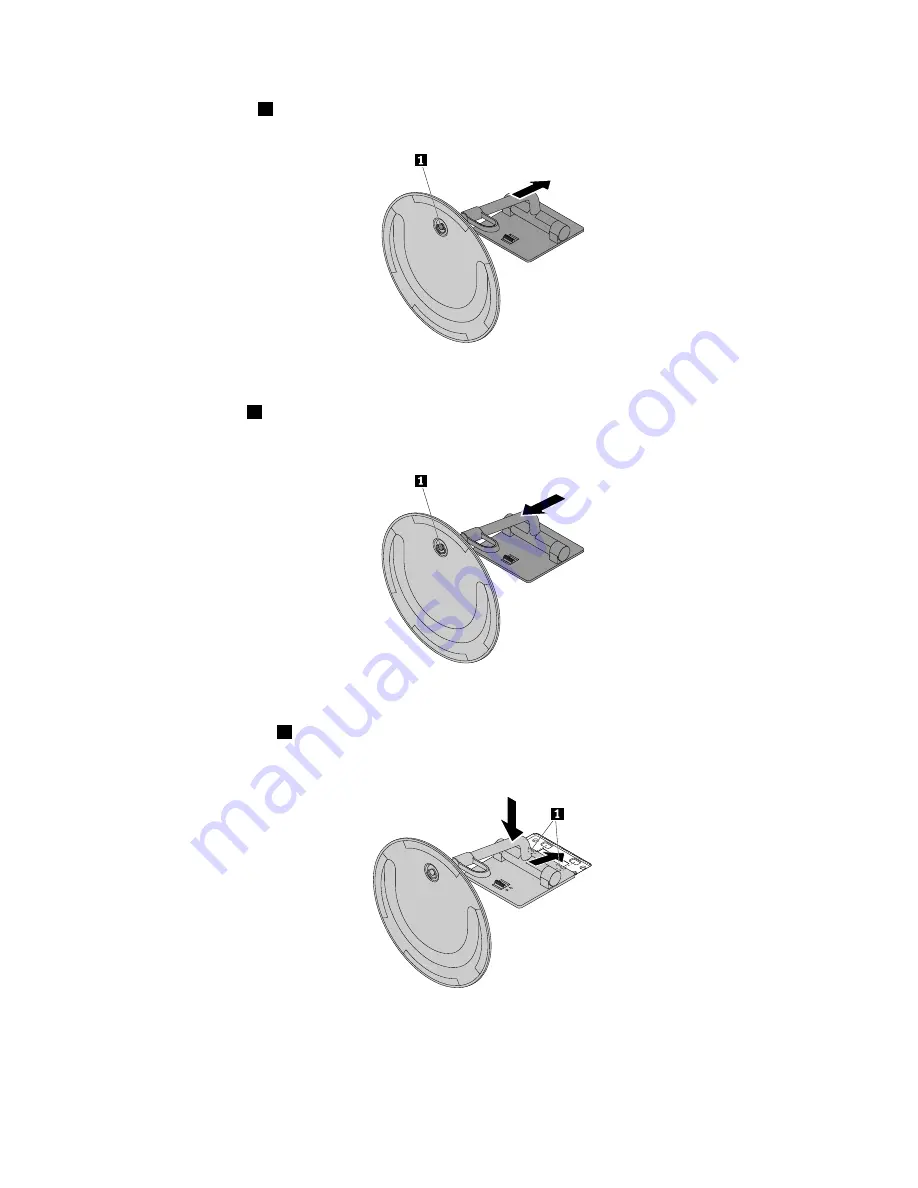
4. Loosen the screw
1
on the base, and then remove the tilt-only monitor stand from the base as shown.
Figure 23. Removing the tilt-only monitor stand from the base
5. Insert the screw
1
on the base into the corresponding hole in the new tilt-only monitor stand. Then,
tighten the screw to secure the monitor stand.
Figure 24. Installing the tilt-only monitor stand on the base
6. Insert the two hooks
1
on the new tilt-only monitor stand into the corresponding holes in the computer
cover as shown. Then, pivot the tilt-only monitor stand downward until it snaps into position.
Figure 25. Installing the tilt-only monitor stand on the computer cover
Replacing the UltraFlex II Stand (for M800z)
To replace the UltraFlex II Stand, do the following:
Chapter 7
.
Installing or replacing hardware
63
Summary of Contents for ThinkCentre M700z
Page 1: ...ThinkCentre M700z and M800z User Guide Machine Types 10ET 10EU 10EV 10EW 10EY and 10F1 ...
Page 10: ...viii ThinkCentre M700z and M800z User Guide ...
Page 44: ...34 ThinkCentre M700z and M800z User Guide ...
Page 46: ...Figure 16 Kensington style cable lock for M700z 36 ThinkCentre M700z and M800z User Guide ...
Page 50: ...40 ThinkCentre M700z and M800z User Guide ...
Page 94: ...84 ThinkCentre M700z and M800z User Guide ...
Page 98: ...88 ThinkCentre M700z and M800z User Guide ...
Page 106: ...96 ThinkCentre M700z and M800z User Guide ...
Page 109: ...Appendix D China Energy Label Copyright Lenovo 2015 99 ...
Page 110: ...100 ThinkCentre M700z and M800z User Guide ...
Page 112: ...102 ThinkCentre M700z and M800z User Guide ...
Page 115: ......
Page 116: ......


