Replacing the system board
Attention
Do not open your computer or attempt any repair before reading and understanding the “Important safety information”
in the
ThinkCentre Safety and Warranty Guide
that came with your computer. To obtain a copy of the
ThinkCentre
Safety and Warranty Guide
, go to:http://www.lenovo.com/support
This section provides instructions on how to replace the system board.
CAUTION:
The heat sink and microprocessor might be very hot. Turn off the computer and wait
three to five minutes to let the computer cool before removing the computer cover.
To replace the system board, do the following:
1. Remove the computer cover. See “Removing the computer cover” on page 68.
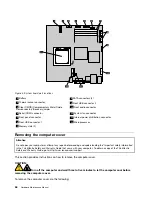
2. Take notes of the locations of all parts and all cable connectors on the system board. See “Locating
components” on page 66 and “Locating parts on the system board” on page 67. Then, disconnect all
the cables.
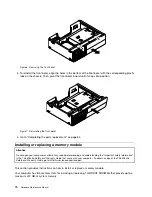
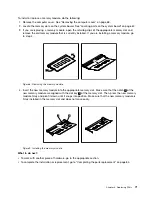
3. Remove the memory modules from the old system board. See “Installing or replacing a memory
module” on page 70.
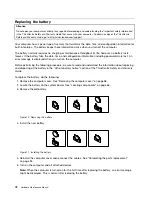
4. Remove the battery from the old system board. See “Replacing the battery” on page 72.
5. Remove the heat sink from the old system board. See “Replacing the heat sink” on page 76.
6. Remove the microprocessor from the old system board. See “Replacing the microprocessor” on page
79.
7. Remove the screws that secure the old system board. Then, carefully remove the old system board
out of the chassis.
8. Place the old system board on a clean and flat surface.
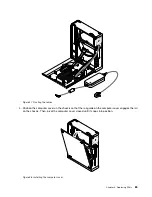
9. Position the new system board so that the screw holes are aligned with the mounting studs on the
computer cover.
10. Install the screws to secure the new system board in place.
11. Install the memory modules, battery, microprocessor, and heat sink that you removed from the old
system board to the new system board.
12. Connect all the cables to the new system board. See “Locating parts on the system board” on page 67.
What to do next:
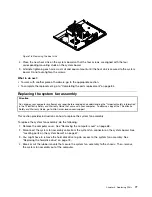
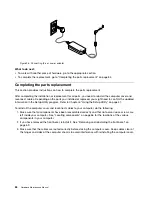
• To work with another piece of hardware, go to the appropriate section.
• To complete the replacement, go to “Completing the parts replacement” on page 84.
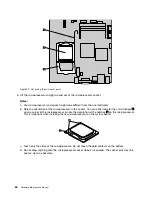
The failing system board must be returned with a microprocessor socket cover to protect the pins during
shipping and handling.
To install the microprocessor socket cover, do the following:
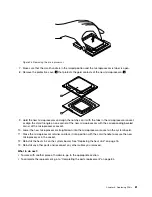
1. Remove the microprocessor from the microprocessor socket. See “Replacing the microprocessor”
on page 79.
2. Close the microprocessor retainer and lock it into position with the small handle.
82
Hardware Maintenance Manual
Summary of Contents for ThinkCentre A58e
Page 1: ...Hardware Maintenance Manual Machine Types 3425 3980 5214 and 5354 ...
Page 2: ......
Page 3: ...Hardware Maintenance Manual Machine Types 3425 3980 5214 and 5354 ...
Page 15: ...Chapter 2 Safety information 9 ...
Page 16: ... 18 kg 37 lbs 32 kg 70 5 lbs 55 kg 121 2 lbs 1 2 PERIGO 10 Hardware Maintenance Manual ...
Page 19: ...Chapter 2 Safety information 13 ...
Page 20: ...1 2 14 Hardware Maintenance Manual ...
Page 21: ...Chapter 2 Safety information 15 ...
Page 27: ...Chapter 2 Safety information 21 ...
Page 31: ...Chapter 2 Safety information 25 ...
Page 38: ...32 Hardware Maintenance Manual ...
Page 42: ...36 Hardware Maintenance Manual ...
Page 50: ...44 Hardware Maintenance Manual ...
Page 109: ......
Page 110: ...Part Number 71Y6308 Printed in USA 1P P N 71Y6308 71Y6308 ...

