Chapter 4. General checkout
Attention
The drives in the computer you are servicing might have been rearranged or the drive startup sequence might
has been changed. Be extremely careful during write operations such as copying, saving, or formatting.
Data or programs can be overwritten if you select an incorrect drive.
General error messages appear if a problem or conflict is found by an application program, the operating
system, or both. For the explanation of these messages, refer to the information supplied with that software
package.
Before replacing any a FRU, make sure that the latest level of Basic Input Output System (BIOS) is installed
on your computer. A down-level BIOS might cause false errors and unnecessary replacement of the system
board. For more information on how to determine and obtain the latest level BIOS, see “BIOS levels”
on page 99.
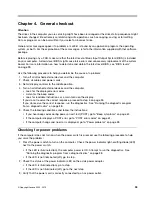
Use the following procedure to help you determine the cause of a problem:
1. Turn off all attached external devices and the computer.
2. Check all cables and power cords.
3. Set all display controls to the middle position.
4. Turn on all attached external devices and the computer.
• Look for the displayed error codes
• Listen for the beep codes
• Look for readable instructions or a main menu on the display.
If you
do not
receive the correct response, proceed to step 5 on page 33.
If you
do
receive the correct response, run the diagnostics. See “Running the diagnostic program
from a diagnostic disc” on page 38.
5. Check the following conditions and follow the instructions:
• If you hear beep codes during power-on self-test (POST), go to “Beep symptoms” on page 61.
• If the computer displays a POST error, go to “POST error codes” on page 61.
• If the computer hangs and no error is displayed, go to “Power problems” on page 33.
Checking for power problems
If the computer does not turn on when the power switch is pressed, use the following procedure to help
you solve the problem:
1. Press the power switch to turn on the computer. Check the power indicator light-emitting diode (LED)
next to the power switch.
• If the LED is illuminated (on), the computer power is OK. Attempt to run the diagnostics. See
“Running the diagnostic program from a diagnostic disc” on page 38.
• If the LED is not illuminated (off), go to step .
2. Check the status of the power indicator LED on the ac/dc power adapter.
• If the LED is illuminated (on), go to step .
• If the LED is not illuminated (off), go to the next step .
3. Verify that the power cord is correctly connected to an ac power outlet.
© Copyright Lenovo 2009, 2010
33
Summary of Contents for ThinkCentre A58e
Page 1: ...Hardware Maintenance Manual Machine Types 3425 3980 5214 and 5354 ...
Page 2: ......
Page 3: ...Hardware Maintenance Manual Machine Types 3425 3980 5214 and 5354 ...
Page 15: ...Chapter 2 Safety information 9 ...
Page 16: ... 18 kg 37 lbs 32 kg 70 5 lbs 55 kg 121 2 lbs 1 2 PERIGO 10 Hardware Maintenance Manual ...
Page 19: ...Chapter 2 Safety information 13 ...
Page 20: ...1 2 14 Hardware Maintenance Manual ...
Page 21: ...Chapter 2 Safety information 15 ...
Page 27: ...Chapter 2 Safety information 21 ...
Page 31: ...Chapter 2 Safety information 25 ...
Page 38: ...32 Hardware Maintenance Manual ...
Page 42: ...36 Hardware Maintenance Manual ...
Page 50: ...44 Hardware Maintenance Manual ...
Page 109: ......
Page 110: ...Part Number 71Y6308 Printed in USA 1P P N 71Y6308 71Y6308 ...


