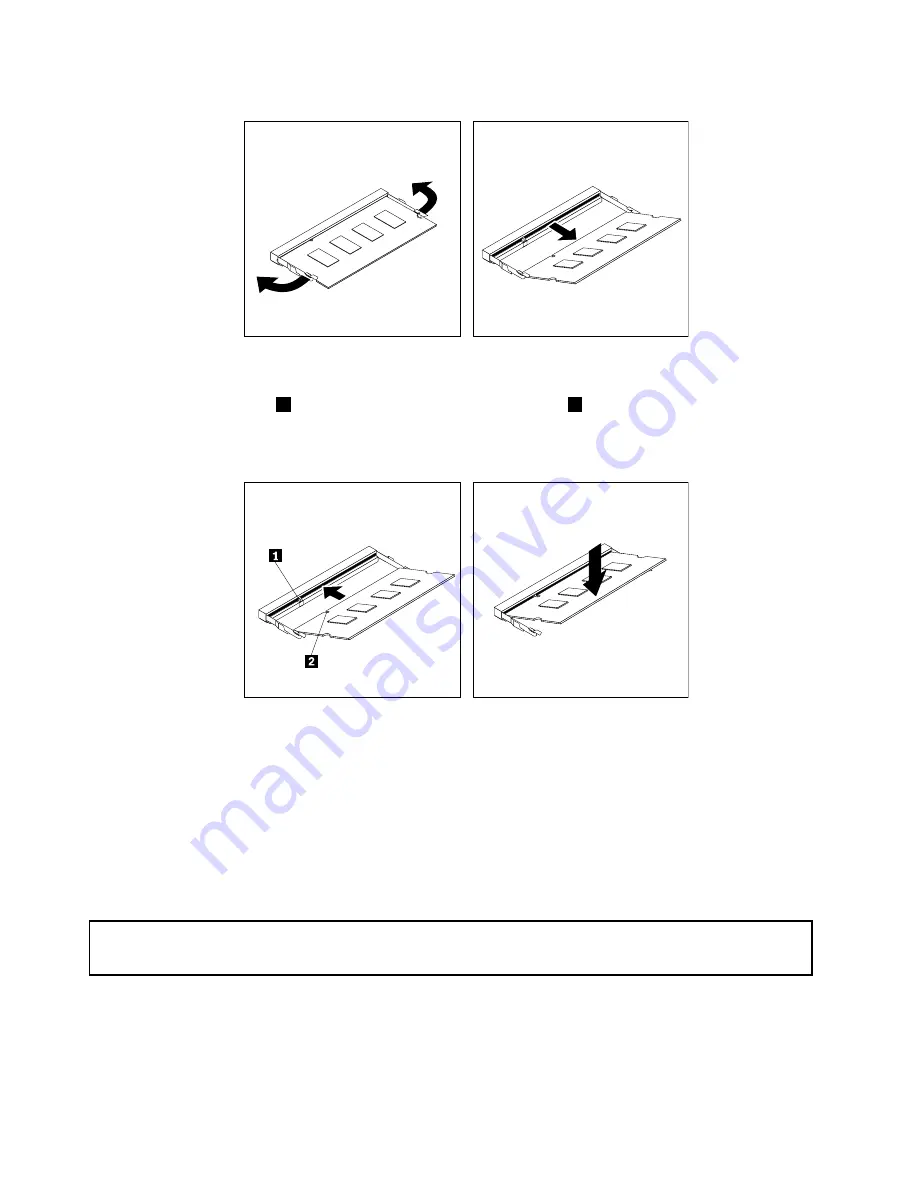
Figure 43. Removing the memory module
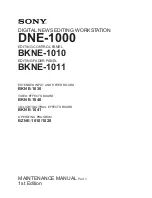
6. Insert the notched end
2
of the new memory module into the slot
1
. Press the memory module
firmly and pivot the memory module until it snaps into place. Make sure that the memory module is
secured in the slot and does not move easily.
Figure 44. Installing a memory module
7. Reinstall the hard disk drive assembly. See “Installing or removing the hard disk drive assembly”
on page 57.
What to do next:
• To work with another piece of hardware, go to the appropriate section.
• To complete the installation or replacement, go to “Completing the parts replacement” on page 80.
Replacing the battery
Attention:
Do not open your computer or attempt any repair before reading and understanding the “Important safety information”
on page v.
Your computer has a special type of memory that maintains the date, time, and settings for built-in features,
such as parallel-connector assignments (configuration). A battery keeps this information active when you
turn off the computer.
60
ThinkCentre M93/p Tiny User Guide
Summary of Contents for M93/p Tiny
Page 1: ...ThinkCentre M93 p Tiny User Guide Machine Types 10A4 10A5 10AA and 10AB ...
Page 6: ...iv ThinkCentre M93 p Tiny User Guide ...
Page 36: ...24 ThinkCentre M93 p Tiny User Guide ...
Page 136: ...124 ThinkCentre M93 p Tiny User Guide ...
Page 142: ...130 ThinkCentre M93 p Tiny User Guide ...
Page 146: ...134 ThinkCentre M93 p Tiny User Guide ...
Page 149: ...Appendix E China Energy Label Copyright Lenovo 2013 2014 137 ...
Page 150: ...138 ThinkCentre M93 p Tiny User Guide ...
Page 152: ...140 ThinkCentre M93 p Tiny User Guide ...
Page 156: ...144 ThinkCentre M93 p Tiny User Guide ...
Page 157: ......
Page 158: ......


