


7. Screw in the left side cover screws.
8. Reconnect the power cord and all other disconnected cables to the computer.
Note:
If a locking device is available, use it to lock the computer cover.
Right side cover
Prerequisite
Before you start, read Appendix A “Important safety information” on page 73 and print the following
instructions.
Before you open the computer cover, turn off the computer and wait several minutes until the computer is
cool.
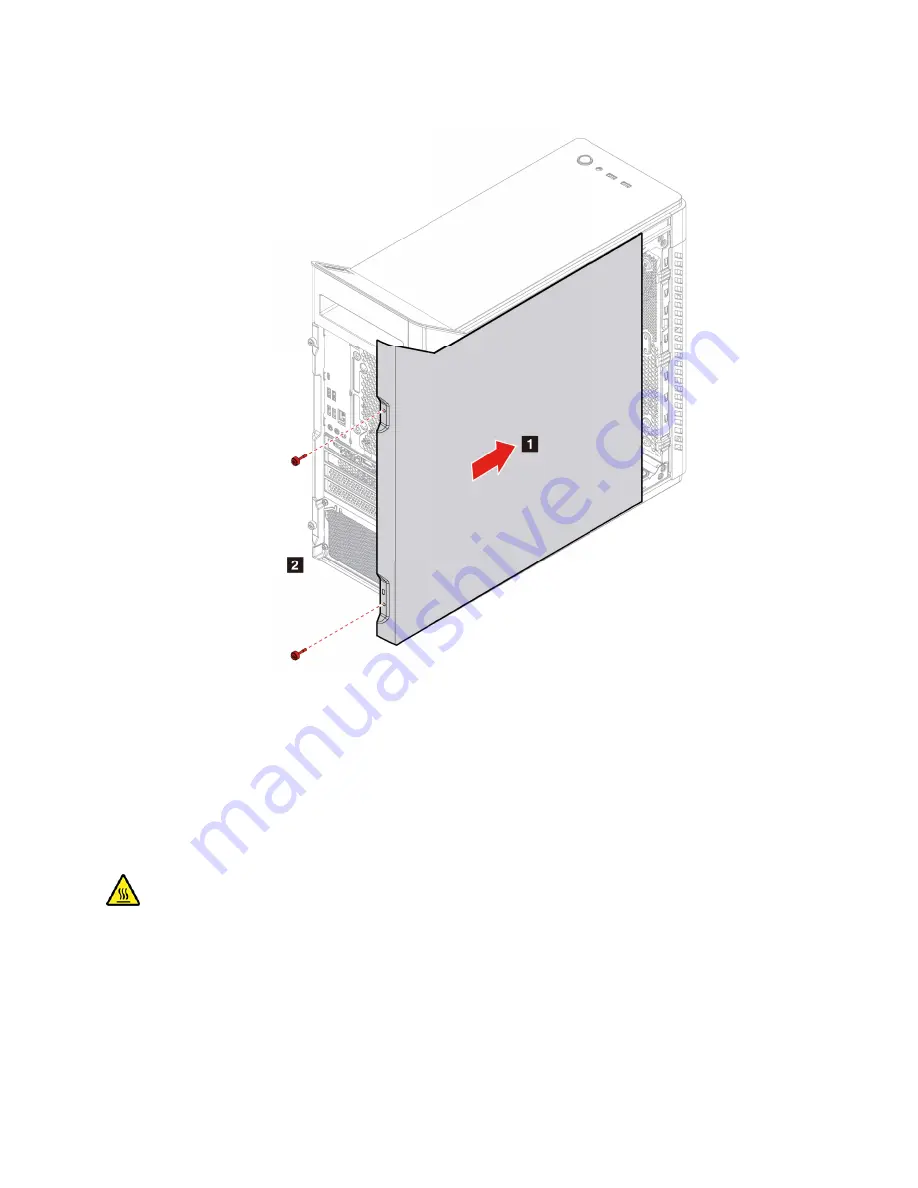
Replacement procedure
1. Remove the power cord. See “Power cord” on page 26
2. Unlock any locking device that secures the computer cover. See “Lock the computer” on page 14.
3. Place a soft, clean towel or cloth on the desk or surface. Hold the sides of your computer and gently lay
it down so that the left side cover is against the surface and the right side cover is facing up.
29
Summary of Contents for 90NC007PUS
Page 1: ...User Guide Lenovo Legion Tower 5 28L 05 and Lenovo Legion R5 28L 05 ...
Page 4: ...ii User Guide ...
Page 6: ...iv User Guide ...
Page 8: ...Figure 2 Lenovo Legion R5 28L 05 1 Lenovo Legion logo LED indicator 2 User Guide ...
Page 9: ...Top Figure 3 Lenovo Legion Tower 5 28L 05 Chapter 1 Meet your computer 3 ...
Page 14: ...8 User Guide ...
Page 30: ...24 User Guide ...
Page 34: ...5 Remove the left side cover 6 Install the new left side cover 28 User Guide ...
Page 38: ...4 Open the tabs and remove the front bezel 32 User Guide ...
Page 40: ...5 Open the tabs and remove the back cover 34 User Guide ...
Page 52: ...3 Disengage the tabs on the memory modules 4 Remove the memory module 46 User Guide ...
Page 56: ...6 Install the new heatsink and fan 7 Screw in the heatsink mounting screws 50 User Guide ...
Page 57: ...8 Plug the fan power cable into the motherboard Chapter 5 CRU replacement 51 ...
Page 62: ...5 Open the latch 6 Remove the PCI Express card super holder screws 56 User Guide ...
Page 72: ...7 Remove the power supply assembly 8 Install the new power supply assembly 66 User Guide ...
Page 78: ...72 User Guide ...
Page 92: ...86 User Guide ...
Page 108: ...102 User Guide ...
Page 111: ......
Page 112: ......


