


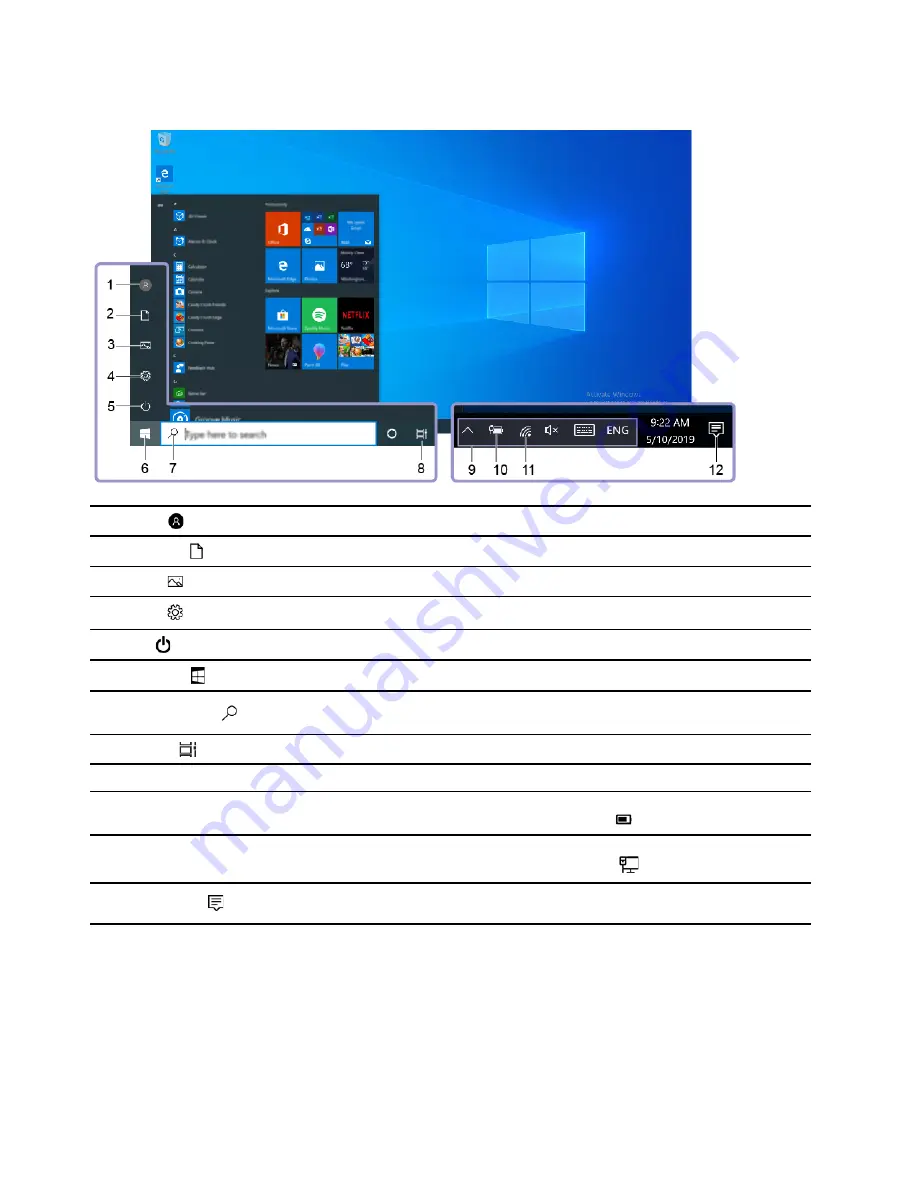
Windows user interface
1.
Account
Change account settings, lock the computer, or sign out from the current account.
2.
Documents
Open the
Documents
folder, a default folder to save your received files.
3.
Pictures
Open the
Pictures
folder, a default folder to save your received pictures.
4.
Settings
Launch Settings.
5.
Power
Shut down, restart, or put the computer into sleep mode.
6.
Start button
Open the
Start
menu.
7.
Windows Search
Type what you are looking for in the search box and get search results from your
computer and the Web.
8.
Task View
Display all opened apps and switch among them.
9.
Windows notification area
Display notifications and status of some features.
10.
Battery status icon
Display power status and change battery or power settings. When your computer
is not connected to ac power, the icon changes to
.
11.
Network icon
Connect to an available wireless network and display the network status. When
connected to a wired network, the icon changes to
.
12.
Action center
Display the latest notifications from apps and provide quick access to some
features.
Open the Start menu
• Click the
Start
button.
• Press the Windows logo key on the keyboard.
Open the Start context menu
Right-click the
Start
button.
10
User Guide
Summary of Contents for 90NC007PUS
Page 1: ...User Guide Lenovo Legion Tower 5 28L 05 and Lenovo Legion R5 28L 05 ...
Page 4: ...ii User Guide ...
Page 6: ...iv User Guide ...
Page 8: ...Figure 2 Lenovo Legion R5 28L 05 1 Lenovo Legion logo LED indicator 2 User Guide ...
Page 9: ...Top Figure 3 Lenovo Legion Tower 5 28L 05 Chapter 1 Meet your computer 3 ...
Page 14: ...8 User Guide ...
Page 30: ...24 User Guide ...
Page 34: ...5 Remove the left side cover 6 Install the new left side cover 28 User Guide ...
Page 38: ...4 Open the tabs and remove the front bezel 32 User Guide ...
Page 40: ...5 Open the tabs and remove the back cover 34 User Guide ...
Page 52: ...3 Disengage the tabs on the memory modules 4 Remove the memory module 46 User Guide ...
Page 56: ...6 Install the new heatsink and fan 7 Screw in the heatsink mounting screws 50 User Guide ...
Page 57: ...8 Plug the fan power cable into the motherboard Chapter 5 CRU replacement 51 ...
Page 62: ...5 Open the latch 6 Remove the PCI Express card super holder screws 56 User Guide ...
Page 72: ...7 Remove the power supply assembly 8 Install the new power supply assembly 66 User Guide ...
Page 78: ...72 User Guide ...
Page 92: ...86 User Guide ...
Page 108: ...102 User Guide ...
Page 111: ......
Page 112: ......


