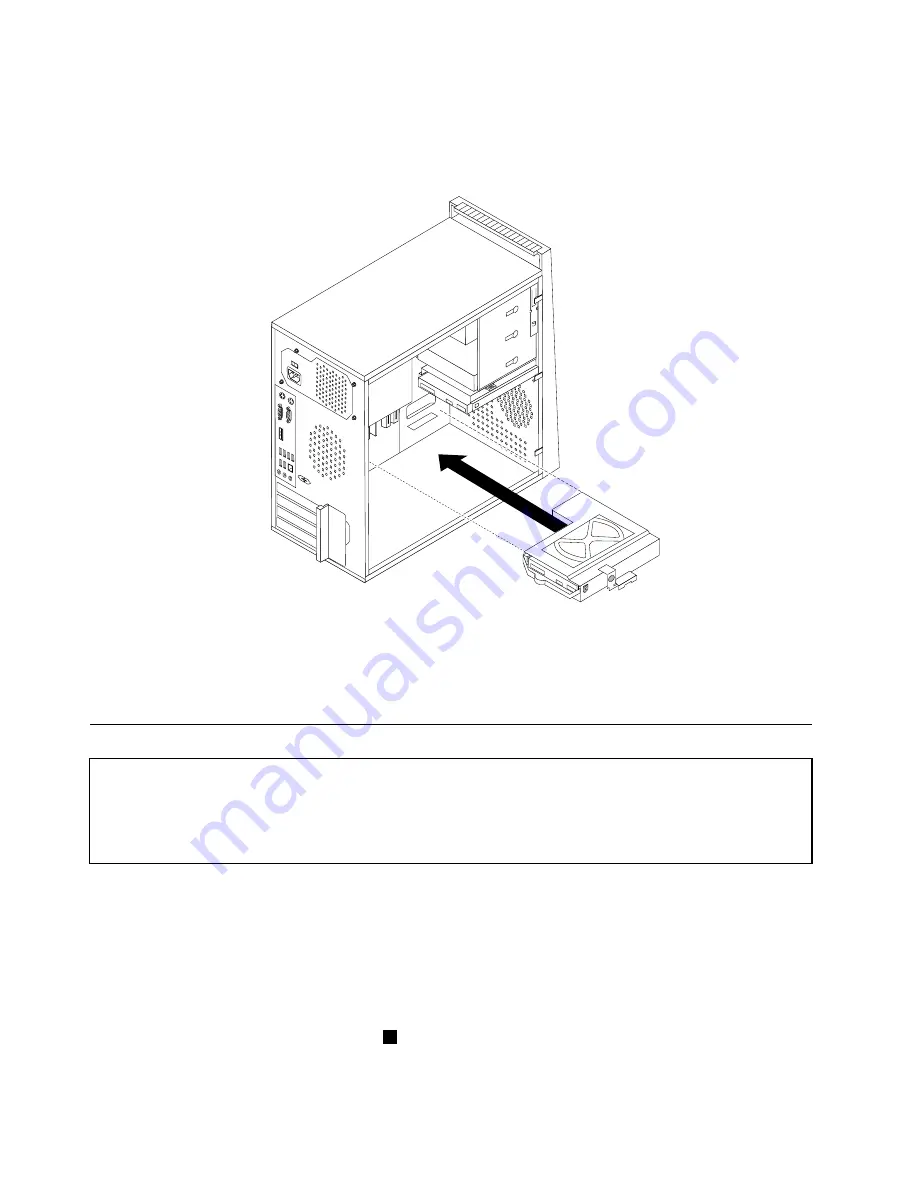
9. Slide the new hard disk drive into the hard disk drive cage until it snaps into position.
10. Install the hard disk drive cage into the chassis until it snaps into position underneath the metal tab.
Make sure that the hard disk drive cage is secure in the chassis.
Figure 24. Installing the secondary hard disk drive and drive cage
11. Connect the signal and power cables to the rear of the new hard disk drive.
12. Go to “Completing the FRU replacement” on page 99.
Replacing the optical drive
Attention
Do not open your computer or attempt any repair before reading and understanding the “Important safety information”
in the
ThinkCentre Safety and Warranty Guide
that came with your computer. To obtain a copy of the
ThinkCentre
Safety and Warranty Guide
, go to:
http://www.lenovo.com/support
This section provides instructions on how to replace the optical drive.
To replace the optical drive:
1. Remove the computer cover. See “Removing the computer cover” on page 69.
2. Disconnect the signal and power cables from the rear of the optical drive.
3. Press the blue release button and remove the optical drive out the front of the computer.
Note:
There is a spare retainer bracket
1
attached to the side of the upper drive cage.
90
ThinkCentre Hardware Maintenance Manual
Summary of Contents for 7360D6U - THINKCENTRE M58 7360
Page 2: ......
Page 8: ...vi ThinkCentre Hardware Maintenance Manual ...
Page 17: ...Chapter 2 Safety information 9 ...
Page 21: ...Chapter 2 Safety information 13 ...
Page 22: ...1 2 14 ThinkCentre Hardware Maintenance Manual ...
Page 23: ...Chapter 2 Safety information 15 ...
Page 29: ...Chapter 2 Safety information 21 ...
Page 33: ...Chapter 2 Safety information 25 ...
Page 50: ...42 ThinkCentre Hardware Maintenance Manual ...
Page 74: ...66 ThinkCentre Hardware Maintenance Manual ...
Page 560: ...552 ThinkCentre Hardware Maintenance Manual ...
Page 564: ...556 ThinkCentre Hardware Maintenance Manual ...


