Note:
In
the
following
procedure,
you
can
select
an
item
not
only
with
the
arrow
keys,
but
also
with
the
TrackPoint
pointer.
Instead
of
pressing
Enter,
click
the
left
button.
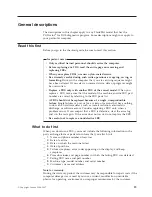
1.
Insert
the
PC-Doctor
disk
into
the
diskette
drive;
then
power
on
the
computer.
If
the
computer
cannot
be
powered
on,
go
to
“Power
system
checkout”
on
page
30,
and
check
the
power
sources.
If
an
error
code
appears,
go
to
“Symptom-to-FRU
index”
on
page
45.
On
the
first
screen,
select
the
model
and
press
Enter.
Follow
the
instructions
on
the
screen.
2.
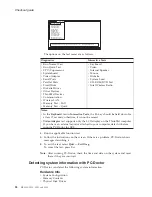
The
main
panel
of
PC-Doctor
appears.
3.
Select
Diagnostics
with
the
arrow
keys,
and
press
Enter.
A
pull-down
menu
appears.
(Its
exact
form
depends
on
the
model.)
Note:
PC-Doctor
menu
does
not
mean
the
formal
support
device
list.
Some
unsupported
device
names
may
appear
in
the
PC-Doctor
menu.
Checkout
guide
General
descriptions
27
Summary of Contents for 2529E8U
Page 2: ......
Page 3: ...ThinkPad Z60m Hardware Maintenance Manual ...
Page 6: ...iv MT 2529 2530 2531 and 2532 ...
Page 8: ...2 MT 2529 2530 2531 and 2532 ...
Page 86: ...2 3 Removing and replacing a FRU 80 MT 2529 2530 2531 and 2532 ...
Page 92: ...7 7 Removing and replacing a FRU 86 MT 2529 2530 2531 and 2532 ...
Page 118: ...3a 3b 6 5 4 continued Removing and replacing a FRU 112 MT 2529 2530 2531 and 2532 ...
Page 122: ...5 4 4 4 4 5 Removing and replacing a FRU 116 MT 2529 2530 2531 and 2532 ...
Page 149: ...LCD FRUs a b c d 1 2 3 7 8 9 10 4 5 6 e Parts list ThinkPad Z60m 143 ...

