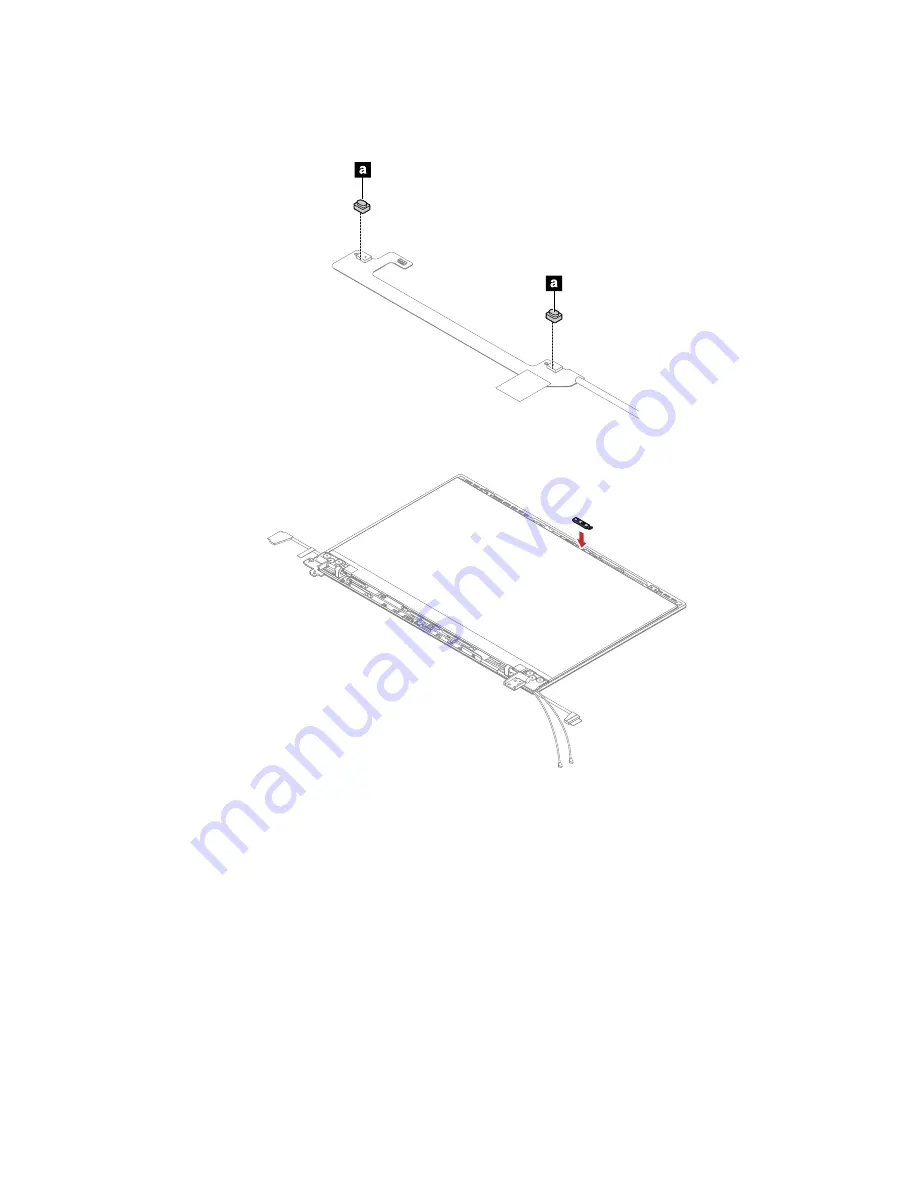
When installing
:
• Attach the microphone rubbers as shown.
• Install the ThinkShutter as shown.
2060 WLAN antenna kit and LCD rear cover assembly
For access, remove this FRU:
• “1010 Base cover assembly” on page 63
• “1150 LCD unit” on page 81
• “2010 LCD-bezel frame, strip cover, and ThinkShutter ” on page 84
• “2020 Hinges” on page 85
• “2030 LCD panel assembly and LCD cable” on page 86
93
Summary of Contents for 20QT
Page 1: ...P1 Gen 2 X1 Extreme and X1 Extreme 2nd Hardware Maintenance Manual ...
Page 6: ...iv P1 Gen 2 X1 Extreme and X1 Extreme 2nd Hardware Maintenance Manual ...
Page 11: ...DANGER DANGER DANGER DANGER DANGER Chapter 1 Safety information 5 ...
Page 12: ...6 P1 Gen 2 X1 Extreme and X1 Extreme 2nd Hardware Maintenance Manual ...
Page 13: ...PERIGO PERIGO Chapter 1 Safety information 7 ...
Page 15: ...PERIGO DANGER DANGER DANGER DANGER Chapter 1 Safety information 9 ...
Page 17: ...VORSICHT VORSICHT VORSICHT VORSICHT Chapter 1 Safety information 11 ...
Page 19: ...Chapter 1 Safety information 13 ...
Page 20: ...14 P1 Gen 2 X1 Extreme and X1 Extreme 2nd Hardware Maintenance Manual ...
Page 21: ...Chapter 1 Safety information 15 ...
Page 22: ...16 P1 Gen 2 X1 Extreme and X1 Extreme 2nd Hardware Maintenance Manual ...
Page 23: ...Chapter 1 Safety information 17 ...
Page 24: ...18 P1 Gen 2 X1 Extreme and X1 Extreme 2nd Hardware Maintenance Manual ...
Page 25: ...Chapter 1 Safety information 19 ...
Page 26: ...20 P1 Gen 2 X1 Extreme and X1 Extreme 2nd Hardware Maintenance Manual ...
Page 30: ...24 P1 Gen 2 X1 Extreme and X1 Extreme 2nd Hardware Maintenance Manual ...
Page 36: ...30 P1 Gen 2 X1 Extreme and X1 Extreme 2nd Hardware Maintenance Manual ...
Page 55: ...Major FRUs Chapter 6 Locations 49 ...
Page 103: ...Installation steps of the LCD cable Chapter 8 Removing or replacing a FRU 97 ...
Page 113: ......
Page 114: ...Part Number SP40G76835 Printed in 1P P N SP40G76835 ...
Page 115: ... 1PSPXXXXXXXX ...


