D4R Pro - CHAPTER 13
End-On-End
Dovetails
47
While you have the router set up for half-blind dovetails, it is a good time to try end-on-end dovetails.
If you have not yet routed half-blind dovetails or read through chapter 11, please do so now before
attempting end-on-end dovetails.
13-1
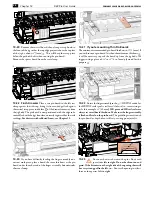
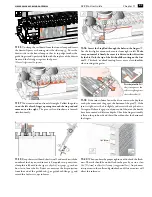
End-on-end dovetails are made in the same modes as half-
blind joints, but both boards are routed vertically in the front clamp,
alternately face side in and then face side out
j
. Boards for end-
on-end joints may be up to
3
⁄
4
"[20mm] thick.
Use only the guidebush, dovetail bits and depths of cut as
specified in Chapter 10 or Appendix II.
13-2
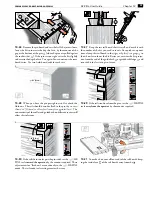
The end-on-end dovetail is laid out in the
H
HB TAILS
mode. There is a special mark on the scale for end-on-end dovetails.
Align the support bracket line with the small arrow as shown. Adjust
the guidefingers as required.
20
15
10
5
25–38
1
2
1
4
3
4
1
2
13-3
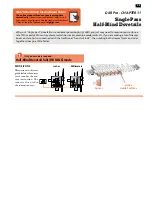
Rout the tails. Clamp end-on-end dovetail boards in the jig
for routing one end face side in and one end face side out. Keep
the same edge against the side stop for both ends.
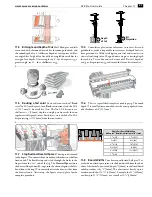
13-4
Rout the tails on each end of the tail boards.
The online video will reduce your learning time
dramatically!
Stream to your smart phone or tablet to use in
your shop as a visual reference. Find the video in the Instructional
Videos section of the Support menu at
leighjigs.com
.
Watch the Online Instructional Video
Summary of Contents for D4R Pro
Page 14: ...JIG ASSEMBLY MOUNTING AND USING THE CLAMPS 6 Chapter 1 D4R Pro User Guide ...
Page 24: ...WOOD PREPARATION 16 Chapter 6 D4R Pro User Guide ...
Page 86: ...BIT SELECTION 78 Appendix II D4R Pro User Guide ...
Page 90: ...JIG PARTS 82 Appendix III D4R Pro User Guide ...
Page 92: ...PRINTED IN CANADA Joining Tradition with Today Printed in Canada ...


