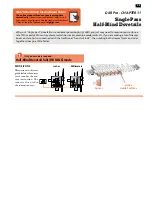
VARIABLY SPACED HALF-BLIND DOVETAILS
36
Chapter 10
D4R Pro User Guide
10-20
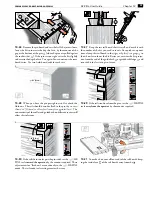
Remove the test tail board, then clamp a scrap board in
the front of the jig so that the top edge projects above the top face
of the jig by about
1
⁄
8
"[3mm]
➀
. This will keep the scrap piece
below the path of the bit when routing the pin board.
Remove the spacer board from the rear clamp.
1
10-21 If you’re mounting Thin Pin Boards:
The minimum recommended pin board thickness is
1
⁄
2
"[13mm]. If
you wish to rout a pin board less than the minimum thickness
➀
,
it will be necessary to pack the board up from the jig body. We
suggest using a piece of
1
⁄
4
" to
3
⁄
8
"[6 to 9mm] plywood for this
purpose
➁
.
2
1
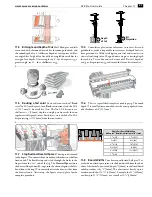
10-22 Flush Drawers
Place a test pin board in the left rear
clamp against the side stop, fitting its front end edge flush against
the vertical scrap piece, inside face
i
of the drawer front away from
the jig body. The pin board is now positioned with the edge to be
routed flush with the jig’s front face, correctly registered for the scale
readings.
For drawers with rabbeted fronts, see Chapter 12.
10-23
Rotate the finger assembly to the
h
HB PINS mode. Set
the HB PINS scale equal to tail board thickness (i.e., same setting as
tails: this example,
3
⁄
4
"[20mm]).
HB pins and HB tail scales are
always set to tail board thickness. Make sure the finger assembly
is flush and level on the pin board.
The guidefingers must touch
the pin board or depth of cut will vary, causing poor joint fit.
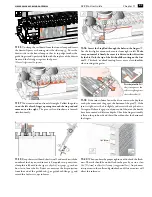
10-24
If you have difficulty leveling the finger assembly on a
narrow workpiece, place a board the same thickness as the pin
board under the other end of the finger assembly,
but not under
the rear clamp
.
Rout out the waste between the pins. Rout each
space from
left to right. Do not back rout on end
grain. If the bit enters on the right side of the opening there will
be a very strong pull to the left, so...
Rout each opening in at least
three or four passes,
left to right.
10-25
Summary of Contents for D4R Pro
Page 14: ...JIG ASSEMBLY MOUNTING AND USING THE CLAMPS 6 Chapter 1 D4R Pro User Guide ...
Page 24: ...WOOD PREPARATION 16 Chapter 6 D4R Pro User Guide ...
Page 86: ...BIT SELECTION 78 Appendix II D4R Pro User Guide ...
Page 90: ...JIG PARTS 82 Appendix III D4R Pro User Guide ...
Page 92: ...PRINTED IN CANADA Joining Tradition with Today Printed in Canada ...


