background image

EN

Preparation

31

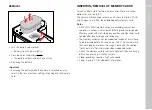
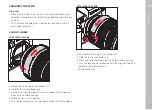
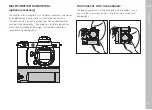
 CHARGING THE BATTERY

The camera is powered by a lithium-ion battery.

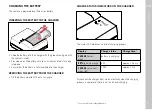
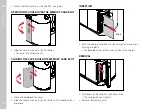
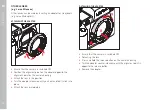
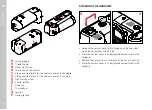
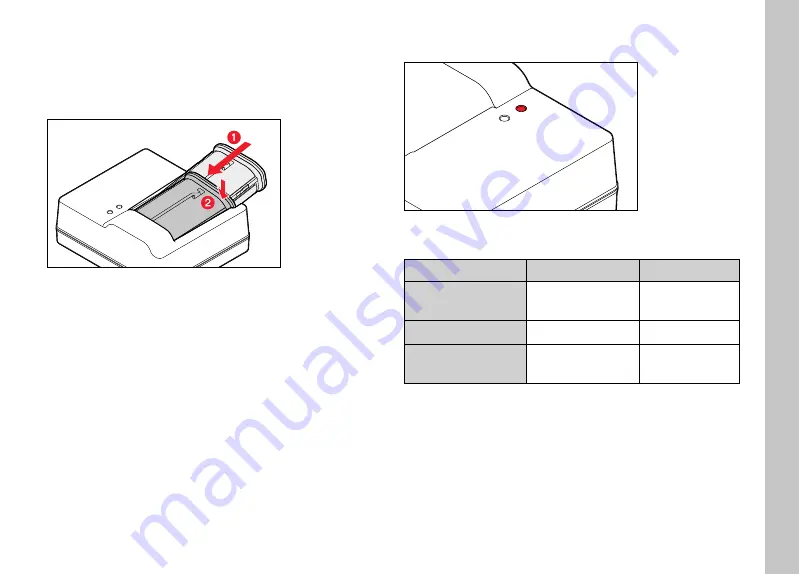
INSERTING THE BATTERY IN THE CHARGER

Slide the battery into the charger with the groove facing up until 

the contacts meet

Press down on the battery until you can hear and feel it clicking 

into place

Ensure that the battery is fully inserted into the charger

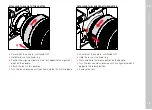
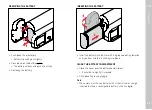
REMOVING THE BATTERY FROM THE CHARGER

Tilt the battery up and lift it out at an angle

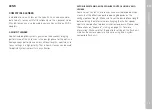
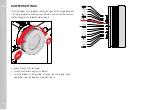
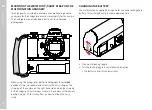
 CHARGE STATUS INDICATORS ON THE CHARGER

CHARGE

80%

The status LED indicates a correct charging process.

Display

Charge status

Charge time*

CHARGE

 fl ashes 

green

battery is charging

80%

 lights up orange 80%

approx. 2 hours

CHARGE

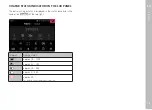
 continuous 

green light

100%

approx. 3½ h

Disconnect the charger from mains electricity when the charging 

process is complete. There is no risk of overcharging.

* for a completely discharged battery

Summary of Contents for 10854

Page 1: ...LEICA SL2 Instruction manual ...

Page 2: ... about the Leica SL2 whenever you need it at sl2 leica camera com Your Leica Camera AG SCOPE OF DELIVERY Before using your camera for the first time please check that the accessories supplied are complete Leica SL2 Lithium ion battery Leica BP SCL4 Leica BC SCL4 charger incl mains cable US EU Camera bayonet cover Carry strap Quick Start Guide CE flyer Creative Cloud flyer Test certificate Subject ...

Page 3: ...manual or by Leica Camera AG must be used with the camera battery charger mains plug mains cable etc These accessories should only be used with this product Third party accessories may result in malfunctions or damage to the product Please read the chapters Legal information Safety remarks and General information before using your camera for the first time Knowledge of the content will prevent ina...

Page 4: ...be found in the camera menu Select Camera Information Camera Information in the main menu Select License Informations License Informations REGULATORY INFORMATION You will find the manufacturing date of your camera on the stickers in the Warranty Card and or on the packaging The date format is year month day Specific regional approvals for this device can be found in the camera menu Select Camera I...

Page 5: ...lessly communicated data We highly recommend that you activate encryption in the wireless access point settings to ensure data safety Avoid using the camera in areas where it can be exposed to magnetic fields static electricity or other interferences e g near a microwave oven RF transmissions may otherwise not reach the camera Using the camera near devices like microwave ovens or wireless phones t...

Page 6: ...for lens detection in the bayonet You must similarly prevent direct contact of the bayonet with grains of sand or similar particles as these could cause irreparable damage This component must only be cleaned with a dry cloth in system cameras Use a cotton or linen cloth instead of a microfiber cloth from an optician s synthetic when cleaning the contacts Make sure to discharge any electrostatic ch...

Page 7: ... short circuited battery can get very hot and cause severe burns When a battery is accidentally dropped make sure to check the housing and the contacts immediately for any damage A damaged battery can damage the camera The battery must be removed from the camera or charger and must be replaced immediately in case of a strange smell discoloration deformation overheating or leakage Continued use of ...

Page 8: ...d and keep them clean and dry Keep memory cards out of the reach of children Swallowing a memory card may cause suffocation SENSOR Cosmic radiation e g during flights may cause pixel defects CARRY STRAP Carry straps are usually made of very robust material You should therefore keep it out of the reach of children A carry strap is not a toy and poses a strangulation risk Use the carry strap only fo...

Page 9: ...EN 9 Safety remarks ...

Page 10: ...heir current charge level A partially charged battery will charge to full capacity faster than a fully discharged one The rechargeable batteries come only partly charged ex works and should therefore be charged fully before their first use A new battery only reaches its full capacity after it has been fully charged and by using it in the camera depleted 2 to 3 times This depletion process should b...

Page 11: ... from time to time because fragmented residual data from deleted files may block some of the storage capacity Generally it is not necessary to format initialize memory cards that have been previously used Formatting will however be necessary if you insert an unformatted memory card or a card that was formatted in another device e g a computer for the first time We recommend backing up your data on...

Page 12: ...ewsletter informing you of the availability of a new firmware update if you register your camera on the Leica Camera homepage Visit the download section or the Customer Area for information about how to register or how to get firmware updates for your Leica SL2 Additionally you can find information about changes or additions to the manual at club leica camera com Leica releases firmware updates fo...

Page 13: ...ng Any products still delivered with the warranty document in the packaging remain governed exclusively by that document For more information regarding the warranty scope warranty services and limitations please visit warranty leica camera com Leica SL2 comes with splash water and dust protection The camera was tested under controlled laboratory conditions and is classes as IP54 in accordance with...

Page 14: ... MULTIFUNCTION HAND GRIP SL 41 CAMERA OPERATION 46 CONTROL ELEMENTS 46 MAIN SWITCH 46 SHUTTER BUTTON 47 FRONT SETTING WHEEL 48 THUMBWHEEL 48 JOYSTICK 49 PLAY BUTTON MENU BUTTON 49 FN BUTTONS 50 LCD PANEL TOUCH SCREEN 51 TOP DISPLAY 52 MENU CONTROL 52 CONTROL ELEMENTS 52 MENU SECTIONS 53 STATUS SCREEN 55 MENU NAVIGATION 58 SUBMENU 60 KEYBOARD NUMBER PAD 60 MENU BAR 61 SCALE MENU 62 DATE TIME MENU 6...

Page 15: ...EVF MODE 79 FOCUS LIMIT 79 EV INCREMENT 79 AUXILIARY DISPLAYS 80 INFO PROFILES 80 CHANGING THE INFO PROFILES 81 DEACTIVATING INDIVIDUAL INFO PROFILES 81 CUSTOMIZING THE INFO PROFILES 81 SHOW AVAILABLE 82 INFO BARS 82 GRID 82 FOCUS PEAKING 82 CLIPPING ZEBRA 83 LEVEL GAUGE 84 HISTOGRAM 85 RECORDING BASIC SETTINGS PICTURE 86 SENSOR FORMAT 86 FILE FORMAT 87 JPG SETTINGS 88 RESOLUTION 88 NOISE REDUCTIO...

Page 16: ...ETECTION 106 AF SETTINGS 107 AF PROFILES 107 PRE FOCUS 108 AF QUICK SETTING 109 ACCESSING AF QUICK SETTING 109 ADJUSTING THE METERING FIELD SIZE 109 CHANGING THE AF METERING METHOD 109 MF ASSIST FUNCTIONS 110 ENLARGEMENT IN AF MODE 110 AF ASSIST LIGHT 110 ACOUSTIC AF CONFIRMATION 110 MANUAL FOCUSING MF 111 MF SETTINGS 111 MF ASSIST FUNCTIONS 112 FOCUS PEAKING 112 ENLARGEMENT IN MF MODE 112 DISTANC...

Page 17: ...DEO MODE AND CINE MODE 142 START EXIT VIDEO MODE 143 START END VIDEO RECORDING 144 FOCUSING 144 AUTOFOCUS MODES 145 CONTROLLING THE AUTOFOCUS 145 TOUCH AF 145 SUPPRESSING CONTINUOUS FOCUSING 145 AUTOFOCUS METERING METHODS 146 TRACKING 147 PERSON DETECTION 148 AF SETTINGS 149 AF QUICK SETTING 149 MF ASSIST FUNCTIONS 150 MANUAL FOCUSING MF 151 MF SETTINGS 151 MF ASSIST FUNCTIONS 152 ISO SENSITIVITY ...

Page 18: ...NAGEMENT 186 DATA STRUCTURE ON THE MEMORY CARD 186 EDIT FILE NAMES 187 CREATING A NEW FOLDER 187 ADDING COPYRIGHT INFORMATION 187 RECORDING THE IMAGE LOCATION WITH GPS 188 FORMATTING A MEMORY CARD 188 DATA TRANSFER 189 USING RAW DATA DNG 190 RESETTING THE CAMERA TO FACTORY SETTINGS 190 FIRMWARE UPDATES 191 UPDATING THE CAMERA FIRMWARE 191 UPDATING THE LENS FIRMWARE 192 UPDATING THE ADAPTER FIRMWAR...

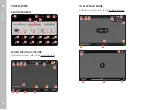
Page 19: ...ous categories of information found in this manual Note Additional information Important Failure to observe the instructions may result in damage to the camera the accessories or the pictures Attention Non compliance may result in personal injury ...

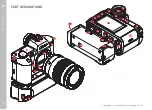
Page 20: ...Part Designations EN 20 PART DESIGNATIONS 15 15 14 6 9 10 11 1 2 3 4 5 12 13 2 1 7 8 optional accessory Multifunction hand grip SL lens 24 25 26 27 23 30 31 20 17 19 18 22 16 21 32 21 34 29 33 22 29 28 ...

Page 21: ...ng 15 Strap lugs 16 Main switch 17 Viewfinder eyepiece 18 Eye sensor 19 Diopter setting ring 20 FN button 21 Joystick 22 Thumbwheel 23 Status LED 24 PLAY button 25 FN button 26 MENU button 27 LCD panel 28 Memory card slot 29 Tripod thread 30 Contact for multifunction hand grip 31 Battery release lever 32 Battery compartment MULTIFUNCTION HAND GRIP SL 1 Shutter button 2 Front setting wheel 21 Joyst...

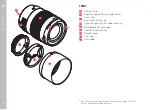
Page 22: ...poss zoom setting ring 38 Alignment point for lens hood mounting 39 Male bayonet for lens hood 40 Internal thread for filters 41 Bayonet cover 42 Lens cap 43 Lens hood 43 38 37 38 39 40 41 42 36 35 Not included in the delivery package Representative image Technical features may vary depending on model ...

Page 23: ...EN Part Designations 23 ...

Page 24: ...19 25 10 11 12 13 03 02 04 WHEN TAKING A PICTURE All displays values refer to the actual settings 15 19 20 18 14 26 27 28 04 03 11 07 08 10 12 09 IN PLAYBACK MODE All displays values refer to the displayed image 15 19 20 18 14 27 28 29 11 07 08 10 12 09 30 Activated Capture Assistants Capture Assistants 15 19 20 18 14 26 27 28 04 03 36 35 11 34 33 32 08 10 12 09 31 ...

Page 25: ... Autofocus metering method 17 Autofocus settings 18 Exposure metering method 19 White balance mode 20 File format compression level resolution 21 Formatting a memory card 22 User profile 23 Locking unlocking the setting wheels 24 Leica FOTOS 25 Main menu 26 Flash mode 27 Aspect ratio sensor 28 Color rendering Film Style Film Style 29 File number of the picture shown 30 Stabilization activated 31 F...

Page 26: ...9 55 60 56 61 56 62 48 49 50 51 39 38 40 45 46 WHEN TAKING A PICTURE All displays values refer to the actual settings 52 55 56 54 63 04 64 39 49 43 46 44 48 50 47 45 IN PLAYBACK MODE All displays values refer to the displayed image 52 55 56 63 65 67 43 44 46 68 72 71 70 69 66 ...

Page 27: ...cation 51 Exposure compensation value 52 Focus mode 53 Autofocus metering method 54 Exposure metering method 55 White balance mode 56 File format compression level resolution 57 Recording level 58 Headphone volume 59 User profile 60 Locking unlocking the setting wheels 61 Leica FOTOS 62 Main menu 63 Color rendering Video Style Video Style 64 Indicates recording in progress 65 Stabilization activat...

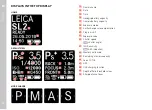
Page 28: ...p battery capacity 77 Camera battery capacity 78 Exposure mode 79 Set flash exposure compensation 80 Program shift 81 Exposure value 82 Shutter speed Cine Cine shutter angle 83 ISO Sensitivity Cine Cine ASA indication 84 Memory card used 85 Remaining memory capacity 86 Leica FOTOS 87 GPS 88 USB charging function 89 Depth of field threshold values 90 Sharp distance focus ...

Page 29: ...CD PANEL The battery charge status is displayed in the status pane and in the header line Info Bars Info Bars at the top right Display Charge status approx 75 100 approx 50 75 approx 25 50 approx 0 25 approx 0 The battery needs charging or replacing ...

Page 30: ...ached the carry strap please make sure that the clips are mounted correctly to prevent the camera from falling PREPARING THE CHARGER Use the mains cable with the matching regional plug to connect the charger to mains electricity Note The charger will automatically adapt to local mains voltage ...

Page 31: ...serted into the charger REMOVING THE BATTERY FROM THE CHARGER Tilt the battery up and lift it out at an angle CHARGE STATUS INDICATORS ON THE CHARGER CHARGE 80 The status LED indicates a correct charging process Display Charge status Charge time CHARGE flashes green battery is charging 80 lights up orange 80 approx 2 hours CHARGE continuous green light 100 approx 3 h Disconnect the charger from ma...

Page 32: ...t On On Off Off Notes The camera will only charge while it is switched off The charging process will be interrupted as soon as the camera is switched on The camera will be displayed as a USB storage medium if an SD card is inserted see p 189 Charging does start automatica INSERTING REMOVING THE BATTERY Ensure that the camera is switched OFF see p 46 INSERTION click Insert the battery into the slot...

Page 33: ...HC High Capacity or SDXC eXtended Capacity memory card Notes SD SDHC SDXC memory cards are available from various suppliers in various sizes and with differing read write speeds Memory cards with high storage capacities and high read write speeds offer quick storage and rendering The memory card may not be supported capacity or will have to be formated before first use see p 188 The camera will in...

Page 34: ...VER OVER THE MEMORY CARD SLOT 2 1 Close and hold down the cover Slide the cover as shown in the illustration until it audibly clicks into place INSERTION click Push the memory card into the slot until you hear and feel it clicking into place The beveled corner of the card must be at the top left REMOVAL 1 2 Push down on the card until you hear a click The card pushes out slightly Remove the memory...

Page 35: ...s a high priority That is how SL lenses can be used for optimally creative results in any situation EXPOSURE METERING AND EXPOSURE CONTROL USING VARIO LENSES Some Leica TL and SL Vario lenses have a variable speed which means that the effective aperture opening depends on the configured focal length Make sure to set the desired focal length before storing the meter value or changing the shutter sp...

Page 36: ...R lens has an ROM contact strip You will have to enter the lens model manually if the lenses are not relevantly equipped Using automatic detection Select Camera Information Camera Information in the main menu Select Lens Profiles Lens Profiles Activate automatic lens detection Auto Auto or deactivate the feature Off Off Setting the lens type manually Select Camera Information Camera Information in...

Page 37: ...at the camera is switched OFF Hold the lens on the fixed ring Position the alignment point on the lens opposite the alignment point on the camera housing Attach the lens in this position Turn the lens clockwise until you hear and feel it click into place DETACHING THE LENS 1 2 3 Ensure that the camera is switched OFF Hold the lens on the fixed ring Press and hold the release button on the camera h...

Page 38: ...apter opposite the alignment point on the camera housing Attach the lens in this position Turn the adapter clockwise until you hear and feel it click into place Attach the lens immediately DETACHING THE ADAPTER 2 3 1 Ensure that the camera is switched OFF Detaching the lens Press and hold the release button on the camera housing Turn the adapter counter clockwise until the alignment point is oppos...

Page 39: ...t point on the adapter Attach the lens in this position Turn the lens clockwise until you hear and feel it click into place DETACHING THE LENS FROM THE ADAPTER 1 2 3 Ensure that the camera is switched OFF Hold the lens on the fixed ring Press and hold the release button on the adapter Turn the lens counter clockwise until its alignment point is opposite the release button Remove the lens ...

Page 40: ...a range between 4 and 2 diopter to allow glasses wearers the use of the camera without eyeglasses diopter adjustment Look through the viewfinder Aiming at and focusing on an object Turn the diopter setting wheel until you see the image in the viewfinder and the displays in perfect focus ...

Page 41: ...ck thumbwheel and front setting wheel positioned specifically for easy portrait photography The handgrip is therefore particularly useful for one handed photography It also offers space for a second rechargeable battery PHOTOGRAPHY WITH THE HANDGRIP The operating elements of the handgrip are positioned is such a way as to be in easy reach when using the camera for portrait photography ...

Page 42: ...of the camera G Front setting wheel H Shutter button I Strap lug J Thumbwheel K Joystick L Hand grip lock ATTACHING THE HANDGRIP 1 2 Squeeze the contact cover of the handgrip on the two sides marked with triangles and lift it off Store the contact cover in its designated compartment in the handgrip Remove the contact cover in the base of the camera housing Store the contact cover in its designated...

Page 43: ...th the handgrip attached and re tighten it as needed DETACHING THE HANDGRIP Turn the handgrip to the left to unlock the connection Make sure to hold the camera and the handgrip securely while doing so Replace both cover caps over the connections Important Make sure that the contact covers are securely in place on the camera and on the handgrip whenever the handgrip is not attached to the camera Th...

Page 44: ...or extended periods of time we recommend attaching the carry strap on the strap lug of the camera on the right hand side and on the strap lug of the handgrip This will always maintain the camera in the correct position See p 30 for instructions on how to attach the carry strap CHANGING THE BATTERY The multifunction handgrip offers space for a second rechargeable battery This will significantly inc...

Page 45: ...SERTING THE BATTERY 1 2 Insert the battery into the slot with the groove pointing towards until you hear and feel it clicking into place CLOSE THE BATTERY COMPARTMENT Close the cover over the battery compartment It will click to signify it is locked Click down the locking toggle Note The camera must have a battery with at least minimal charge inserted to utilize a rechargeable battery in the handg...

Page 46: ...ready to use after approx 1 s Displays in the viewfinder appear SWITCHING THE CAMERA OFF Note The function Auto Power Off Auto Power Off see p 72 deactivates the camera automatically if no operation occurs within a preset time Use the main switch to deactivate the camera if this function is Off Off to prevent inadvertent exposures and battery discharge when the camera is not in use ...

Page 47: ... control from standby mode 2 Press down fully Shutter release The data is then transferred to the memory card Starting a video recording Starting a preselected self timer delay Starting a picture series or interval shooting Notes Press down the shutter button in a smooth motion until you hear the click of the shutter to prevent camera shake The shutter button remains locked if the memory card inse...

Page 48: ... Enlarging reducing viewed pictures THUMBWHEEL Menu navigation Accessing the submenu Applying menu settings Setting selected menu items functions Setting the exposure value Exposure compensation value selection Setting the program shift Scrolling through the picture memory Playback of video recordings Confirming the prompts ...

Page 49: ...Shifting the metering field Field or Spot AF Exposure lock Playback of video recordings Confirming the prompts PLAY BUTTON MENU BUTTON PLAY BUTTON Activation and deactivation of the continuous review playback mode Return to full screen display MENU BUTTON Accessing the menu incl status screen Accessing the Playback Review menu Exiting the currently displayed sub menu ...

Page 50: ...ETTINGS in picture mode in playback review mode FN button 25 Toggle info profiles FN button 20 LCD panel EVF switchover FN button 4 Mode change photo video Marking rating a recording FN button 3 Photo ISO ISO Video ISO ISO Cine Exposure Index Exposure Index FN button 9 Photo Magnification Video Microphone Gain Microphone Gain FN button 10 Autofocus metering method ...

Page 51: ...ng reducing viewed pictures swipe Shifts the enlarged image section horizontal swipe full length Mode change photo video Scrolling through the picture memory vertical swipe full length Switch to playback review mode Switch to picture mode touch and hold Accessing the AF quick setting two finger pinch spread Enlarging reducing viewed pictures swipe and hold hold and swipe Shifting the AF metering f...

Page 52: ... Display of the active mode Display of recording data Display of camera information MENU CONTROL CONTROL ELEMENTS The following elements are used for menu control 2 26 21 22 21 Joystick 2 Front setting wheel 26 MENU button 22 Thumbwheel ...

Page 53: ...t important settings Favorites Favorites your custom list see p 64 for details on how to manage this list Main Menu Main Menu offers access to all menu items contains various submenus Note The favorites menu can only be displayed if it has at least one menu item assigned SECTION PHOTO VIDEO Status screen dark background bright background Favorites dark header line bright header line Main menu top ...

Page 54: ... switch between menu sections by scrolling through the pages Alternative ly the status screen and the favorites menu offer access to the main menu as their respectively last menu item Scrolling forward Press the MENU button or Turn the front setting wheel in clockwise direction The status screen will appear again after page 6 of the main menu Scrolling backward Turn the front setting wheel in anti...

Page 55: ...ideo see p 143 B Exposure settings see p 121 and p 159 C Menu items D Access to the main menu Notes Where touch control is not possible or not desirable e g in EV mode the status screen can alternatively be controlled via the joystick and or the thumbwheel The settings become effective immediately The framed control panels can be selected Unframed values are added in automatically depending on the...

Page 56: ...enu appears DIRECT SETTINGS A version of the menu bar appears in the lower area of the status screen see p 61 Select the desired function directly or swipe ACCESSING A STANDARD SUBMENU These menus behave as if they were accessed from within the main menu see p 60 Touch control is therefore unavailable From there you return to the status screen and not to the next higher menu item Select the desire...

Page 57: ...enu items It can contain up to 11 menu items These can be assigned individually see p 64 MAIN MENU The main menu offers access to all settings Most of these are organized in submenus A B C D A Menu sections Main Menu Main Menu and Favorites Favorites B Menu item name C Menu item setting D Submenu reference ...

Page 58: ...Scrolling backward Turn the front setting wheel in anti clockwise direction Page 6 of the main menu will appear again after the status screen LINE BY LINE NAVIGATION Function function option selection Press the joystick up down or Turn the thumbwheel to the right down to the left up Once the last menu item has been reached scrolling up or down the display will automatically jump to the previous or...

Page 59: ...he selection of On On or Off Off An automatic save is done GO BACK ONE STEP Return to the superordinate menu item Press the joystick to the left This option is only available for list type submenus GO BACK TO TOP MENU LEVEL Press the MENU button 1x The top level of the currently selected menu section is displayed EXITING THE MENU You can exit the menus and submenus at any time with without applyin...

Page 60: ...A E C B D A Entry line B Keyboard Number pad C Delete button deletes the last character entered D Confirm button to apply individual values and existing settings E Return to previous menu level F Shift key toggles between upper and lower case letters G Changing the character type ...

Page 61: ...he line is reached Press the joystick thumbwheel Using touch control Press the button of your choice SAVE Select button D CANCEL Select button E MENU BAR Using button control Press the joystick left right or Turn the thumbwheel Using touch control Select the desired function directly or swipe Notes The currently active setting displayed in the center is highlighted in red The set value is displaye...

Page 62: ... is highlighted in red The set value is displayed above the scale below the menu bar The following applies for direct access The selected function requires no additional confirmation and will be active immediately DATE TIME MENU To move to the next settings field Press the joystick left right or Turn the thumbwheel To set values Press the joystick up down To save and return to superordinate menu i...

Page 63: ... Press the joystick in the relevant direction or Turn the thumbwheel To set individual items Press the joystick thumbwheel The set value displayed next to the menu item is highlighted Press the joystick left right or Turn the thumbwheel To apply the setting Press the joystick thumbwheel To return to the superordinate menu item Press the joystick to the left ...

Page 64: ...tem ISO ISO in Cine mode accesses the associated Exposure Index Exposure Index function The favorites menu will be represented by an asterisk in the header line provided it contains at least one menu item MANAGING THE FAVORITES MENU Switch to the desired mode picture or video Select Customize Control Customize Control in the main menu Select Edit Favorites Edit Favorites Select the desired menu it...

Page 65: ...rrently assigned menu function Switch to the desired mode picture or video Press the desired FN button longer The direct access appears on the LCD panel Select the desired menu item ACCESSING THE ASSIGNED MENU FUNCTION Press the desired FN button briefly The assigned function is accessed or a submenu appears on screen Notes The submenus accessed via direct access may look differently than when the...

Page 66: ...Exposure compensation Shutter speed A Aperture Exposure compensation M Aperture Shutter speed Video mode Thumbwheel Front setting wheel P Exposure compensation Microphone Gain S Exposure compensation Shutter speed A Aperture Exposure compensation M Aperture Shutter speed CUSTOMIZING THE SETTING WHEELS The functions of the two setting wheels can be swapped Picture mode Video mode Switch to the desi...

Page 67: ...o mode Thumbwheel Front setting wheel A Magnification Exposure compensation M Magnification Shutter speed CUSTOMIZING THE SETTING WHEELS The functions of the two setting wheels can be swapped Switch to the desired mode picture or video Select Customize Control Customize Control in the main menu Select Wheel Assignment MF Lens Wheel Assignment MF Lens Select the desired setting ...

Page 68: ...ory setting Stop Down Stop Down Switch to the desired mode picture or video Select Customize Control Customize Control in the main menu Select Front Wheel Direction Front Wheel Direction Select Stop Down Stop Down or Stop Down Stop Down JOYSTICK FUNCTIONS IN PICTURE MODE You can assign various functions to the joystick in picture mode The settings for AF and MF mode are done separately See p 112 p...

Page 69: ...y be locked in recording mode Note Appears on screen when a operating element is used while the lock is active LOCKING THE SETTING WHEELS Select Dial Lock Dial Lock in the main menu Select On On Off Off LOCKING THE JOYSTICK Select Joystick Lock Joystick Lock in the main menu Select On On Off Off ...

Page 70: ... update MENU LANGUAGE Factory setting English Available menu languages German French Italian Spanish Russian Japanese Korean Traditional or Simplified Chinese Select Language Language in the main menu Select your language Aside from a few exceptions the language will be changed for all information DATE TIME RECEIVING THE SETTINGS FROM A MOBILE DEVICE The date and time settings can be automatically...

Page 71: ...12 Hours 12 Hours 24 Hours 24 Hours Set the time Select am am or pm pm for the 12 hour format TIME ZONE Select Camera Settings Camera Settings in the main menu Select Date Time Date Time Select Time Zone Time Zone Select your time zone current location DAYLIGHT SAVING TIME Select Camera Settings Camera Settings in the main menu Select Date Time Date Time Select Daylight Saving Time Daylight Saving...

Page 72: ...elect Auto Power Off Auto Power Off Select the desired setting Off Off 3 s 3 s 5 s 5 s 10 s 10 s 2 min 2 min 5 min 5 min 10 min 10 min Note The camera can be woken from standby mode at any time by pressing the shutter button or by switching the main switch off and on again LCD PANEL VIEWFINDER EVF SETTINGS The camera comes equipped with a 3 2 liquid crystal color panel which is protected by a glas...

Page 73: ...w Menu control EVF extended Recording Playback Review Menu control Select Display Settings Display Settings in the main menu Select EVF LCD EVF LCD Select the desired setting LCD LCD Auto Auto EVF Extended EVF Extended EVF EVF Note Select EVF EVF if you want to keep the LCD panel switched off e g on dark environments EYE SENSOR SENSITIVITY You can adjust the eye sensor sensitivity to ensure that t...

Page 74: ... main menu Select EVF Brightness EVF Brightness Look through the viewfinder Select the desired brightness Confirm selection COLOR RENDERING Color rendering can also be adjusted Brightness is set individually for the LCD panel and the viewfinder Selection occurs via key control or touch control LCD PANEL Select Display Settings Display Settings in the main menu Select LCD Color Adjustment LCD Color...

Page 75: ...ALS Some functions can be acknowledged with acoustic signals The following special functions can be configured separately Electronic shutter sound AF Confirmation VOLUME The volume of active signals can be set Select Camera Settings Camera Settings in the main menu Select Acoustic Signal Acoustic Signal ACOUSTIC SIGNALS This setting specifies whether the camera shout output general notification si...

Page 76: ...firmation AF Confirmation Select On On Select Volume Volume Select Low Low High High SILENT PHOTOGRAPHY When pictures should be taken as quietly as possible Select Camera Settings Camera Settings in the main menu Select Acoustic Signal Acoustic Signal Select Electronic Shutter Sound Electronic Shutter Sound AF Confirmation AF Confirmation Acoustic Signals Acoustic Signals Select Off Off for each o...

Page 77: ...EN Camera basic settings 77 ...

Page 78: ...F Touch AF Select On On Off Off Positioning the AF Metering Field Briefly tap the LCD panel in the desired position or Swipe at desired position 1 8000 2 8 F 12500 ISO EV 3 2 1 0 2 1 3 8234 12MP To move the metering field back to the center of the screen Double tap the LCD panel Notes This function is available in conjunction with the following AF metering methods Spot Spot Field Field Zone Zone a...

Page 79: ...ens used see relevant instructions This function is not available for specific lenses lenses mounted via an adapter e g Leica M lenses with L adapter M specific Leica SL lenses EV INCREMENT You can choose between 1 2 EV or 1 3 EV graduations This will allow you to choose between stronger or more subtle effects for your relevant settings This setting doesn t just apply for exposure compensation set...

Page 80: ...FILES Up to 4 independent profiles can be used The desired function can be selected and adjusted individually for each profile During operation the switch between info profiles is done via direct access see p 65 In factory settings that will be the FN button at the back left next to the LCD panel 25 It allows quick switches between various views The following profiles are predefined in the factory...

Page 81: ...Capture Assistants Select a profile Select On On Off Off CUSTOMIZING THE INFO PROFILES Select Camera Settings Camera Settings in the main menu Select Capture Assistants Capture Assistants Select Setting Setting Select a profile Select the desired function Select the desired setting Function Available settings Info Bars Info Bars On On Off Off Grid Grid 3 x 3 3 x 3 6 x 4 6 x 4 Off Off Focus Peaking...

Page 82: ...to fit the object You can choose one of two grid displays They divide the frame into 3 x 3 or 6 x 4 fields FOCUS PEAKING This assist function highlights the edges of in focus subject elements in color When Focus Peaking is activated will appear to the right of the frame with a display of the color used TAG COLOR The color can be user specified This setting will apply for all info profiles Factory ...

Page 83: ...ing Zebra display marks very bright image areas This function is a very easy and exact tool for checking the correct exposure setting The two displays differ as follows In picture mode Clipping flashes black In video mode Zebra black white striped pattern SETTING THE LIMIT VALUE You can set a threshold value for these displays i e define a value at what degree of overexposure they will appear so t...

Page 84: ... to the left and right of the image center indicate the transverse axis on screen in zero position green in tilted position red The longitudinal axis is indicated in level position by two green double lines immediately left and right of the image center When the camera is tilted these lines are white and a short red line appears above or below them Note The camera will switch the aspect of the lev...

Page 85: ...pixels at each brightness level This type of rendering allows an additional quick and easy assessment of the exposure setting Notes The histogram is always based on the brightness displayed depending on the settings used it may not represent the final exposure In picture mode the histogram should be regarded as a trend indicator The histogram during rendering may differ slightly from the one durin...

Page 86: ...ta of the entire 35 mm sensor can be used or only a cropped section which corresponds to the APS C format This can be helpful e g when only limited storage capacity remains or a lens developed specifically for APS C is used The max available resolution is dependent on the setting of the sensor format Sensor format DNG resolution 35 mm 8368 x 5584 pixels 46 7 MP APS C 5504 x 3664 pixels 20 MP Full ...

Page 87: ...G DNG JPG JPG JPG Notes The standardized DNG Digital Negative format is generally used for the storage of raw data When picture data is saved in DNG DNG and in JPG JPG format simultane ously then the camera will use the resolution setting for the JPG JPG format is used for the JPG file The DNG DNG format always works with the highest available resolution no matter what JPG JPG setting is selected ...

Page 88: ...JPG L JPG Select JPG Settings JPG Settings in the main menu Select JPG Resolution JPG Resolution Select the desired resolution L JPG 47 MP 20 MP L JPG 47 MP 20 MP M JPG 24 MP 10 MP M JPG 24 MP 10 MP S JPG 12 MP 5 MP S JPG 12 MP 5 MP NOISE REDUCTION In digital photography the appearance of flawed pixels that can be white red blue and green is called noise Except when high sensitivities are used noi...

Page 89: ...ht and dark is at edges in the picture Expanding or reducing these areas will therefore change the impression of sharpness COLOR SATURATION The saturation factor in color images determines whether colors in the picture appear pale and pastel like or bright and colorful While you can t do anything about weather conditions clear misty you can change the way an image is rendered COLOR PROFILE Three p...

Page 90: ...ons for saving data when two memory cards are inserted DNG JPG on SD1 SD2 Backup DNG JPG on SD1 SD2 Standard DNG on SD1 JPG on SD2 Split SD1 SD2 Backup All files are saved to SD1 and SD2 One of the cards therefore serves as backup SD1 SD2 Standard Files are saved to SD1 first until its capacity is reached Subsequent files will then be saved to SD2 SD1 SD2 Split Files are saved separately depending...

Page 91: ... that time Factory setting On On Select Long exposure noise reduction Long exposure noise reduction in the main menu Select On On Off Off SHUTTER TYPE The Leica SL2 comes equipped with a mechanical shutter and a purely electronic shutter function The electronic shutter expands the available shutter area and functions completely noiseless which may be important in some work environments Factory set...

Page 92: ...g the slower will be the required shutter speeds for correct exposure Visual image stabilization is a great tool for preventing out of focus images due to blurring Factory setting On On Select Image Stabilization Image Stabilization in the main menu Select On On Off Off SETTING THE STABILIZATION DIRECTION For camera pans it can be useful to only correct camera shake in specific directions Factory ...

Page 93: ...sist Lamp Select On On Off Off Notes The AF assist light illuminates an area of up to approx 5 m The AF assist light switches off automatically once focusing was successful AF metering field is green or has failed AF metering field is red ACOUSTIC AF CONFIRMATION You can set an acoustic confirmation signal for successful focus metering in AF mode Factory setting Off Off Select Camera Settings Came...

Page 94: ...n which corresponds to the APS C format This can be helpful e g when only limited storage capacity remains or a lens developed specifically for APS C is used Factory setting 35 mm 35 mm Select Sensor Format Sensor Format in the main menu Select the desired setting 35 mm 35 mm APS C APS C Full frame image circle APS C image circle Full frame Still 3 2 8368 x 5584 Full frame C4k 17 9 8192 x 4320 Ful...

Page 95: ...e preset video format settings are then accessed automatically when one of the two file formats is selected Note You can toggle between video file formats via the status screen without having to re configure the settings VIDEO FORMAT The following combinations of resolution and frame rate are available Frame rate Resolution file format 23 98 fps 5K C4K 4K FHD MOV MOV MOV MP4 MOV MP4 25 fps MOV MOV...

Page 96: ...able depending on the selected resolution The frame rates 100 fps to 180 fps allow slow motion recordings in varying speeds SETTING THE VIDEO FORMAT Factory setting file format MP4 resolution FHD frame rate 59 94 fps MOV Select Video Format Resolution Video Format Resolution in the main menu Select MOV MOV Select the desired resolution 5K 5K C4K C4K 4K 4K Full HD Full HD Select the desired frame r...

Page 97: ...Select Video Style Video Style in the main menu Select Video Style Settings Video Style Settings Select a profile Contrast Contrast Sharpness Sharpness Saturation Saturation Select the desired level 2 2 1 1 0 0 1 1 2 2 MICROPHONE The sensitivity of the integrated microphone can be set Factory setting 0 dB 0 dB Select Video Settings Video Settings in the main menu Select Microphone Gain Microphone ...

Page 98: ...ta record that is generated and recorded alongside the image and audio data It ensures the correct time assignment of picture and audio signals after cutting or after later separate processing Time code mode and start time can be selected TIME CODE MODE Time information is written to the recorded video file if the time code setting is activated Factory setting Off Off Off Off Timekeeping begins at...

Page 99: ...ith the BT 709 standard HLG HLG Optimization for HDR capable UHD TV devices L Log L Log Optimization for professional reworking e g color grading Factory setting Low Low Select Video Settings Video Settings in the main menu Select Video Gamma Video Gamma Select the desired setting Off Off HLG HLG L Log L Log SHARPNESS AND SATURATION SETTINGS Sharpness and saturation can be set individually for HLG...

Page 100: ...DMI Output HDMI Output in the main menu Select the desired setting With Audio With Audio Without Audio Without Audio Note An output with audio may result in some negligible delays We recommend the setting Without Audio Without Audio to avoid this effect if for example HDMI Live View is required for a recording with an external recorder VIDEO ASSIST FUNCTIONS AF ASSIST LIGHT The AF assist light cou...

Page 101: ... 40 1 Select On On Off Off Notes The format limits of a wider aspect ratio than that of the recorded video are indicated by horizontal green lines those of a narrower one by vertical red lines The auxiliary lines are labeled with the relevant aspect ratio SAFETY AREA Depending on the playback device used a small area of the image borders may be invisible It is therefore possible to display a safet...

Page 102: ...a SL2 offers a number of other picture modes Please read the relevant sections for information about functional ities and setting options Select Drive Mode Drive Mode in the main menu Select the desired function options Mode Setting options Variants Single frame exposure Single Single Serial exposures see p 131 Speed Continuous Low Speed Continuous Low Speed Continuous Medium Speed Continuous Medi...

Page 103: ...ase read the following chapters for more information AUTOFOCUS MODES The following AF modes are available AFs AFs AFc AFc and Intelligent AF Intelligent AF The currently selected AF mode is shown in the header line Factory setting Intelligent AF Intelligent AF Select Focusing Focusing in the main menu Selecting Focus Mode Focus Mode Select the desired setting Intelligent AF Intelligent AF AFs AFs ...

Page 104: ... metering fields are indicated by a small frame field metering or a cross spot metering The very small measuring range for spot metering allows focusing on tiny details of the subject The slightly larger measuring range in field metering is less critical for focusing but still permits selective metering These metering methods can also be used for serial exposures in which the part of the object yo...

Page 105: ...he capture of moving objects The focus on the object in the metering field is continuously adjusted once it is detected Aim the metering field at the desired subject by panning the camera shifting the metering field Tap and hold the shutter button or Press and hold the joystick provided it was assigned the function AF L AF L or AF L AE L AF L AE L see p 128 The camera focuses on the object Pan the...

Page 106: ...The picture is taken on the right edge of the frame The subsequent measurement is taken at the left edge of the frame Select Focusing Focusing in the main menu Select AF Setup AF Setup Select AF Tracking Start Position AF Tracking Start Position Select the desired setting Last Position Last Position Recall Recall Center Center PERSON DETECTION Person detection is an expansion of the face recogniti...

Page 107: ...Sensitivity Depth Sensitivity Field Movement Field Movement and Shift in Direction Shift in Direction higher values lower values Depth Sensitivity Depth Sensitivity Changes in the distance to the object are tracked immediately the adjustment is delayed slightly to prevent unwanted focus jumps should e g an object pass in front of the object Field Movement Field Movement in case of movement from wi...

Page 108: ...le Select desired parameter Press the joystick thumbwheel Set the desired value RESETING THE ACTIVE PROFILE Accessing the active profile Press the joystick to the right Press the joystick thumbwheel PRE FOCUS When the function is active the camera carries out a continuous depth mapping in realtime before the actual focusing That allows a pre identification of possible focus points in a scene It sp...

Page 109: ...f the metering field if the metering method Field Field is set ADJUSTING THE METERING FIELD SIZE only Field Field Turn the thumbwheel or Pinch or spread The size of the AF metering field is adjustable in 3 incre ments Note AF Quick Setting can only be accessed if the function Touch AF Touch AF is active see p 78 CHANGING THE AF METERING METHOD Turn the front setting wheel A menu bar appears at the...

Page 110: ... in the displayed cropped section The enlargement starts at the 2nd of 3 enlargement increments Adjusting the enlargement function Turn the thumbwheel front setting wheel Changing the position of the enlarged section Swiping will allow you to move the position of an enlarged cropped section or Press the joystick in the relevant direction Exiting the enlargement function Tap the shutter button Note...

Page 111: ...NGS Factory setting On On The speed of the MF setting is adjustable Example for a setting to 90 90 the entire focus range will be run through when the focus setting ring is turned by one quarter A full turn of the focus setting ring will be needed for a setting to 360 360 Smaller angles allow faster adjustments while larger angles offer more precise settings Select Focusing Focusing in the main me...

Page 112: ...ocus ENLARGEMENT IN MF MODE The larger the details of the subject are shown the better you can assess their sharpness and the more accurately you can focus This function can be automatically activated during manual focusing or can be accessed independently ACCESS VIA THE FOCUS SETTING RING Turning the focus ring will automatically enlarge a image section Select Focusing Focusing in the main menu S...

Page 113: ... ring ACCESSING WITH THE FN BUTTON JOYSTICK This function can be assigned to an FN button or the joystick Assigning the function to one of the FN buttons See p 65 Assigning the function to the joystick Select Customize Control Customize Control in the main menu Select Joystick Joystick Select Magnification Magnification Accessing the enlargement function Press FN button joystick A enlarged image s...

Page 114: ...g the enlargement function Tap the shutter button Note The enlargement function remains active until it is exited DISTANCE DISPLAY Distance information is shown in the top display during manual focusing Focus Mode MF when the shutter button is pressed to the first pressure point Focus Mode AF when the shutter button is pressed and held at the first pressure point followed by a turning of the focus...

Page 115: ...eld Menu settings Joystick Shutter button AFs AE L AFs AE L AFc AE L AFc AE L Exposure and focus AFs AFs AFc AFc Sharpness Exposure Aim at the object Press and hold the joystick The measurement is taken and saved Store more measurements via the shutter button as needed Select the final image section Shutter release ISO SENSITIVITY The ISO setting covers a range between ISO 50 and ISO 50000 allowin...

Page 116: ...d or to the configured shutter speed aperture settings combination In conjunction with aperture priority mode this function extends the range for automatic exposure control Select ISO ISO in the main menu Select Auto ISO Auto ISO LIMITING SETTING RANGES A max ISO value can be set which will then limit the automatic setting range Maximum ISO Maximum ISO A max exposure time can also optionally be co...

Page 117: ...lect Shutter Speed Limit with Flash Shutter Speed Limit with Flash Select the desired value Auto Auto 1 250 1 250 1 125 1 125 1 60 1 60 1 30 1 30 1 15 1 15 1 8 1 8 1 4 1 4 1 2 1 2 FLOATING ISO This function complements Auto ISO Light strength changes with many zoom lenses when the focal length is changed Floating ISO will in this situation adjust the sensitivity in fine graduations and will simult...

Page 118: ...ntly encountered light sources Daylight Daylight for outdoor pictures in sunlight Cloudy Cloudy for outdoor pictures in cloudy conditions Shadow Shadow for outdoor pictures with the main subject in shadow Tungsten Tungsten for indoor pictures with predominantly incandescent lamp light HMI HMI for indoor pictures with predominantly light from metal halide lamps Fluorescent warm Fluorescent warm for...

Page 119: ...new measurements are taken or one of the other white balance settings is selected GRAY CARD This metering variant captures all color hues in the metering field and uses these to calculate a mean gray value Select White Balance White Balance in the main menu Select Graycard Graycard The following will appear on the LCD panel the image based on automatic white balance a frame in the center of the im...

Page 120: ...the metering field Press the joystick in the relevant direction Taking measurements Shutter release or Press the joystick thumbwheel The measurement is taken Canceling the measurement Press the FN button 25 DIRECT SETTING OF THE COLOR TEMPERATURE Values between 2000 and 11 500 K Kelvin can be set directly That gives you a very wide range which covers virtually all color temperatures occurring in r...

Page 121: ...ng semi automatic exposure setting Function assignments can be modified see p 66 Exposure settings can be done quickly and easily via the status screen Briefly touch the desired control panel The active control panel is highlighted in red A setting band appears instead of the light balance A dot marks the current setting The current setting value is displayed above the dot Tap the setting band bri...

Page 122: ...ter speed will also appear in the top display SPOT METERING This metering method is concentrated exclusively on a small area in the center of the image The metering fields are joined together when the exposure metering method Spot Spot is combined with the AF metering methods Spot Spot and Field Field Exposure metering will then occur at the point specified by the AF metering field even if it is m...

Page 123: ... the desired mode The mode display changes in the top display and on screen All modes can be reached by turning the wheel in either direction The selected mode will be applied automatically approx 2 s after the thumbwheel is moved the last time To apply the selected mode immediately Press thumbwheel joystick or Tap the shutter button Via the status screen Touch the control panel briefly Tap the de...

Page 124: ...MBINATIONS SHIFT Changing the preset values using the Shift function combines the reliability and speed of fully automatic exposure control with the opportunity to vary the speed aperture combination selected by the camera at any time to fit in with your own ideas and intentions The overall exposure i e the brightness of the image remains unchanged Faster shutter speeds are a good choice for e g s...

Page 125: ...f the screen This contains the automatically set value pair of aperture setting and shutter speed All other visible displays of the info bars will be hidden Shutter release SHUTTER SPEED PRIORITY S Shutter speed priority mode will set exposure automatically according to the manually selected shutter speed It is therefore particularly suitable for pictures of moving objects where the sharpness of t...

Page 126: ...preview if P A S M P A S M is selected in the menu item Exposure Preview Exposure Preview after exposure metering see p 127 LONG TERM EXPOSURE In the modes S and M the Leica SL2 allows shutter speeds up to 30 minutes The remaining exposure time after shutter release is counted down in seconds on the display for shutter speeds greater than 1 s Image noise becomes apparent when using higher sensitiv...

Page 127: ...or the manual exposure setting M Factory setting P A S M P A S M Select Exposure Preview Exposure Preview in the main menu Select P A S P A S only in automatic aperture priority and shutter speed priority mode or P A S M P A S M also for manual setting Notes Depending on ambient lighting conditions the brightness of the screen image may differ from that of the actual pictures despite the settings ...

Page 128: ...vide the lock functions between the shutter button and the joystick or assign both to the joystick The functions include settings and storage AF L AUTO FOCUS LOCK The camera stores the focus setting That makes it easier to change the image section when focusing is fixed AE L AUTO EXPOSURE LOCK The camera stores the exposure value The focus can therefore be set on another object no matter which exp...

Page 129: ...e desired setting Press and hold the joystick The measurement is taken and saved Store more measurements via the shutter button as needed Select the final image section Shutter release METERING MEMORY LOCK IN AF MODE In NF mode only the exposure can be locked via the shutter button This function can also be assigned to the joystick The exposure value is saved via the shutter button independent of ...

Page 130: ...sation value marks at 0 Off Select Exposure Compensation Exposure Compensation in the main menu A scale appears as a submenu item Set the value on the scale The set value is displayed above the scale While setting the value you can see the effect on the screen image which becomes darker or lighter Notes This function is assigned to one of the setting wheels in the three semi automatic exposure mod...

Page 131: ...were taken in a series the last picture in the series or the last picture saved on the memory card while the save process is ongoing will be displayed first in both review modes Serial exposures with Continuous High Speed Continuous High Speed set are taken at a frequency of max 10 fps provided shutter speeds of 1 60 s or faster are used Serial exposures are not possible if a flash is used Only a ...

Page 132: ...ooting Select Number of Frames Number of Frames Enter the desired value SPECIFYING THE INTERVALS BETWEEN SHOTS Select Drive Mode Drive Mode in the main menu Select Interval Shooting Interval Shooting Select Interval Interval Enter the desired value SETTING THE DELAY TIME Select Drive Mode Drive Mode in the main menu Select Interval Shooting Interval Shooting Select Countdown Countdown Enter the de...

Page 133: ...rdless of how many pictures were taken in a series the last picture in the series or the last picture in the series or the last picture saved on the memory card while the saving process is ongoing will be displayed first in both review modes The camera may under some circumstances be unable to take good pictures That may happen if for example focusing was unsuccessful In that case the camera will ...

Page 134: ...nding on the exposure mode the exposure gradations are produced by changing the shutter speed and or aperture value Shutter speed A M Aperture S Shutter speed and aperture value P The picture sequence underexposed correct exposure overexposure The working range for automatic bracketing may be limited depending on the available shutter speed aperture combination With automatic ISO sensitivity contr...

Page 135: ...witched off Exposure metering is done first in autofocus mode focusing is first The delay time only starts after this FLASH PHOTOGRAPHY The camera determines the necessary flash intensity by firing one or more pre flashes before taking the actual picture The main flash fires immediately after i e during exposure COMPATIBLE FLASH UNITS The entire scope of functions described in this instruction man...

Page 136: ...tem compatible flash units see p 135 and for the auto modes aperture priority and manual setting In aperture priority mode and with manual setting the camera furthermore allows the use of other interesting flash techniques like flash synchronization and firing with slower shutter speeds than the max sync time The camera additionally communicates the sensitivity setting to the flash unit The flash ...

Page 137: ...ASH CONTROL The settings and functions described in the following sections only apply to settings and functions available in this camera and in system compatible flash units SYNC POINT Flash exposures are lit by two light sources ambient light Flash Any subject elements lit primarily by the flash will almost always be rendered in perfect focus by the short burst of light provided the focus is set ...

Page 138: ...ct Flash Sync Flash Sync Select the desired setting Start of Exp Start of Exp End of Exp End of Exp The set sync point is shown in the header line Notes Do not use synch cables that are longer than 3 m 10 feet When using the flash with faster shutter speeds a difference between the two flash times will be barely discernible or only noticeable for very fast movements FLASH RANGE The usable flash ra...

Page 139: ...ead to the cancellation of a compensation that has been set i e in such cases it is automatically reset to 0 0 Flash Exp Compensation Flash Exp Compensation is not available if flash units with an integrated compensation function are used e g Leica SF 58 A compensation value configured on the camera will be overruled when a relevantly equipped flash unit is attached e g a Leica SF 60 and a compens...

Page 140: ...ping these settings Notes A flash unit that is not ready to flash may cause incorrect exposures or error messages Studio flash systems may have a very long flash firing duration It may therefore be advantageous to select a slower shutter speed than 1 180 s when using such a system The same applies for RF controlled flash firing for so called off camera flashes as the transmission time may cause a ...

Page 141: ...EN Picture Mode 141 ...

Page 142: ...mode the joystick is used exclusively for focusing metering and saving A coupling of exposure metering and focusing is not done no matter which metering method is selected VIDEO MODE AND CINE MODE Cine mode is optimized for use by cinematography professionals The mode is reduced to the most important points and the use of terminology from cinematography ensure a seamless user experience Semi autom...

Page 143: ...cture and Video mode Using touch control Variant 1 Video Photo Variant 2 Video Photo The color of the status screen changes accordingly Using button control Press the FN button with the function assignment Photo Video Photo Video In factory settings that will be the FN button at the back left next to the LCD panel 25 Note The camera switches to the most recently set photo or video mode ...

Page 144: ...ing methods available for automatic focusing Only manual setting options are available for MF lenses TAKING VIDEOS WITH AF Focusing is done as needed when AFs AFs is in use The area in the AF metering field will be focused continuously if AFc AFc and Intelligent AF Intelligent AF are in use Continuous focusing can be suppressed by using a metering memory lock TAKING VIDEOS WITH MF Focusing is done...

Page 145: ... control specifically in conjunction with Touch AF CONTROLLING THE AUTOFOCUS TOUCH AF During video recordings Touch AF facilitates a more intuitive focus control even if the main object moves outside the center of the frame With AFs Briefly tap the LCD panel at the desired point Focusing is done after the touch With AFc Keep your finger on the LCD panel and move it dynamically The focus will adapt...

Page 146: ...he object that are within the relevant AF metering fields The metering fields are indicated by a small frame field metering or a cross spot metering The very small measuring range for spot metering allows focusing on tiny details of the subject Simply move the AF metering field to another position The slightly larger measuring range in field metering is less critical for focusing but still permits...

Page 147: ...helps in the capture of moving objects The focus on the object in the metering field is continuously adjusted once it is detected Aim the metering field at the desired subject by panning the camera shifting the metering field Tap and hold the shutter button or Press and hold the joystick The camera focuses on the object The metering field tracks the saved object and focus is continuously adjusted ...

Page 148: ... Setup Select AF Tracking Start Position AF Tracking Start Position Select the desired setting Last Position Last Position Recall Recall Center Center PERSON DETECTION Person detection is an expansion of the face recognition feature In addition to biometric patterns of faces the camera also detects body patterns and uses them for focusing Tracking will therefore continue once a person is detected ...

Page 149: ...up Select AF Speed AF Speed Select the desired setting 5 5 4 4 3 3 2 2 1 1 0 0 1 1 2 2 3 3 4 4 5 5 AF QUICK SETTING AF Quick Setting offers the following functions quick switches of the AF metering methods Adjusting the metering field size during field metering The viewfinder image remains visible continuously during setting adjustments ACCESSING AF QUICK SETTING Touch and hold the LCD panel All a...

Page 150: ... to use this feature see p 65 Assigning the function to one of the FN buttons See p 65 Accessing the enlargement function Press the FN button A enlarged image section appears The position of the enlargement depends on the position of the AF metering field The rectangle within the frame at the top right represents the current magnification as well as its position in the displayed cropped section Th...

Page 151: ...ocus setting ring to select the desired focusing MF SETTINGS Factory setting On On The speed of the MF setting is adjustable Example for a setting to 90 90 the entire focus range will be run through when the focus setting ring is turned by one quarter A full turn of the focus setting ring will be needed for a setting to 360 360 Smaller angles allow faster adjustments while larger angles offer more...

Page 152: ...the more accurately you can focus This function can be automatically activated during manual focusing or can be accessed independently ACCESS VIA THE FOCUS SETTING RING Turning the focus ring will automatically enlarge a image section Select Focusing Focusing in the main menu Select Focus Assist Focus Assist Select Auto Magnification Auto Magnification Select On On Turn the focus ring A enlarged i...

Page 153: ...the shutter button is pressed to the first pressure point Focus Mode AF when the shutter button is pressed and held at the first pressure point followed by a turning of the focus setting ring The unit of measure m m or ft ft can be selected see p 71 ISO SENSITIVITY Video mode The ISO setting covers a range between ISO 50 and ISO 50000 allowing you to adapt to the relevant situation as required The...

Page 154: ...e for automatic exposure control Select ISO ISO in the main menu Select Auto ISO Auto ISO Note This function is not available in Cine mode LIMITING SETTING RANGES A max ISO value can be set which will then limit the automatic setting range Maximum ISO Maximum ISO A max exposure time can also optionally be configured There are automatic settings and fixed max shutter speeds 1 30 1 30 s and 1 2000 1...

Page 155: ... only if the original ISO setting allows scope for change i e the highest lowest ISO setting is not already being used The Floating ISO Floating ISO warning icon will be displayed in that case This function is not available in Cine mode ASA SENSITIVITY Cine Mode The sensitivity setting in Cine mode is always done manually The menu item Exposure Index Exposure Index replaces the menu item ISO ISO T...

Page 156: ...tered light sources Daylight Daylight for outdoor pictures in sunlight Cloudy Cloudy for outdoor pictures in cloudy conditions Shadow Shadow for outdoor pictures with the main subject in shadow Tungsten Tungsten for indoor pictures with predominantly incandescent lamp light HMI HMI for indoor pictures with predominantly light from metal halide lamps Fluorescent warm Fluorescent warm for indoor pic...

Page 157: ...ew measurements are taken or one of the other white balance settings is selected GRAY CARD This metering variant captures all color hues in the metering field and uses these to calculate a mean gray value Select White Balance White Balance in the main menu Select Graycard Graycard The following will appear on the LCD panel the image based on automatic white balance a frame in the center of the ima...

Page 158: ...he metering field Press the joystick in the relevant direction Taking measurements Shutter release or Press the joystick thumbwheel The measurement is taken Canceling the measurement Press the FN button 25 DIRECT SETTING OF THE COLOR TEMPERATURE Values between 2000 and 11 500 K Kelvin can be set directly That gives you a very wide range which covers virtually all color temperatures occurring in re...

Page 159: ...g semi automatic exposure setting Function assignments can be modified see p 66 Exposure settings can be done quickly and easily via the status screen Briefly touch the desired control panel The active control panel is highlighted in red A setting band appears instead of the light balance A dot marks the current setting The current setting value is displayed above the dot Tap the setting band brie...

Page 160: ...er speed will also appear in the top display SPOT METERING This metering method is concentrated exclusively on a small area in the center of the image The metering fields are joined together when the exposure metering method Spot Spot is combined with the AF metering methods Spot Spot and Field Field Exposure metering will then occur at the point specified by the AF metering field even if it is mo...

Page 161: ...rate see p 96 When Auto ISO is active the camera uses the dynamic adjustment function for the ISO value for the exposure setting Depending on the exposure mode selected the automatic ISO setting interacts with automatically controlled aperture and or shutter speed settings SELECTING A MODE Via the thumbwheel Press the thumbwheel The currently selected mode is shown in the top display The currently...

Page 162: ...MATIC EXPOSURE SETTING P AUTOMATIC PROGRAM P The exposure is controlled by an automatic shutter speed and aperture setting The exposure compensation and recording level are controlled directly via the setting wheels Selecting the operating mode P see p 161 Set exposure compensation as needed Start video recording ...

Page 163: ...e p 161 Set the desired exposure value Start video recording SHUTTER SPEED PRIORITY S Shutter speed priority mode will set exposure automatically accord ing to the manually selected shutter speed The selected shutter speed will be maintained for the duration of the recording Select the operating mode S see p 161 Select the desired shutter speed Start video recording MANUAL EXPOSURE SETTING M The f...

Page 164: ...hich becomes darker or lighter Notes This function is assigned to one of the setting wheels in the three semi automatic exposure modes and therefore quickly accessible see p 66 The set exposure compensation is indicated by a mark on the exposure compensation scale in the footer line see p 26 The following applies for set compensation values no matter how they were initially set They remain effecti...

Page 165: ...EN Video Mode 165 ...

Page 166: ...rded pictures are not automatically rotated in Review mode to utilize the full screen area It may not be possible to render files with this camera that were not recorded with this device In some cases the screen image may not have the expected quality or the LCD panel will remain blank and only display the file name You can toggle back from playback mode to recording mode at any time by tapping th...

Page 167: ...ELEMENTS ON THE LCD PANEL On screen control elements generally function by intuitively by touch Many can also be selected by pressing one of the three buttons to the left of the LCD panel A control element in the header is accompanied by an icon denoting the relevant button A control element on the edge of the screen will be positioned directly next to the relevant button Example The Go back icon ...

Page 168: ...depending on the current camera setting Initial situation After pressing the PLAY button Full screen display of a recording Recording mode Display of an enlarged cropped section or several thumbnails Full screen display of the recording SELECTING SCROLLING THROUGH RECORDINGS The recordings are visually arranged in a horizontal reel When the end of an image series is reached the display automatical...

Page 169: ... an empty info profile completely without assist function icons in Playback Review mode without having to set them again when switching to recording mode See S 80 for setting options and additional information The assist functions Grid Grid and Level Gauge Level Gauge are not available in Playback Review mode DISPLAYING ASSIST FUNCTIONS To switch between info profiles Press the FN button at the re...

Page 170: ...uch control Using touch control Two finger pinch spread The central cropped section of the picture is enlarged Swiping will allow you to move the position of an enlarged cropped section The rectangle within the frame at the top right represents the current magnification as well as its position in the displayed cropped section Double tap Toggles between max zoom at the tap position and full screen ...

Page 171: ...layed cropped section You can move directly from one picture to the next in magnification mode which will then also be displayed with the same magnification Turn the thumbwheel to the left right Notes It may not be possible to enlarge pictures taken with other camera types Video recordings cannot be enlarged DISPLAYING MULTIPLE RECORDINGS AT ONCE The camera offers an overview function in which sev...

Page 172: ...rding B Number of the currently selected recording C Scrollbar The currently viewed recording is framed in red and can be selected for a closer look To navigate between recordings Press the joystick in the relevant direction or Turn the thumbwheel To display the recording in full size Using touch control Two finger spread or Briefly touch the image Using button control Turn the front setting wheel...

Page 173: ...marked with The icon will appear in the header line on the far right when viewing images in full size and in the top left corner of the thumbnail in overview mode Removing a tag Press the FN button at the top left 4 The marking disappears DELETING RECORDINGS There are several methods available to delete recordings deleting individual recordings deleting multiple recordings deleting all recordings ...

Page 174: ...e called up when in overview mode because the menu function Delete Delete of the Review menu is not available in this context The Scroll and Magnify functions continue to be available when the Delete screen is active DELETING MULTIPLE RECORDINGS Several recordings can be marked in a Delete overview with twelve thumbnails and can then be deleted all at once This overview can be reached in two ways ...

Page 175: ...ked files appears Select Yes Yes To cancel deletion and return to the normal Playback Review mode Select the Go back icon DELETING ALL RECORDINGS Press the MENU button Select Delete All Delete All in the Review menu The prompt Do you want to delete all files Do you want to delete all files appears Select Yes Yes Note The message No valid picture to play No valid picture to play appears after succe...

Page 176: ...s 3 s 3 s 5 s 5 s Permanent Permanent Shutter pressed Shutter pressed Permanent Permanent The most recent recording is displayed until automatic review is ended by pressing the PLAY button or by tapping the shutter button Shutter pressed Shutter pressed The most recent recording is displayed for as long as the shutter button is pressed down Notes Various control elements change back to regular Rev...

Page 177: ...ration Duration Select the desired duration 1 s 1 s 2 s 2 s 3 s 3 s 5 s 5 s STARTING THE SLIDE SHOW Press the MENU button Select Slideshow Slideshow in the Review menu Select the desired setting Play All Play All Pictures only Pictures only Videos only Videos only The slide show will start automatically with the selected recordings and runs in an endless loop until it is exited ENDING THE SLIDE SH...

Page 178: ... volume Briefly tap the LCD panel or Press the joystick thumbwheel Notes A running playback will be interrupted if a control element is accessed The control elements disappear after about 3 s Touching the LCD panel or pressing a button will make them reappear START PLAYBACK Appears on screen if you have selected a video file in playback mode Press the joystick thumbwheel or touch briefly PAUSE PLA...

Page 179: ...y anywhere in the picture Using button control Press the joystick thumbwheel NAVIGATE TO ANY POINT IN THE FILE QUICK JUMP Using touch control While control elements are visible Touch the playback status bar briefly at the desired position Using button control Press and hold the joystick left right PRECISE SELECTION Turn the thumbwheel ...

Page 180: ...rol Press the PLAY button SETTING THE VOLUME Using touch control While control elements are visible Tap the volume icon briefly Touch the volume status bar briefly at the desired position Using button control Press the joystick up down The volume status bar appears Press the joystick up louder or down quieter Note Sound is switched off at the lowest part of the bar and the volume icon changes to ...

Page 181: ...en appears the left cutting mark is highlighted in red active CHANGING THE CURRENT CUTTING POINT Press the joystick left right The selected cutting point is highlighted in red active MOVING THE ACTIVE CUTTING POINT Turn the thumbwheel The currently selected time of the relevant cutting point is displayed at the bottom left of the footer line A still of the video sequence at that point is displayed...

Page 182: ...d and the original one is deleted Auto Review Auto Review The new video is played The newly cut video is not saved and the original remains unchanged The editing function can be canceled at any time provided no selection was made in the Video Trimming Video Trimming menu Press the PLAY button The video playback screen reappears Notes In all three cases a notification screen appears while the data ...

Page 183: ...EN Playback Review mode 183 ...

Page 184: ...amera Similarly profiles saved on a memory card can be transferred to the camera SAVING CURRENT SETTINGS AS A USER PROFILE CREATING PROFILES Saving settings Creating a profile Create custom settings for the desired functions via menu control Select User Profile User Profile in the main menu Select Manage Profiles Manage Profiles Select Save as Profile Save as Profile Select a memory slot Confirm t...

Page 185: ...E MEMORY CARD Select User Profile User Profile in the main menu Select Manage Profiles Manage Profiles Select Export Profiles Export Profiles or Import Profiles Import Profiles Confirm the selection Notes When importing and exporting all profile slots are transferred to the card i e including any empty slots Any existing profiles stored in the camera will be overwritten during the profile import I...

Page 186: ...rom the factory settings denotes the camera brand The first three characters signify the folder number numerals The next four digits denote the sequential file number Once file number 9999 is reached then a new folder will be automatically created in which the file numbering begins at 0001 again The last three places after the dot denote the file format DNG or JPG Notes When using memory cards tha...

Page 187: ...Settings in the main menu Select Reset Image Numbering Reset Image Numbering A relevant prompt is displayed Confirm the creation of a new folder Yes Yes or cancel the new folder No No Note The name part first letter of a new folder created this way remains unchanged The file numbers in that folder will start again at 0001 ADDING COPYRIGHT INFORMATION This camera allows you to enter letters and oth...

Page 188: ...ce Activate Leica FOTOS and connect to the camera This function is available only as long as the camera is on line with the Leica FOTOS app FORMATTING A MEMORY CARD Memory cards that have already been in use with this camera will usually not require formatting An unformatted memory card that is inserted into the camera for the first time must be formatted We recommend formatting memory cards from ...

Page 189: ...e conveniently transferred to mobile devices via Leica FOTOS see p 194 Alternatively a card reader or USB cable can be used for the transfer ABOUT LEICA FOTOS See chapter Leica FOTOS p 194 VIA USB CABLE The camera supports multiple data transfer options PTP and mass storage mode A transfer mode can be permanently selected or chosen every time a connection is established Factory setting PTP PTP Sel...

Page 190: ...settings You can optionally exclude the user profiles WiFi and Bluetooth settings as well as the image numbering from the reset individually Select Reset Camera Reset Camera in the main menu The prompt Reset Camera Settings Reset Camera Settings appears Confirm or reject the reset to factory settings Yes Yes No No Selecting No No will cancel the reset and the display will return to the main menu S...

Page 191: ...st firmware version Save the download to the memory card Insert the memory card into the camera Switching the camera on Select Camera Information Camera Information in the main menu Select Camera Firmware Version Camera Firmware Version Select Start Update Start Update A prompt with information about the camera is displayed Check the version information Select Yes Yes The promptSave profiles on SD...

Page 192: ...Firmware Version Select Start Update Start Update Select Yes Yes UPDATING THE ADAPTER FIRMWARE Where available you can optionally carry out firmware updates for adapters The instructions provided for camera firmware updates apply Download the latest firmware version Save the download to the memory card Insert the memory card into the camera Switching the camera on Select Camera Information Camera ...

Page 193: ...EN Other functions 193 ...

Page 194: ...p is available from Apple App Store Google Play Store CONNECTION FIRST TIME CONNECTION TO A MOBILE DEVICE The connection is established via Bluetooth A pairing of the camera and the mobile device is required for a first time connec tion to a mobile device CONNECTION WIZARD The connection wizard appears at initial startup of the camera or after a camera reset These settings are also available via t...

Page 195: ...wn devices GPS data will be automatically determined and written to the Exif data when pictures are taken while the camera is connected to the Leica FOTOS app CONNECTING TO KNOWN DEVICES Select Leica FOTOS Leica FOTOS in the main menu Select Bluetooth Bluetooth Select On On Activate the Bluetooth function The camera connects to the mobile device automatically Notes Should there be more than one kn...

Page 196: ...a Information in the main menu REMOTE CAMERA CONTROL You can take pictures and record video remotely via the mobile device and can also change image settings or transfer data to the mobile device A list of available functions and instructions for their use can be found in the Leica FOTOS app REMOTE CAMERA ACTIVATION The camera can be activated remotely from off or standby if this function is activ...

Page 197: ...cessive power consumption A third party device can provided is has been paired with the camera access the camera remotely if your own mobile device is not currently connected or its Bluetooth function is deactivated This poses a danger of unauthorized access to your data or camera functions Solution Only activate this function just before you want to use it Disable the function as soon as it is no...

Page 198: ...erwise be subjected to moisture and tanning residue released by the moist leather All mechanical bearings and sliding surfaces on your camera are lubricated Remember to press the shutter button several times every three months to prevent the lubrication points hardening if the camera will not be used for an extended period of time We also recommend repeated adjustment and use of all the other oper...

Page 199: ...batteries should only be stored partially charged i e not fully depleted or fully charged The camera LCD panel will show the current charge level of the battery Charge the battery twice a year for around 15 minutes to avoid deep discharge in case of very long storage periods MEMORY CARDS Make sure to store memory cards in their anti static container when not in use Do not store memory cards where ...

Page 200: ...ate Auto Review Charging process not starting Incorrect battery polarization or faulty charger connection Check polarization and connection Charging takes too long Battery too hot or too cold Charge the battery at room temperature Charging pilot light is on but battery isn t charging The battery contacts are dirty Clean the contacts with a soft dry cloth Battery has been recharged too many times T...

Page 201: ...of remaining exposures does not count down after a picture is taken The exposure requires only very little memory space This is not a fault the number of remaining exposures is calculated as approximations Recording The camera won t take a picture shutter button is deactivated Memory card is full Replace the memory card The memory card is not formated Reformat the memory card Caution Loss of data ...

Page 202: ...Change the setting Automatic bracketing or Picture series is activated Select other mode The flash does not fully illuminate the object Object is outside the flash range Move object into flash range Flash is covered Make sure the th flash unit is not covered by your finger or some object Image does not sharpen automatically AF is deactivated Activate AF No face detection faces are not recognized F...

Page 203: ... the menu will not be available if the lens switch is set to MF Focus Limit Macro Focus Limit Macro is grayed out in the camera settings The mounted lens does not support this setting Use another lens Lens Profiles Lens Profiles is grayed out in the camera settings No M adapter L or R adapter L attached This menu is available only for Leica M and Leica R lenses Video recording No video is recorded...

Page 204: ...ed while the readiness indicator was flashing Never remove the memory card while the readiness indicator is flashing Charge the battery The memory card formatting is faulty or the card is damaged Reformat the memory card Caution Loss of data Parts of my video scenes are not fully in the picture Difference of aspect ratios between camera and playback medium Set the correct aspect ratio on the camer...

Page 205: ...not be displayed File name of the image was changed on a PC Use appropriate software for image transfers from a PC to the camera available from the Leica AG website Video quality Video recordings show flickering stripes Light source interference in artificial lighting Select a different frame rate suitable for the local AC grid frequency under Video Resolution Video Resolution Camera noise in vide...

Page 206: ...working The mobile device is too far away Bring the devices closer to each other Interference from other devices in the vicinity e g other smartphones or a microwave oven Increase distance to interfering devices Interference from multiple mobile devices in the vicinity Re establish the connection remove other mobile devices Mobile device is currently connected to another device Check connection Ca...

Page 207: ...EN FAQ 207 ...
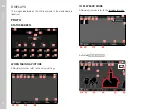
Page 208: ...Interval Shooting H l 132 Exposure Bracketing Exposure Bracketing H l 134 Focusing Focusing H l H l 103 108 145 149 Focus Mode Focus Mode H l H l 103 111 145 AF Mode AF Mode H l l front bottom H l l front bottom 104 106 146 148 Focus Assist Focus Assist H l H l 112 152 Exposure Metering Exposure Metering H l H l 122 160 Exposure Compensation Exposure Compensation H l H l 130 164 ISO ISO PHOTO Vide...

Page 209: ... H l 91 Flash Settings Flash Settings H l 138 140 Flash Exp Compensation Flash Exp Compensation H l 139 140 User Profile User Profile H l H l 184 185 Video Format Resolution Video Format Resolution H l 95 96 Video Style Video Style H l 97 EVF LCD EVF LCD H l l rear top H l l rear top 73 167 Format Card Format Card H l H l 188 189 Dial Lock Dial Lock H l H l 69 Joystick Lock Joystick Lock H l H l 6...

Page 210: ...Automatic review 176 177 Auto Review 176 Auxiliary displays 80 101 169 B Basic recording settings 78 86 94 Basic settings camera 70 Basic settings recording 78 86 94 Bluetooth 5 194 Brightness EVF 74 Brightness LCD panel 74 Button assignment 65 C C4K 96 Camera information 191 Care 198 Carry strap 8 30 Center weighted metering 122 160 Charger 8 30 Charge status charger 31 Charge status LCD panel 29...

Page 211: ...162 Exposure bracketing 133 Exposure compensation 130 164 Exposure compensation flash 139 Exposure long term 91 126 Exposure manual 126 163 Exposure metering flash 136 Exposure metering methods 122 160 Exposure modes 123 161 Exposure preview 127 Exposure simulation 127 Exposure time max 126 Eye sensor 73 F Face detection 106 148 Factory settings 190 FAQ 200 Favorites menu 57 64 208 Favorites pictu...

Page 212: ...PS 188 Gray Card 119 157 Grid 82 H hand grip 41 HDMI 100 HDR 133 Histogram 85 Horizon 84 I Image numbering 186 Image properties 89 97 Image stabilization 92 100 Individual button assignment 65 Info Bars 82 Info profiles 80 Information displays 80 Information regulatory 4 Inserting removing the battery 32 Intelligent AF 103 145 Interval shooting 132 ISO Sensitivity 115 153 ISO value greatest 116 15...

Page 213: ...g 143 168 Monochrome photography 89 97 MOV 95 MP4 95 Multi field metering exposure 122 160 Multi field metering focusing 104 146 N Name file 186 187 Name folder 186 Navigation menu 54 58 Noiseless 76 Noise reduction 88 91 126 Notes legal 4 Number pad 60 O Operating mode exposure 123 161 Operation customized 64 P Part Designations 20 Parts overview 20 P automatic program 124 162 Person detection 10...

Page 214: ...5 Sensitivity ASA 155 Sensitivity eye sensor 73 Sensitivity ISO 115 153 Sensor 8 11 Sensor format 86 94 Serial exposures 131 Service 220 Settings LCD panel EVF 72 Settings store 184 Setting wheel front 48 66 Sharpness image properties 89 97 Shift 124 Shortcut 64 65 Shutdown LCD panel 75 Shutter button 47 Shutter electronic 75 91 Shutter priority mode 125 163 Shutter release 47 Shutter speed apertu...

Page 215: ...fer data 189 Troubleshooting 200 TTL metering 135 136 U Update firmware 12 191 USB 32 User defined operation 64 User profiles 184 V Video 142 178 Video format 95 Video Gamma 99 Video mode 142 Video stabilization 100 Video Style 97 Volume 75 Volume playback 180 W Warning signal 75 Warranty 13 White balance 118 156 Wi Fi WLAN 5 Wind noise reduction 98 WLAN 5 Z Zebra 83 Zone 147 Zone focusing 105 ...

Page 216: ... Out 3 5 mm Audio In 3 5 mm communication interface in the base cover for multifunction hand grip Tripod thread Tripod thread A 1 4 DIN 4503 1 4 with stainless steel in the base Dimensions WxHxD Dimensions WxHxD 146 x 107 x 42 mm Weight Weight approx 835 g without battery SENSOR Sensor size Sensor size CMOS sensor pixel pitch 4 3 µm 35 mm 8368 x 5584 pixels 47 3 MP APS C 5504 x 3664 pixels 20 2 MP...

Page 217: ... MP4 FHD 180 fps 150 fps 120 fps 100 fps 59 94 fps 50 fps 29 97 fps 25 fps 23 98 fps Bit Rate Bit Rate 8 10 bit for recordings on SD card 10 bit via HDMI output Video Gamma Video Gamma Rec 709 L Log Rec 2020 HLG Rec 2020 VIEWFINDER LCD PANEL Viewfinder EVF Viewfinder EVF Resolution 5 760 000 pixels dots 120 fps magnification 0 78x aspect ratio 4 3 frame coverage 100 exit pupil position 21 mm setti...

Page 218: ...ed Field Field can be shifted Multi Field Multi Field Zone Zone Face Body Detection Face Body Detection object Tracking Tracking optional Touch AF Touch AF Autofocus Metering Fields Autofocus Metering Fields 225 EXPOSURE Exposure metering Exposure metering TTL exposure metering through the lens Exposure Metering Methods Exposure Metering Methods Spot Spot Center Weighted Center Weighted Multi Fiel...

Page 219: ...h Wi Fi IEEE802 11b g n 2 4 GHz channel 1 11 2412 2462 MHz and Wi Fi IEEE802 11ac 2 4 GHz 5 GHz channel 39 48 5180 5240 MHz channel 52 64 5260 5320 MHz channel 100 140 5500 5700 MHz standard WLAN protocol encryption method WLAN compatible WPA WPA2 Bluetooth Bluetooth Bluetooth v4 2 Bluetooth Low Energy BLE 2402 to 2480 MHz GPS GPS Via Leica FOTOS app Menu languages Menu languages English German Fr...

Page 220: ...e department or the repair service provided by your regional Leica subsidiary for repairs or warranty claims Leica Camera AG Leica Customer Care Am Leitz Park 5 35578 Wetzlar Germany Phone 49 0 6441 2080 189 Fax 49 0 6441 2080 339 Email customer care leica camera com www leica camera com LEICA ACADEMY Have a look at our full seminar program with many interesting workshops on the topic of photograp...

Reviews: