21
INSTALL THE COMPRESSOR
(HARD BAGS)
NOTE: If you have soft bags (Road King Customs & Classics), skip to the next section;
‘Install Compressor (Soft Bags)’.
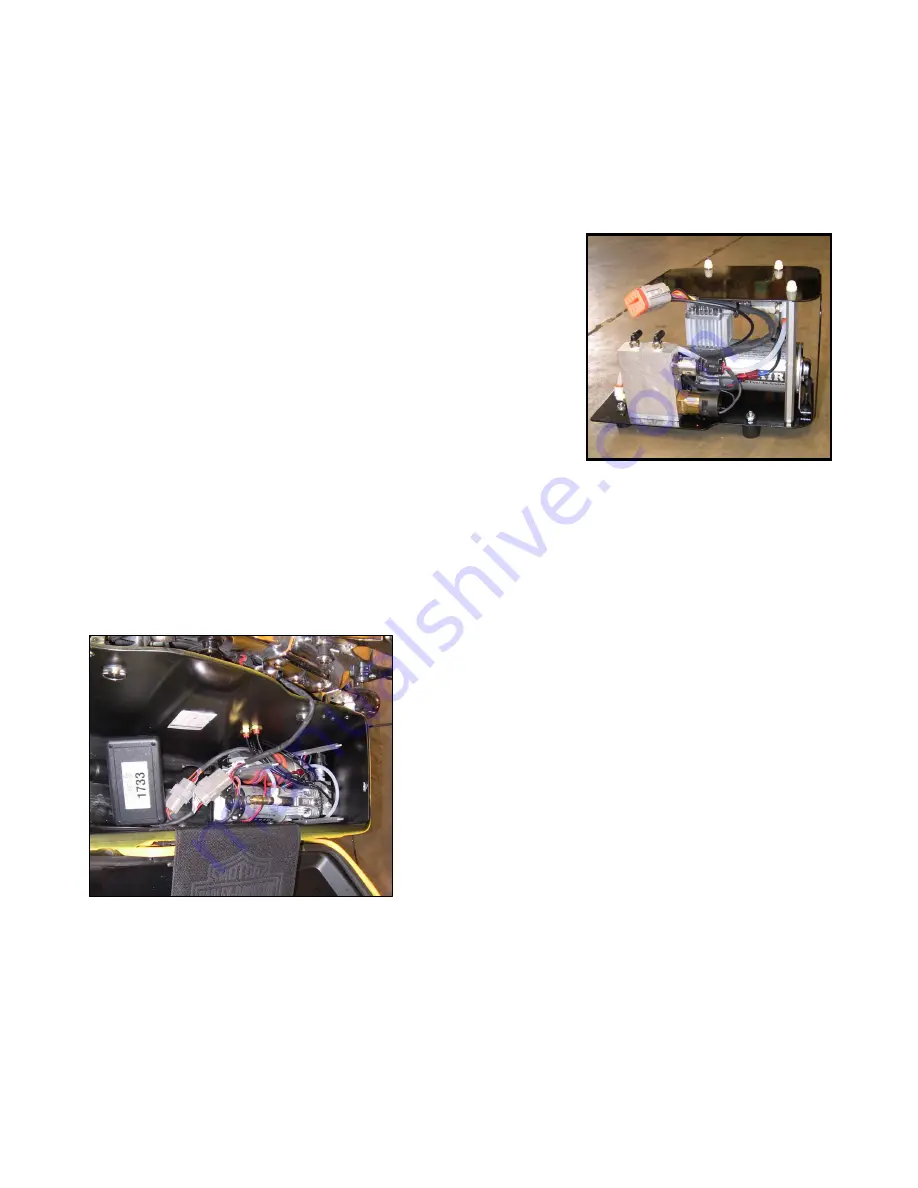
Find the compressor, as shown here. We need to remove the
top, as it won’t be needed until the very end! We do this by
removing the three nylon nuts on the top of the plate. These
are only hand tight and they will be reinstalled without any
tools as well.
Once the top is off the compressor should look something like
the picture below. We want to slowly install the compressor in
the bag. The silver valve system goes toward the back, and the
compressor is slid back as far as it can go. It is mounted on
rubber feet to avoid damage to the bag, and to reduce
vibration. The picture here shows the compressor plugged in, with lines attached.
NOTE: We supply you with some black rubber edging. It may be used if after installing the
compressor you find the metal edge touches the hard bag somewhere causing a vibration. If
once the compressor is on, you need to, cut pieces of the rubber and slide it on the metal
where needed to keep the vibration down.
Once the compressor is in place, the air lines should be
attached to the fittings you mounted in the saddlebag.
The right hose (closest to the outside of the bag)
should be attached to the bottom fitting, and the left
hose should be attached to the top fitting.
The compressor should feel very stable in its new
home. Assuming it does, this would be a good time to
run the big wire into the bag, and connect the computer
(seen left with the label on it) to the 12 pin plug, and
connect the compressor to the 8 pin plug.
These plugs can only be attached one way, and we are going to leave the computer and wires
just loose in the bag for now. I promise we will make it all pretty before you are done.
In preparation for testing the system, if you haven’t already, hook the negative battery terminal
and the lead from our power connection, up to the negative battery terminal (don’t worry that
the proximity sensor is still lying on the lift!).
Skip the next section on ‘Soft Bags’ and jump to ‘Initial System Testing’!
Summary of Contents for LandinGear Generation II
Page 2: ...2 ...
Page 9: ...9 Pin Out for Handlebar Control Box Plugs ...
Page 40: ...40 ILLUSTRATIONS ...


