


Appendix A: Using the KVM Client
96
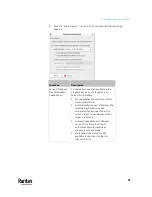
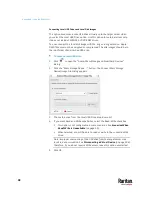
Checkbox
Description
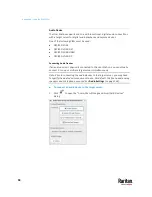
Connect Capture
Device
(Microphone)
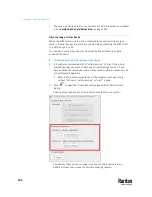
To manually connect an available audio
recording device to the target server,
select this checkbox.
Set the recorded audio format in the
Audio Format field.
Automatically Connect at Startup: The
selected microphone will automatically
be connected to the current target
server whenever that target is
accessed.
Automatically Mute with Window
Focus: The selected device will
automatically mute/unmute as the
window is active/inactive.
Mute/Unmute buttons are also
available in the client toolbar for
manual control.
3.
Click OK.
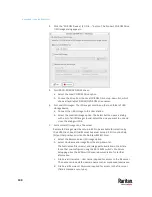
To disconnect the audio device from the target server:
•
See
Disconnecting a Virtual Device
(on page 106).
Virtual Media
The Dominion User Station supports virtual media (VM). Virtual media extends
KVM capabilities by enabling target servers to remotely access media from the
User Station and network file servers.
With this feature, media mounted onto the User Station and network file
servers are essentially "mounted virtually" by the target server. The target
server can then read from and write to that media as if it were physically
connected to the target server itself.
Virtual media sessions are secured using 128 or 256 bit AES encryption.
Virtual media provides the ability to perform tasks remotely, such as:
•
Transferring files
•
Running diagnostics
•
Installing or patching applications
•
Complete installation of the operating system
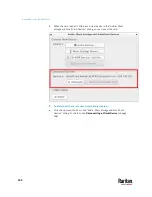
Important: Once you are connected to a virtual media drive, do not change
mouse modes in the KVM client if you are performing file transfers, upgrades,
installations or other similar actions. Doing so may cause errors on the virtual
media drive or cause the virtual media drive to fail.
Summary of Contents for Raritan Dominion User Station
Page 10: ......
Page 63: ...Appendix A Managing Targets and Access Methods 53 VNC Access Settings...
Page 64: ...Appendix A Managing Targets and Access Methods 54 SSH Access Settings...
Page 65: ...Appendix A Managing Targets and Access Methods 55 WEB Access Settings...
Page 159: ...Appendix A Administration Features 149 5 Enter the bind credentials in the Bind section...
Page 204: ...Appendix A Administration Features 194 9 Click Save...
Page 211: ...Appendix A Maintenance Features 201 6 Click OK in the confirmation dialog...
Page 269: ...Appendix D API 259...
Page 280: ......