


Page
43
301 Fulling Mill Road, Suite G
©Copyright 2012 by Legrand,
Middletown, PA 17057
Inc All Rights Reserved.
(800)-321-2343
www.onqlegrand.com
1.
Click the
Add New…
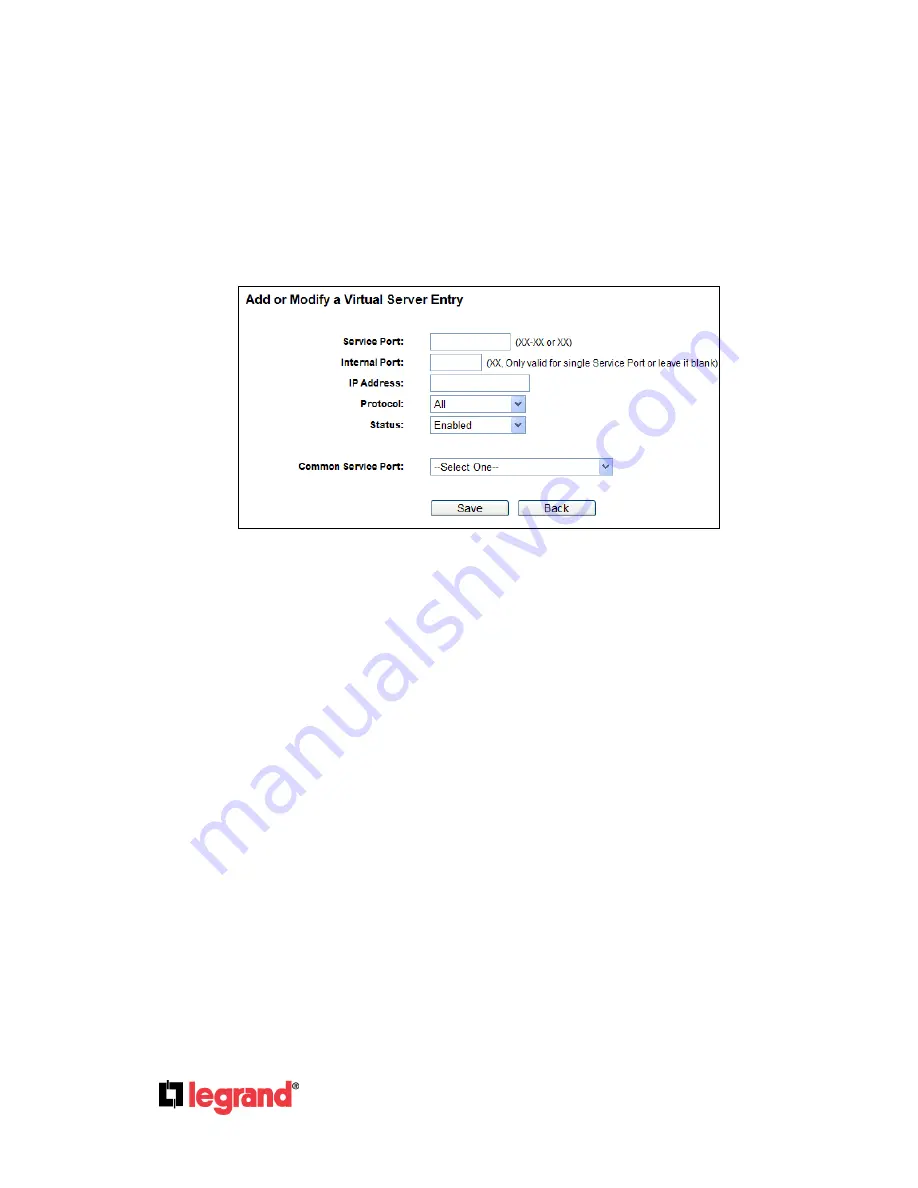
button, the next screen will pop-up as shown in Figure 4-33.
2.
Select the service port you want to use from the
Common Service Port
list. If the
Common
Service Port
list does not have the service that you want to use, type the service port number or
service port range in the
Service Port
box.
3.
Type the IP Address of the computer in the
IP Address
box.
4.
Select the protocol used for this application, either
TCP
,
UDP
, or
All
.
5.
Select
Enabled
in the Status field to enable the virtual server.
6.
Click the
Save
button.
Figure 4-33 Add or Modify a Virtual Server Entry
Note: If your computer or server has more than one type of available service, please
select another service, and enter the same IP Address for that computer or server.
To modify or delete an existing entry:
1.
Click the word
Modify
in the entry if you want to modify it, or
Delete
if you want to delete the
entry.
2. Modify the information.
3. Click the
Save
button.
Click the
Enable/Disabled All
button to make all entries enabled/disabled.
Click the
Delete All
button to delete all entries.
Click the
Next
button to go to the next page and click the
Previous
button to return the previous
page.
Note: If you set the service port of the virtual server as 80, you must set the Web
management port on “Security → Remote Management” page to be any other value except 80
such as 8080. Otherwise there will be a conflict which will disable the virtual server.


