B. DIRECT OPERATION ON THE CONTROL UNIT
TO TURN ON THE HEATER
1. Turn on the valve of the gas supply cylinder.
2. Press the POWER button for 2 seconds, release and press again to
start ignition.
3. Press the POWER button to switch to the temperature heat setting.
Every time the POWER button is pressed it will switch from MAX –
MED – LOW - OFF.
TO TURN OFF THE HEATER
1. Press the POWER button (until it switches to OFF).
2. Turn off the valve of the gas cylinder and disconnect the cylinder.
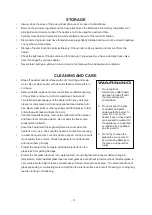
WARNING
1. Close the valve of the gas
cylinder or the regulator
after use.
2. Do not move the heater, or
cover it with protective
cover after it has been
turned off until the
temperature has cooled
down.
IMPORTANT:
ON
MAX
MED
LOW
OFF
Power indicator (ignition batteries)
AUTO SET indicator (for more advanced remote control only)
IR remote control receiver
%
When the appliance is operating, the control unit can automatically detect any breakdown in 1 second and
automatically cuts off both power and gas supplies.
%
Gas supply will automatically cut off in 25 seconds 5 seconds if pilot flame goes out accidentally.
%
If the pilot flame does not ignites within the ignition period of 25 seconds 5 seconds the power and gas
supplies will automatically be cut off.
%
When ignition batteries are exhausted pilot and burner flame will extinguish automatically and gas supply
will be cut off.
REPLACING THE GAS CYLINDER
1. Close the valve of the gas cylinder.
2. Disconnect the regulator from the cylinder following the instructions
that came with your regulator.
3. Replace the cylinder.
4. In the absence of any flame, remove the plug or seal cap from the
cylinder valve.
5. Check for the presence and good state of the gasket before
connecting the regulator.
6. Check that the regulator seal is correctly fitted and able to fulfil its
function.
7. Perform leak test using soapy water solution.
WARNING
1. Change the gas cylinder in
a amply ventilated area,
away from any ignition
source (candle, cigarettes,
other flame producing
appliances, ...)
2. Make sure that all taps on
the consuming appliance
are in closed position.
- 14 -


