LAUNCH X-431IV English User’s Manual
36
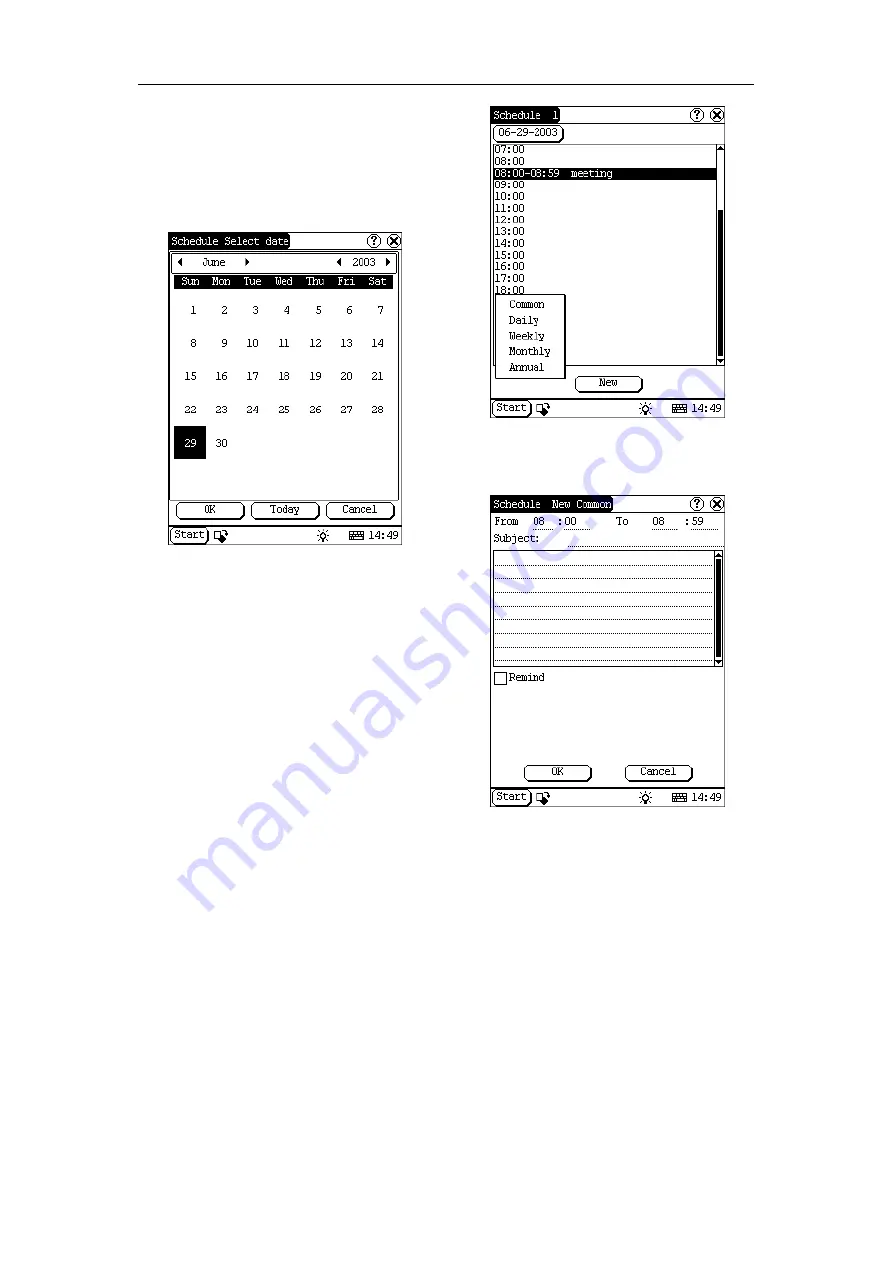
current year, month and date directly.
6)
Click [OK] button to save the date setting
and close the Select Date interface.
7)
You may see the date you set on the
button on the top right of the Schedule
interface.
Figure 5-28
Set the cycle of the schedule:
1)
In the Schedule interface, click [New]
button so that the Cycle list pops up. See
Figure 5-29.
2)
In the Cycle list, select ‘Common’ if it is
done on the selected date.
3)
Select ‘Daily’ if it is done every day.
4)
Select ‘Weekly’ if it is done on a fixed day
every week.
5)
Select ‘Monthly’ if it is done on a fixed day
every month.
6)
Select ‘Annual’ if it is done on a fixed day
every year.
7)
After selecting, open the New Schedule
interface.
Figure 5-29
Set the content of the schedule:
Figure 5-30
1)
In the Schedule New interface, activate
Soft Keyboard, and fill the subject and
contents.
2)
In the textbox on the top of the interface,
fill the time of the schedule.
3)
If the selected cycle is ‘Daily’, ‘Weekly’,
‘Monthly’ or ‘Annual’, you can input the
repeat time in the textbox on the bottom
of the interface. See Figure 5-30.


