background image


Manuel Technique OsmsoeurRO400C  

Version 3 

Page 15 / 26 

Preparing the water purifier for storage and protecting it against 

freezing 

 
If you should not use the water purifier for a period longer than 4 months or if it has to be disconnected from water and 
electrical supplies for many days, it should be filled with a special product that will keep it in  good state. 
 

1.


Make sure that the tap is closed and the water purifier is 
not flushing. 

2.


Close the cock on the water supply pipe. Disconnect the 
electrical plug, the flexible feed water hose and the 
drain hose. 

3.


Unscrew both filter containers. Remove the 2 filters and 
discard them ( they should not be kept for re-use!). 
Empty the water from the containers. 

4.


Reinstall the empty filter containers back in their places. 
Make sure that each sealing ring is in place in the groove 
on the top edge of each container. 

5.


In a bucket, mix 2 litres of Preservative Liquid (Code 
LCRO400C) with 2 litres water. 

6.


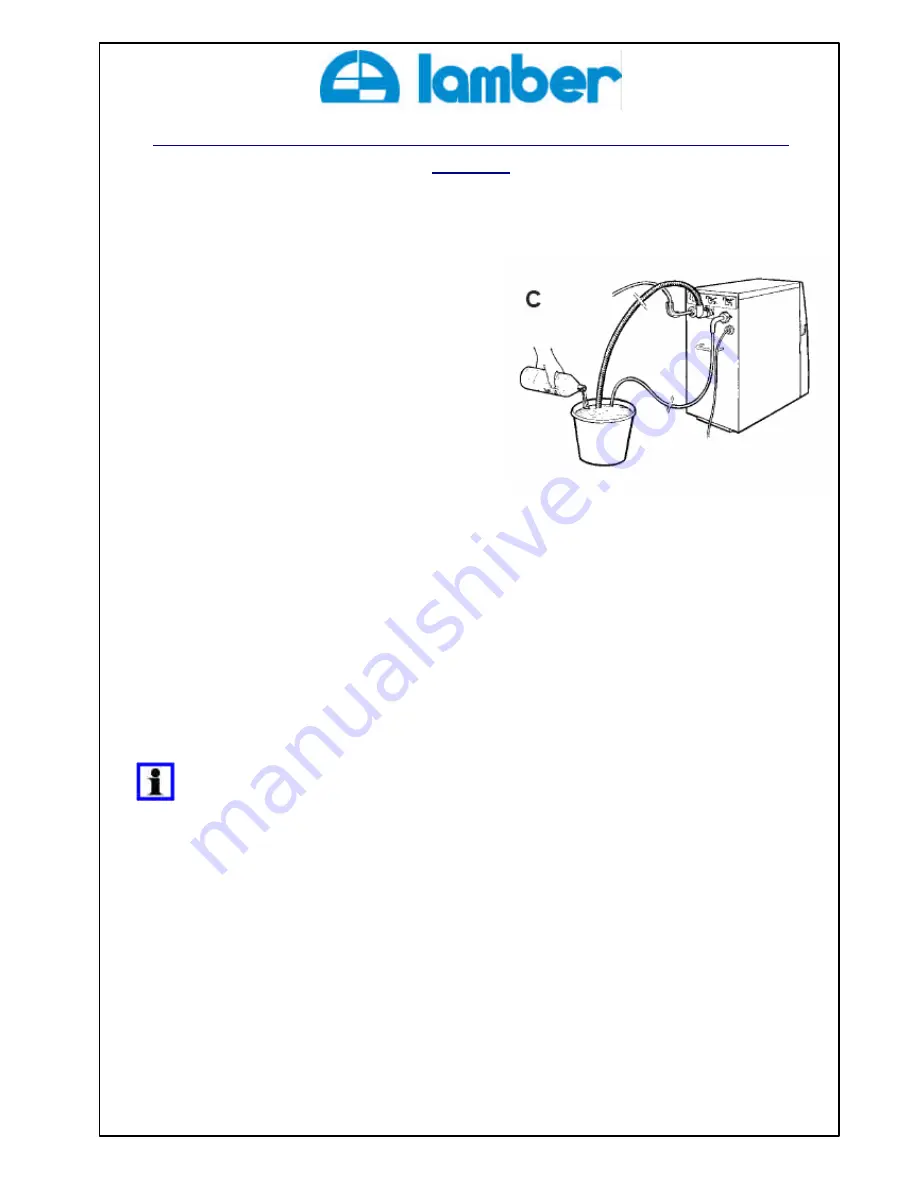
Put the end of the 2 hoses (feed and drain) into the bucket. Make sure that the end of the feed water hose 
remains beneath the surface throughout the operation (picture 

C

). 

7.


Connect the electrical plug again. RO400C will now automatically pump the mixture inside the appliance. Let the 
water purifier suck for 40 seconds, then disconnect the electrical plug. Repeat twice this step. 

8.


If some mixture remains in the bucket, you can throw it in the wash basin. 


RO400C is now ready for storage, for up to nine months. 


When the water purifier is to be brought back into use, you must: 


work through all the steps of the full « Flushing » procedure, to remove the preservative liquid. 


install new filters (filter I and filter II). 


Summary of Contents for RO400C

Page 1: ...CAL MANUAL WATER PURIFIER RO400C RO400C RO400CI020 With 20L storage tank RO400CC060 With 60L storage tank RO400CC075 With 75L storage tank RO400CC120 With 120L storage tank RO400CC150 With 150L storag...

Page 2: ...TION ERRORE IL SEGNALIBRO NON DEFINITO INSTALLATION CALIBRATION ERRORE IL SEGNALIBRO NON DEFINITO MAINTENANCE ERRORE IL SEGNALIBRO NON DEFINITO TO CLEAN THE GRID ERRORE IL SEGNALIBRO NON DEFINITO REPL...

Page 3: ...V 50 Hz 3 Flexible hose for feed water 4 Bracket for drain hose 5 Drain hose 6 1 4 turn valve 7 Purified water hose 8 Non return valve 9 T 10 Storage tank 11 Machine flexible feed hose Only when the w...

Page 4: ...cations air temperature 2 43 C relative humidity 25 95 Water hardness Maximum 20 TH beyond this provide a water softener REQUIREMENTS REGARDING FEED WATER TO THE WATER PURIFIER Inlet Pressure 200 1 00...

Page 5: ...e the purified water exits by copper or galvanized steel but only by PVC or stainless steel Application limits in glass washing Champagne fl tes beer glasses The absence of mineral deposits on the gla...

Page 6: ...urified water hose with non return valve and turn valve 1 T for storage tank connection 1 bag with accessories Union F15 21 M20 27 with O ring drain hose clamp plastic inserts 1 spanner for filters di...

Page 7: ...essed while you remove the red plug 2 Screw and tighten by hand the cold water inlet flexible hose 3 Place the drain hose by using the clamp 4 Push deeply the purified water hose The red line has not...

Page 8: ...ed hose on the T Pressure tanks create a purified water stock always available and assure an optimal preservation of the purified water quality safe from ambient air The internal membrane pre charged...

Page 9: ...cycles in all The water purifier stands by when green ON OFF led is lighted up CALIBRATION Calibration of water purifier should only be carried out the first time the RO400C is used if the appliance...

Page 10: ...r by your supplier Code CORO400C The measured value must be lower than 50 S Connection during the installation 14a Without storage tank Connect the purified water hose to the flexible machine feed hos...

Page 11: ...carried out To replace the membrane If the purified water s capacity decreases till being half of the original capacity even if the curative descaling has been regularly carried out Qualified technici...

Page 12: ...an the filter container and replace the filter with label I or II pointing upwards 6 Make sure the sealing ring is in place in the grooves of the filter container 7 Refit and tighten the container by...

Page 13: ...about 30 min 1 Disconnect the electrical plug Remove the filters and refit the empty containers 2 In a bucket mix 200gr of OSMONET with 2 5 litres of lukewarm water Stir until the powder has dissolve...

Page 14: ...200gr of OSMONET the descaling agent into the container Fill the container almost to the top with lukewarm water 20 to 40 C Stir until the powder has dissolved picture A 7 Screw the container filled...

Page 15: ...filter containers back in their places Make sure that each sealing ring is in place in the groove on the top edge of each container 5 In a bucket mix 2 litres of Preservative Liquid Code LCRO400C with...

Page 16: ...Dry the water inside the base tilt the purifier forward if necessary Filter 1 grid Replace filter 1 and clean the grid The feed water s pressure is too low lower than 2 Bar Check and increase the fee...

Page 17: ...bubbles Use of pre scored glasses Use of a diamond point pencil code SPDCTA to score the glasses Bad drying Rinsing with demineralized water so with almost complete absence of surface active product...

Page 18: ...sec The water purifier cannot show a number of functioning hours lower than 10 hours Displaying of shutdowns for too low pressure When the 3 LEDs have switched off at the end of displaying of the func...

Page 19: ...rs 13 Filter 2 Carbon 14 Filter 1 Particles 15 Containers Technical information Hydraulic circulation diagram Pressostat sortie Outlet pressure switch Pressostat entr e Inlet pressure switch Electrova...

Page 20: ...filter compartment 4 Unscrew the 2 screws in the upper and back side of the cover 5 Remove the cover PCB board Anti trouble filter Access to Aquastop 1 Disconnect the 2 hoses that come from the unit 2...

Page 21: ...e initialisation of outlet switches this operation has nothing to do with calibration Disconnect RO400C from the electrical supply Disconnect the hose for purified water and open the turn valve Press...

Page 22: ...Manuel Technique OsmsoeurRO400C Version 3 Page 22 26 Wiring diagram...

Page 23: ...Manuel Technique OsmsoeurRO400C Version 3 Page 23 26 Exploded view Spare parts...

Page 24: ...ONDRO400 16 Union 17 Motor 230V MORO400C 18 Sealing ring 11 3 x 2 4 20 Sealing ring 19 2 x 3 0 21 Membrane Kit MOIRO400 22 Upper flange 22B Turbine 23 Lower flange 24 Spring 25 Cup for covering 26 Inl...

Page 25: ...8 Float housing 19 Micro switch 20 Protection for micro switch 21 Button 22 Terminal board 24 Filters spanner CFRO400C Position Description Article n Not in picture Connection T for storage tank TRS26...

Page 26: ...R SERIE RO400C WATER PURIFIER REVERSE OSMOSIS SERIE RO400C Est conforme aux dispositions de la directive suivante 73 23 CEE et 93 68 Basse Tension Complies with the requirements of the following direc...

Reviews: