14
Unpacking your machine
To unpack your machine, you will need tin snips, knife and a wrench.
1.
Using the tin snips, cut the banding that is securing the machine to the
pallet.
WARNING: EXTREAM CAUTION MUST BE USED BECAUSE THE
BANDING WILL SPRING AND COULD CAUSE INJURY.
2.
Lift the box off and discard.
3.
Using the knife, cut the plastic wrap from the top. The table, motor, fence
and accessories that were ordered could be attached to the side of the
machine and extreme caution must be taken that the parts do not fall and
cause injury or damage. Remove them in order from the top and set
aside.
4.
Place the motor on the pallet behind the machine. Ensure that there is no
tension
on
the
motor
wiring.
It is
recommended that the motor be assembled to
the bandsaw prior to removing the bandsaw
from the pallet [see mounting motor]. If you
decide to remove the bandsaw prior to
assembling the motor to the bandsaw, ensure
that there is no tension on the motor wiring at
any stage of the operation.
5.
Remove the base mounting bolts that secure
the machine to the pallet [shown removed].
6.
It is recommended that the machine be
removed from the pallet by lifting it with a
hoist or forklift. There is an eyebolt at the top
of the machine, and this should
NEVER
be
used to lift the machine. It is used to secure
the machine horizontally during ship ping only and is not designed to take
the load of the machine.
Place a sling through the bandsaw as shown below behind the tension-adjusting
wheel and lift vertically.
Remove the pallet and lower to the floor.
The machine can be lifted using a forklift truck, sliding it onto the forks or by
using a forklift “SLING”, as shown with a lifting capability of 2,000 Kg (440lb).
Summary of Contents for 16HD Classic
Page 2: ......
Page 6: ......
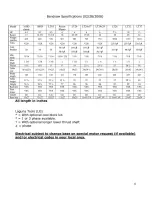
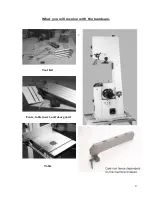
Page 9: ...9 What you will receive with the bandsaw Tool Kit Fence table insert and door guard Table...
Page 36: ...36 Fitting cool block guide system Optional not supplied with the machine...
Page 41: ...41...
Page 58: ...58 Electrical system drawing with switch ON knob...
Page 59: ...59 Electrical system drawing with switch ON knob...
Page 60: ...60 Electrical system drawing with push ON button...
Page 61: ...61 Electrical system drawing with push ON button...
Page 63: ......
Page 64: ......
Page 65: ......
Page 66: ...TOP GUIDE BOTTOM GUIDE...
Page 99: ......


