


LabelTac
®
Pro X | REFERENCE GUIDE
Item
Description
Default
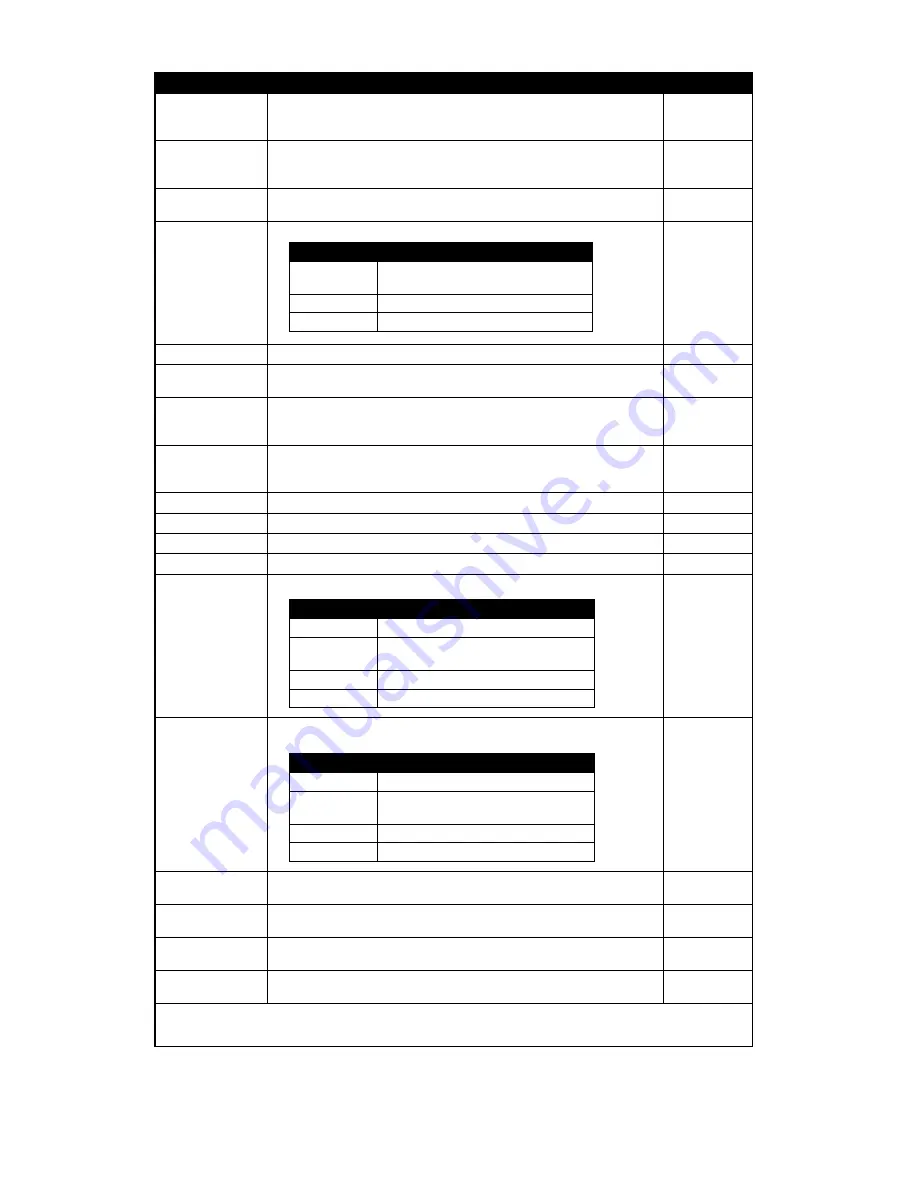
Darkness
Use this item to setup printing darkness. The available setting is from 0
to 30, and the step is 1. You may need to adjust your density based on
selected media.
16
Print Speed
Use this item to setup print speed. The each increase or decrease is 1
ips. Available setting is from 2 to 6.
6 (203dpi)
4 (300dpi)
3 (600dpi)
Tear Off
This item is used to fine tune media stop location. Available setting
value is from “+” to “-” or “0” to “9”.
+000
Print mode
This item is used to set the print mode. There are 3 modes as below,
Tear Off
Print Width
This item is used to set print width. The available value is from “0” to “9”.
N/A
List Fonts
This feature is used to print current printer available fonts list to the label.
The fonts stored in the printer’s DRAM, Flash or optional memory card.
N/A
List Images
This feature is used to print current printer available images list to
the label. The images stored in the printer’s DRAM, Flash or optional
memory card.
N/A
List Formats
This feature is used to print current printer available formats list to
the label. The formats stored in the printer’s DRAM, Flash or optional
memory card.
N/A
List Setup
This feature is used to print current printer configuration to the label.
N/A
Control Prefix
This feature is used to set control prefix character.
N/A
Format Prefix
This feature is used to set control prefix character.
N/A
Delimiter Char
This feature is used to set delimiter character. N/A
Media Power Up
This option is used to set the action of the media when you turn on the printer.
No Motion
Head Close
This option is used to set the action of the media when you close the
print head.
No Motion
Label Top
This option is used to adjust print position vertically on the label. 0 The
range is -120 to +120 dots.
0
Left Position
This option is used to adjust print position horizontally on the label. The
range is -9999 to +9999 dots.
+0000
Reprint Mode
When reprint mode is enabled, you can reprint the last label printer by
pressing “UP” button on printer’s control panel.
Disabled
Format Convert
Selects the bitmap scaling factor. The first number is the original dots
per inch (dpi) value; the second, the dpi to which you would like to scale.
None
Note: If printing from enclosed software/driver, the software/driver will send out the commands, which will overwrite
the settings set from the panel.
Printer Mode
Description
Tear Off
Next label top of form is aligned to the
print head burn line location.
Peeler Off
Enable the label peel off mode.
Cutter
Enable the label cutter mode
Selections
Description
Feed
Printer will advance one label
Calibration
Printer will calibration the sensor
levels, determine length and feed label
Length
Printer determine length and feed label
No Motion
Printer will not move media
Selections
Description
Feed
Printer will advance one label
Calibration
Printer will calibration the sensor
levels, determine length and feed label
Length
Printer determine length and feed label
No Motion
Printer will not move media


