


LabelTac
®
Pro X | REFERENCE GUIDE
Item
Description
Default
Speed
Use this item to setup print speed.
N/A
Density
Use this option to setup printing darkness. The available setting is from 0 to 15,
and the step is 1. You may need to adjust your density based on selected media.
8
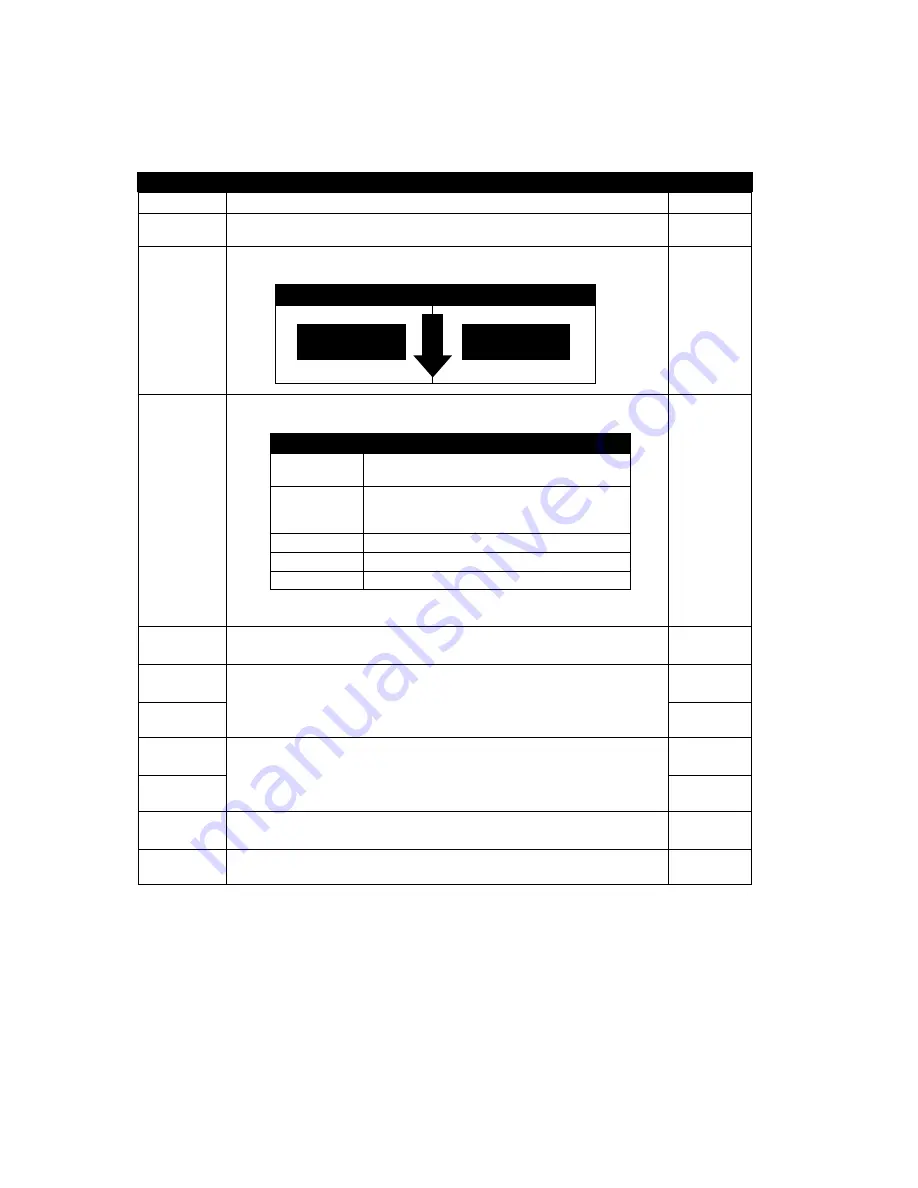
Direction
The direction setting value is either 1 or 0. Use this item to setup the printout
direction.
0
Print mode
This item is used to set the print mode.
There are 5 modes as below,
Batch Mode
Offset
This item is used to fine tune media stop location. Available setting value is from
“+” to “-” or “0” to “9”.
+000
Shift X
This item is used to fine tune print position. Available setting value is from “0” to “9”.
+000
Shift Y
+000
Reference X
This item is used to set the origin of printer coordinate system horizontally and
vertically. Available setting value is from “0” to “9”.
000
Reference Y
000
Code Page
Use this item to set the code page of international character set.
850
Print mode
Use this option to set the country code.
001
Note: If printing from enclosed software/driver, the software/driver will send out the commands, which will
overwrite the settings set from the panel.
DIRECTION 0
DIRECTION 1
DIRECTION
DIRECTION
FE
ED
Printer Mode
Description
None
Next label top of form is aligned to the print
head burn line location. (Tear Off Mode)
Batch Mode
Once image is printed completely, label gap/
black mark will be fed to the tear plate location
for tear away.
Peeler Mode
Enable the label peel off mode.
Cutter Mode
Enable the label cutter mode.
Cutter Batch
Cut the label once at the end of the printing job.


