Model DP Oil-Fired Heater
Page 11
SHOULD START THE OIL BURNER.
Check the operation of the burner. Make sure of
the proper air adjustment. Check the flame pattern and
temperature. The air shutter is factory set for 12%
C0
2
, but verify this after installation.
1.
Start the filter pump. Let it run for about five
minutes to free any trapped air.
2.
Set the thermostat well above the pool water
temperature.
3.
Turn the heater switch ON. If the burner motor
does not start right away, reset the manual
overload switches on the motor and primary
control. If the motor runs but the burner fails to
light, it may be necessary to bleed air from the
fuel line. See Step 5.
4.
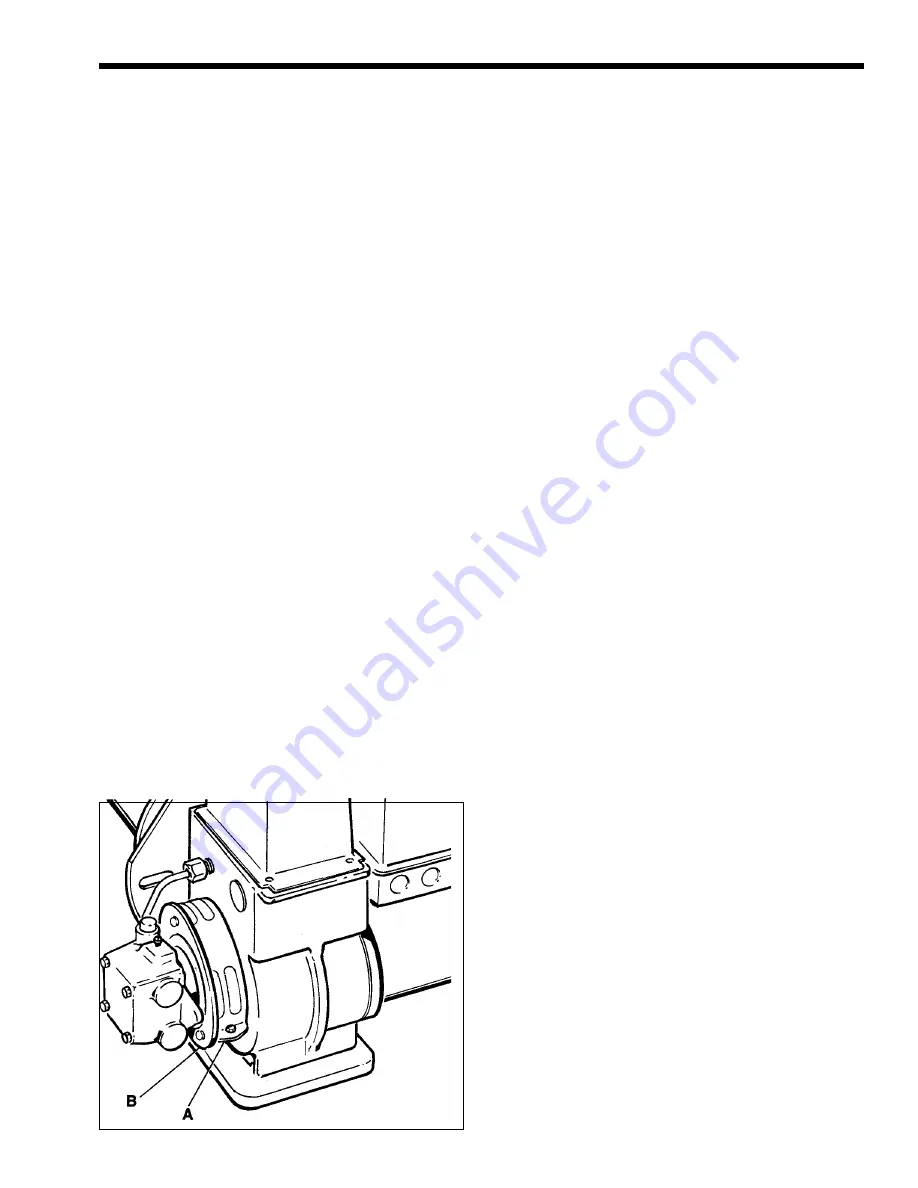
Check the initial air adjustment (see Fig. 17).
Normally, the bulk air band (A) and the end air
shutter (B) should be partially open. It is factory
set for both indoor and outdoor installations, but
check it again after completing the installation by
measuring the C0
2
, It should be 12% C0
2
with
zero smoke. Set a barometric draft control to
give .02" to .03" W.C. draft below the draft
control when the heater is installed indoors.
5.
When the heater is attached to a two-pipe
system, the fuel pump will automatically vent air
out of the fuel lines. If there is a lot of air, the
primary control may shut the burner down before
all the air has been purged. If this happens, wait
2 minutes, then press the reset button on the
primary control. Repeat this procedure until all
the air has been vented and the unit fires properly
(see NOTE below). If a one-pipe system is used,
it must be thoroughly purged of air using the vent
plug on the oil pump.
IMPORTANT: If there is no ignition after three
reset attempts, stop. Check for accumulated oil in the
firebox. Remove all unburned oil with dry rags before
continuing the restart procedure. If there is no oil
accumulated, try three more re-sets. If there is still no
ignition, have a qualified oil service technician bleed
the fuel line and check for ignition problems.
When the heater does fire, oil which is in the
firebox will cause considerable smoke as it burns off.
6.
Set the thermostat to the desired temperature.
Until the pool water reaches a temperature of
approximately 70°F (21°C), there may be
condensate on the heat exchanger. This will stop
after the water reaches the right temperature.
NOTE: The firebox in the heater is made from
the best high temperature material available. Starches
have been added to this material during the molding
process. When the heater is first fired, the starches
oxidize producing noticeable smoke. This will stop
after about an hour of operation.
If the heater is installed in an enclosed area, keep
all doors and windows open during the first two hours
of operation. After a long shutdown, there may be
some smoke-like emissions from the heater when it is
first fired. This condition will only last a few minutes.
3B. Setting the Time Clock
The most economical and trouble-free way of
operating a pool heater and filter system is to include a
time clock in the system for automatic cycling.
Adjust the stops on the time clock to provide a
single filter cycle every 24 hours.
The ON cycle should be at least 12 hours to
allow the filter system to properly clean the pool. Set
the ON cycle at least 4 to 6 hours before the pool is to
be used. During cold spells, the heater may have to be
on longer to maintain the proper pool temperature.
Remove all stops on the time clock during these
periods.
IMPORTANT: Run the heater continuously
during the initial warm-up period by removing all time
clock stops. If the pool temperature is going to be
maintained on standby temperature, operate the filter
pump until the water temperature reaches 70°F (21°C).
If the pool is going to be used for swimming, bring the
water up to swimming temperature before replacing the
Figure 17. Initial Air Adjustment.


