26
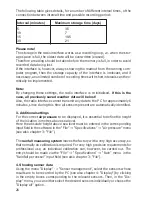
The following table gives details, for a number of different interval times, of the
connection between interval time and possible recording period:
Interval (minutes)
Maximum storage time (days)
5
3.5
10
7
15
10.5
30
21
Please note!
The storage in the radio interface works as a recording loop, i.e. when the stor-
age space is full, the oldest data will be overwritten (erased).
Therefore a reading should be taken before the memory is full, in order to avoid
recorded data being lost.
If the interface is, however, always showing the readout from the running com-
puter program, then the storage capacity of the interface is irrelevant, and if
necessary, an unlimited number of recording times with short intervals can theo-
retically be implemented.
Note:
By changing these settings, the radio interface is re-initialised.
If this is the
case, all previously saved weather data will be lost!
Also, the radio interface cannot transmit any data to the PC for approximately 6
minutes, since during this time all sensors present are automatically identified.
3. Additional settings
For the correct
air pressure
to be displayed, it is essential to define the height
of the location in metres above sea level.
Here the absolute height above sea level must be entered in the corresponding
input field in the software in the “File” -> “Specifications” -> “Air pressure” menu
(see also chapter 3: “File”).
The
rainfall measuring system
leaves the factory with a very high accuracy, so
that normally no calibration is required. For very high precision requirements for
professional use, an individual calibration can, however, be carried out. The
entry should be made via the “File” -> “Specifications” -> “Rain” menu in the
“Rainfall per vessel” input field (see also chapter 3: “File”).
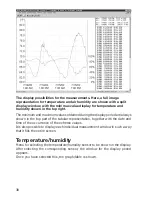
4. Showing sensor data
Using the menu “Display” -> “Sensor management”, select the sensors whose
results are to be recorded by the PC (see also chapter 4: “Display”) by clicking
in the empty boxes corresponding to the relevant sensors. Then, in the “Dis-
play” menu, you can either select the desired sensors individually or choose the
“Display all” option.
Summary of Contents for WS-2510
Page 3: ...3 ...
Page 9: ...9 Chapter 1 Introduction ...
Page 16: ...16 ...
Page 17: ...17 Chapter 2 Starting operation ...
Page 28: ...28 Chapter 3 File menu ...
Page 36: ...36 Chapter 4 Display menu ...
Page 42: ...42 Chapter 5 Weather display menu ...
Page 44: ...44 Chapter 6 Interface menu ...
Page 49: ...49 ...
Page 50: ...50 Chapter 7 View menu ...
Page 75: ...75 ...

