Kyocera ECOSYS MA2100cfx Operation Manual Download Page 227

6-29

Using Various Functions > Functions
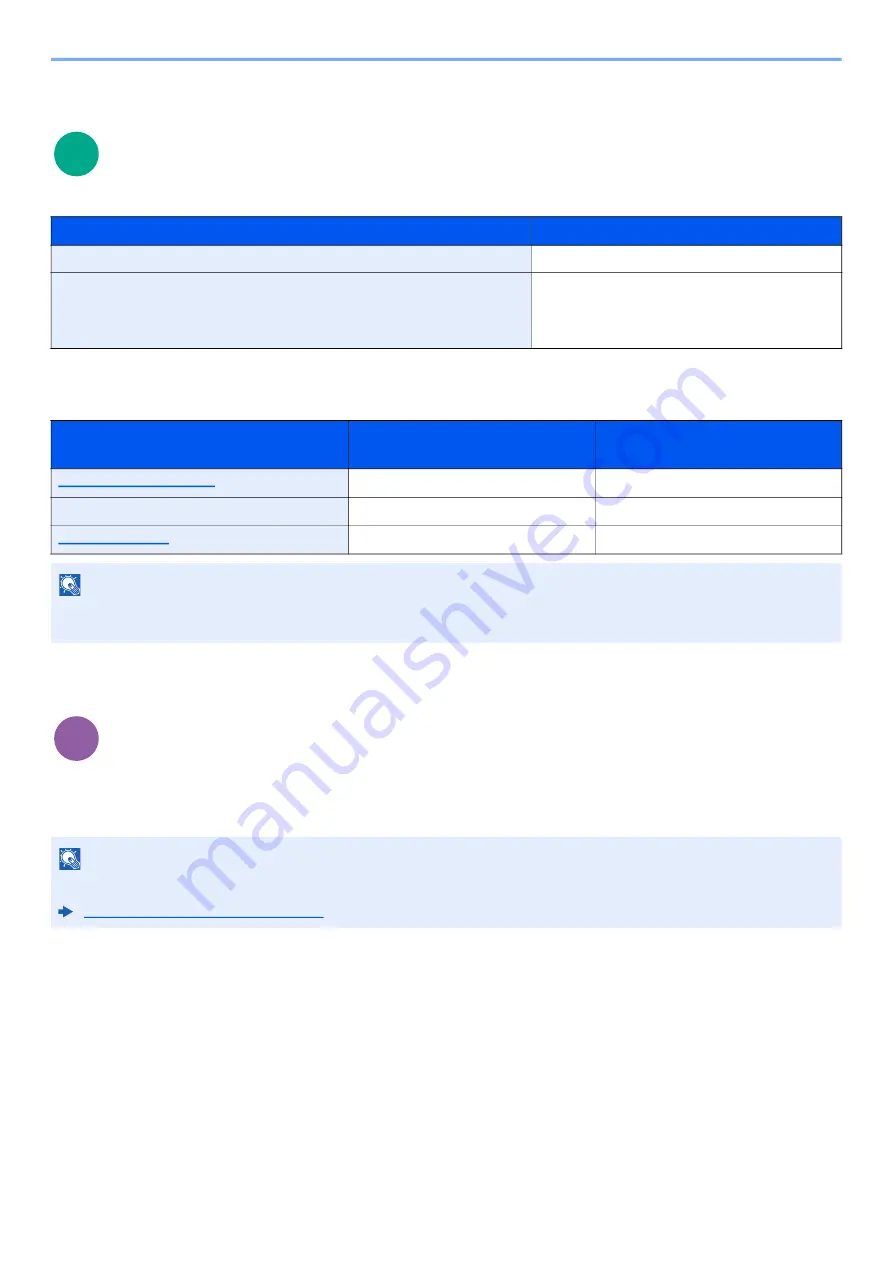
Storing Size

Select size of image to be stored.

Relationship between Original Size, Storing Size, and Zoom

Original Size, Storing Size and Zoom are related to each other. For details, see the table below.

Encrypted PDF

Enter the preassigned password to print the PDF data.
Enter the Password, and select [

OK

].

Item

Description

Same as OrigSize

Store an image the same size as the original.

A4, A5, A6, B5, B6, Folio, 216

×

340 mm, Letter, Legal, Statement, 

Executive, Oficio II, 16K, ISO B5, Envelope #10, Envelope #9, 

Envelope #6, Envelope Monarch, Envelope DL, Envelope C5, 

Hagaki (Cardstock), Oufuku Hagaki (Return postcard), Youkei 4, Youkei 2

Select from standard sizes.

Original Size and the size you wish to 

store as are

the same

different

Original Size (page 6-15)

Specify as necessary.

Specify as necessary.

Storing Size

Select [

Same as Original Size

].

Select the desired size.

Zoom (page 6-11)

Select [

100%

] (or [

Auto

]).

Select [

Auto

].

NOTE

When you select Storing Size that is different from Original Size, and select the Zoom [

100%

], you can store the image 

as the actual size (No Zoom).

NOTE

For details on entering the password, refer to the following:

Character Entry Method (page 11-8)

Scan to

USB

Print from

USB

Summary of Contents for ECOSYS MA2100cfx

Page 1: ...Guide ECOSYS MA2100cwfx ECOSYS MA2100cfx Please scan the code on the right Or please check the following URL Printer Driver Utility Install Manual Download Refer to the following URL https kyocera in...

Page 2: ...sing genuine Kyocera toner containers which must pass numerous quality inspections The use of non genuine toner containers may cause failure We will not be liable for any damages caused by the use of...

Page 3: ...n Copying Scanning 1 10 Wireless Connection Mexico only 1 10 Security Precautions when Using Wireless LAN If equipped 1 10 Limited Use of This Product If equipped 1 11 Legal Information 1 12 Energy Sa...

Page 4: ...mail Settings 2 53 Registering Destinations 2 57 Transferring Data from Our Other Products 2 58 Migrating the Address Book 2 58 3 Preparation before Use 3 1 Loading Paper 3 2 Precaution for Loading Pa...

Page 5: ...the Machine 5 1 Loading Originals 5 2 Placing Originals on the Platen 5 2 Loading Originals in the Document Processor 5 3 Loading Paper in the Multipurpose Tray 5 5 Program 5 8 Registering Programs 5...

Page 6: ...e USB Drive 5 39 Printing Documents Stored in Removable USB Drive 5 39 Saving Documents to USB Drive Scan to USB 5 41 Check the USB Drive Information 5 42 Removing USB Drive 5 42 6 Using Various Funct...

Page 7: ...r 8 33 Send 8 36 FAX 8 37 Document Box 8 37 Edit Destination 8 38 Adjust Maint 8 39 9 User Authentication and Accounting User Login Job Accounting 9 1 Overview of User Login Administration 9 2 Managin...

Page 8: ...sfer Unit 10 4 Toner Container Replacement 10 5 Loading Paper 10 8 Troubleshooting 10 9 Solving Malfunctions 10 9 Machine Operation Trouble 10 9 Printed Image Trouble 10 12 Color printing trouble 10 1...

Page 9: ...Screen 11 12 Paper 11 13 Basic Paper Specifications 11 13 Choosing the Appropriate Paper 11 14 Special Paper 11 17 Specifications 11 21 Machine 11 21 Copy Functions 11 22 Printer Functions 11 23 Scan...

Page 10: ...in the machine and on a USB drive Printing Data Saved in the Printer page 4 10 You can apply the various machine security levels to your specific needs Frequently Used Sending Method page 5 14 Input D...

Page 11: ...he document processor at one time the originals can be scanned in separate batches and then copied or sent as one job Continuous Scan page 6 17 Optimize your office workflow Save energy and cost Send...

Page 12: ...on skips the blank pages and prints only pages that are not blank Skip Blank Page page 6 22 Save energy and cost Strengthen security Send a FAX to reduce the communication cost FAX Delayed Transmissio...

Page 13: ...stall the machine without concerning the network cables Wireless Network If there is a wireless LAN environment it is possible to install the unit without worrying about the network wiring In addition...

Page 14: ...ns more efficiently Perform remote operation Command Center RX You can access to the machine remotely to print send or download data Administrators can configure the machine behavior or management set...

Page 15: ...canned image as desired Basic Color Modes The basic color modes are as follows For details refer to the following Color Selection page 6 19 Color mode Description Reference image Reference page Before...

Page 16: ...Color Balance page 6 19 Adjust the saturation Saturation page 6 21 Adjust the image quality precisely Emphasize or blur the image outline Example Emphasize the image outlines Sharpness page 6 20 Adjus...

Page 17: ...ic functions of the machine how to use convenient features how to perform routine maintenance and what to do when problems occur For safe use of the machine Safety Guide Provides safety and cautionary...

Page 18: ...OCERA Net Direct Print Operation Guide Explains how to print PDF files without launching Adobe Acrobat or Reader Monitor the machine and printers on the network KYOCERA Net Viewer User Guide Explains...

Page 19: ...uch as placing originals making copies sending documents and using document boxes 6 Using Various Functions Explains convenient functions that are available on the machine 7 Status Job Cancel Explains...

Page 20: ...ove from the current page to the previously displayed page This is convenient when you want to return to the page from which you jumped to the current page Click an item in the Table of Contents to ju...

Page 21: ...paper placement orientations on the message display Actual procedure Procedure indicated in this guide Select the System Menu Counter key Select the or key to select Common settings Select the OK key...

Page 22: ...e 6 9 Zoom page 6 11 Combine page 6 13 Original Size page 6 15 Orig Orientation page 6 15 Mixed Size Orig page 6 16 Original Image page 6 16 Density page 6 17 EcoPrint page 6 17 Continuous Scan page 6...

Page 23: ...Mixed Size Orig page 6 16 Continuous Scan page 6 17 File Format page 6 24 File Name Entry page 6 18 Subject Body page 6 28 JobFinish Notice page 6 18 FAX Resolution Refer to FAX Operation Guide FAX De...

Page 24: ...5 Mixed Size Orig page 6 16 Continuous Scan page 6 17 File Format page 6 24 File Separation page 6 28 File Name Entry page 6 18 JobFinish Notice page 6 18 Density page 6 17 Sharpness page 6 20 Contras...

Page 25: ...e 7 6 Scheduled Job page 7 7 Print Job Log page 7 10 Send Job Log page 7 11 Store Job Log page 7 12 FAX Job Log Refer to FAX Operation Guide Scanner page 7 14 Printer page 7 14 FAX Refer to FAX Operat...

Page 26: ...6 Counter page 2 46 System Network Network Setting Host Name page 8 7 Wi Fi Direct Set Wi Fi Direct page 8 7 Device Name page 8 7 IP Address page 8 7 Auto Disconnect page 8 7 Wi Fi Settings Wi Fi page...

Page 27: ...Auth page 9 19 Group Auth page 9 14 Guest Auth Set page 9 15 PIN Login page 9 20 NW User Property page 9 18 Job Account Set Job Accounting page 9 23 AccountingAccess page 9 24 Account Report page 9 3...

Page 28: ...22 SpcialPaper Act page 8 22 Paper Setup Msg page 8 22 Preset Limit page 8 24 Measurement page 8 24 Error Handling DuplexPaperError page 8 25 PaperMismatchErr page 8 25 Date Setting Date Time page 8 2...

Page 29: ...28 File Name Entry page 8 28 Subject Body page 8 28 Con scan Copy page 8 29 Con scan FAX page 8 29 Con scan Others page 8 29 File Format page 8 29 File Separation page 8 29 JPEG TIFF Print page 8 29...

Page 30: ...2 Printer Emulation Set page 8 33 Color Setting page 8 33 EcoPrint page 8 33 Override A4 LTR page 8 33 Duplex page 8 33 Copies page 8 33 Orientation page 8 33 Gloss Mode page 8 33 Wide A4 page 8 33 Fo...

Page 31: ...to FAX Operation Guide Select Key Set page 8 32 Edit Destination Address Book page 8 38 Edit Restriction page 8 38 Print List page 8 38 Addr Book Defaults page 8 38 Adjust Maint Copy Denst Adj page 8...

Page 32: ...ower 1 7 Compliance and Conformity 1 7 Other precautions for users in California the United States 1 8 Warranty the United States and Canada 1 9 Legal Restriction on Copying Scanning 1 10 Wireless Con...

Page 33: ...ention are indicated inside the symbol General warning Warning of high temperature The symbol indicates that the related section includes information on prohibited actions Specifics of the prohibited...

Page 34: ...sters when this machine is moved after installation the floor material may be damaged During copying some ozone is released but the amount does not cause any ill effect to one s health If however the...

Page 35: ...omach If necessary contact a physician If you do happen to get toner in your eyes flush them thoroughly with water If there is any remaining tenderness contact a physician If toner does happen to get...

Page 36: ...n emitted inside this machine is hermetically sealed within the protective housing and external cover In the normal operation of the product by user no radiation can leak from the machine This machine...

Page 37: ...Act A laser product related act was implemented on Aug 2 1976 by the Center for Devices and Radiological Health CDRH of the U S Food and Drug Administration FDA This act prohibits the sale of laser pr...

Page 38: ...lar installation If this equipment does cause harmful interference to radio or television reception which can be determined by turning the equipment off and on the user is encouraged to try to correct...

Page 39: ...separation distance of at least 20 cm from all persons and must not be co located or operating in conjunction with any other transmitter Industry Canada ICES 003 Compliance Label CAN ICES 3B NMB 3B NO...

Page 40: ...orized KYOCERA Dealer in your area or check KYOCERA s website at www kyoceradocumentsolutions com for KYOCERA Document Solutions America Inc or www kyoceradocumentsolutions ca for KYOCERA Document Sol...

Page 41: ...between wireless access points instead of using a network cable which offers the advantage that a LAN connection can be established freely within an area in which radio waves can be transmitted On the...

Page 42: ...of the automatic control equipment use this product according to the instructions and precautions provided on the automatic control equipment If this product is used in devices that are directly relat...

Page 43: ...ean language fonts installed in this machine are used under licensing agreement with Monotype Imaging Inc Helvetica Palatino and Times are registered trademarks of Linotype GmbH ITC Avant Garde Gothic...

Page 44: ...ill not modify alter disassemble decrypt reverse engineer or decompile the Software 7 Monotype Imaging warrants that for ninety 90 days after delivery the Software will perform in accordance with Mono...

Page 45: ...which meet EN 12281 2002 or an equivalent quality standard be used This machine also supports printing on 64 g m2 paper Using such paper containing less raw materials can lead to further saving of fo...

Page 46: ...ork Setup 2 18 Configuring the Wired Network 2 18 Configuring the Wireless Network 2 20 Setting Wi Fi Direct 2 26 Energy Saver function 2 28 Sleep 2 28 Auto Sleep 2 29 Sleep Rules models for Europe 2...

Page 47: ...Inner Tray 3 Paper Stopper 4 Cassette 1 5 Power Switch 6 Button Right Cover Open 7 USB Port 8 Right Cover 9 Original Stopper 10 Original Eject Table 11 Original Table 12 Original Width Guides 13 Slit...

Page 48: ...2 3 Installing and Setting up the Machine Part Names Machine Exterior 18 Handles 19 Anti theft Lock Slot 20 Rear Cover 1 18 20 19...

Page 49: ...Part Names Connectors Interior 1 TEL Connector 2 LINE Connector 3 USB Interface Connector 4 Network Interface Connector 5 Feed Cover 6 Paper Length Guide 7 Paper Width Guides 8 Multipurpose Tray 9 Tra...

Page 50: ...alling and Setting up the Machine Part Names Connectors Interior 12 Toner Container Yellow 13 Toner Container Cyan 14 Toner Container Magenta 15 Toner Container Black 16 Toner Container Lock Lever 16...

Page 51: ...2 6 Installing and Setting up the Machine Part Names With Optional Equipments Attached Part Names With Optional Equipments Attached 1 Cassette 2 2 Rear Cover 2 Optional Equipment page 11 2 1 2...

Page 52: ...using wireless LAN refer to the following Configuring the Wireless Network page 2 20 Connection Environment Function Necessary Cable Connect a LAN cable to the machine Printer Scanner Network FAX LAN...

Page 53: ...nect the cable to the machine 1 Connect the LAN cable to the network interface connector 2 Connect the other end of the cable to the hub or the PC 2 Power on the machine and configure the network IMPO...

Page 54: ...er on the machine Connecting the Power Cable 1 Connect the cable to the machine Connect one end of the supplied power cable to the machine and the other end to a power outlet IMPORTANT Make sure that...

Page 55: ...UTION If this machine will be left unused for an extended period e g overnight turn it off at the power switch If the machine will not be used for an even longer period of time e g vacation remove the...

Page 56: ...eys Selects the menu displayed at the bottom of the message display 11 Processing indicator Blinks while printing or sending receiving 12 Memory indicator Blinks while the machine is accessing the mac...

Page 57: ...have been entered 25 Numeric keys Enter numbers and symbols 26 Stop key Cancels or pauses the job in progress 27 Start key Starts copying and scanning operations and processing for setting operations...

Page 58: ...K is displayed select the OK key to confirm the selection Select the OK key to display the selected menu The selected item is displayed with asterisk at the beginning Select the OK key to confirm the...

Page 59: ...lect the key to display the previous step Select the OK key to exit the Help screen NOTE You can select the Function Menu key to configure original and paper settings Paper Selection page 6 8 Original...

Page 60: ...login password are set as shown below Login User Name 2100 Login Password 2100 You will be unable to login if you forget your login user name or login password In this event login with administrator...

Page 61: ...t from the machine select the Authentication Logout key to return to the login user name login password entry screen Users are automatically logged out in the following circumstances When the machine...

Page 62: ...is enabled you can only change the settings by logging in with administrator privileges If user login administration is disabled the user authentication screen appears Enter a login user name and pass...

Page 63: ...k Setting OK key key Wired Netwk Set OK key key TCP IP Settings OK key key IPv4 Setting OK key 2 Configure the settings When setting the static IP address 1 key DHCP OK key key Off OK key 2 key IP Add...

Page 64: ...the or key to enter a number Select the or key to move the position being entered which is shown highlighted IMPORTANT After changing the setting restart the network from System Menu or turn the mach...

Page 65: ...nfigure the network in details from System menu Wi Fi Settings page 8 8 Setting the Connection by Using the Wi Fi Setup Tool This is the tool included in the Product Library You can configure the conn...

Page 66: ...Wi Fi Setup Tool 1 Launch a web browser 2 Enter https kyocera info to the browser s address bar or location bar 3 Enter and search the product name and select this product from the candidate list 4 Ch...

Page 67: ...Using Wi Fi Direct 1 Display the screen System Menu Counter key key System Network OK key key Network Setting OK key key Wi Fi Direct Set OK key key Wi Fi Direct OK key 2 Configure the settings key On...

Page 68: ...5 Launch the Wi Fi Setup Tool 1 Launch a web browser 2 Enter https kyocera info to the browser s address bar or location bar 3 Enter and search the product name and select this product from the candi...

Page 69: ...onfiguring Network Connection Using the Push Button If your router supports WPS you can configure network connection using the push button 1 Configure the network between the computer and the router a...

Page 70: ...point page 1 Configure the network between the computer and the router access point 2 Turn on the printer 3 System Menu Counter key key System Network OK key key Network Setting OK key key Wi Fi Sett...

Page 71: ...e select Yes The network between this machine and the handheld device is configured Connecting to Computers or Handheld Devices Unsupported Wi Fi Direct Here we ll explain the procedures for connectin...

Page 72: ...Yes 4 Wi Fi Direct key key PushButton Setup OK key 5 Press the push button on the computer or handheld device and select Push Button on the screen of operation panel simultaneously Next The network be...

Page 73: ...tomatically wakes up and starts printing Also when fax data arrives while the machine is in Sleep the machine automatically wakes up and starts printing To resume perform the following actions Select...

Page 74: ...r Europe You can set whether sleep mode operates for each function When the machine enters sleep mode the ID card cannot be recognized For more information on Sleep Rules settings refer to the followi...

Page 75: ...s refer to the following Sleep Level models except for Europe page 8 26 1 Display the screen System Menu Counter key key Common Settings OK key key Timer Setting OK key key Sleep Level OK key 2 Select...

Page 76: ...er print speed for quiet processing Select this mode when the running noise is uncomfortable When the Quiet Mode key is selected the Quiet Mode key blinks and Quiet Mode is enabled NOTE The processing...

Page 77: ...a computer software application as a fax via the machine Kyocera TWAIN Driver This driver enables scanning on the machine using a TWAIN compliant software application Kyocera WIA Driver WIA Windows I...

Page 78: ...ownload and install a software from our website 1 Download a software from the website 1 Launch a web browser 2 Enter https kyocera info to the browser s address bar or location bar 3 Enter and search...

Page 79: ...e software Using the web installer Install a software by using a web installer downloaded from our website 1 Download a software from the website 1 Launch a web browser 2 Enter https kyocera info to t...

Page 80: ...d its language setting as needed 5 Utility tab Web installer A web installer will be downloaded 2 Double click the downloaded installer to launch NOTE Installation on Windows must be done by a user lo...

Page 81: ...machine cannot be detected unless it is on If the computer fails to detect the machine verify that it is connected to the computer via a network or USB cable If a desired device is not displayed selec...

Page 82: ...rd If a system restart message appears restart the computer by following the screen prompts This completes the printer driver installation procedure If you are installing the TWAIN driver continue by...

Page 83: ...eted 3 Finish uninstalling If a system restart message appears restart the computer by following the screen prompts This completes the software uninstallation procedure NOTE Uninstallation on Windows...

Page 84: ...the product name and select this product from the candidate list NOTE Installation on Mac OS must be done by a user logged on with administrator privileges When printing from a Macintosh computer set...

Page 85: ...want to download An installer of the selected software will be downloaded 2 Install the Printer Driver Install the printer driver as directed by the instructions in the installation software This com...

Page 86: ...ck the item that appears in Name and then select the driver in Use 3 Select the options available for the machine 4 The selected machine is added NOTE When using an IP connection click the IP icon for...

Page 87: ...iver NOTE In Windows 8 1 click Search in charms and enter TWAIN Driver Setting in the search box Select TWAIN Driver Setting in the search list 1 Enter the machine name 2 Select this machine from the...

Page 88: ...2 43 Installing and Setting up the Machine Installing Software 3 Finish registering NOTE Click Delete to delete the added machine Click Edit to change names...

Page 89: ...appears 2 Select the same name as this machine from WIA Drivers and click Properties 2 Configure WIA Driver NOTE In Windows 8 1 click Search in charms and enter View scanners and cameras in the searc...

Page 90: ...achine Checking the Counter Checking the Counter Check the number of sheets printed and scanned 1 Display the screen System Menu Counter key key Counter OK key 2 Check the counter Select the item you...

Page 91: ...s user will allow you to configure all settings therefore please change the login user name and password In addition this machine is equipped with user authentication function which can be configured...

Page 92: ...and lower case letters are distinguished case sensitive Login User Name Admin Login Password Admin Setting Description Administ rator General User Device Information The machine s structure can be che...

Page 93: ...2 Configure the function Select a category from the navigation bar on the left of the screen NOTE If the screen There is a problem with this website s security certificate is displayed configure the...

Page 94: ...following order to check the machine s IP address and the host name System Menu Counter key key Report OK key key Report Print OK key key Status Page OK key Yes 3 Log in with administrator privileges...

Page 95: ...achine Command Center RX 2 Configure the Security Settings From the Security Settings menu select the setting you want to configure NOTE For details on settings related to certificates refer to the fo...

Page 96: ...der to check the machine s IP address and the host name System Menu Counter key key Report OK key key Report Print OK key key Status Page OK key Yes 3 Log in with administrator privileges The factory...

Page 97: ...y the host name Enter the device information and then click Submit IMPORTANT After changing the setting restart the network or turn the machine OFF and then ON To restart the network click Reset in th...

Page 98: ...The setting to limit the size of E mails Item E mail Size Limit in E mail Send Settings The procedure for specifying the SMTP settings is explained below 1 Display the screen Display the SMTP Protocol...

Page 99: ...2 54 Installing and Setting up the Machine Command Center RX 4 From the Network Settings menu click Protocol 2 Configure the settings Set SMTP E mail TX to On in the Send Protocols 1 2...

Page 100: ...2 55 Installing and Setting up the Machine Command Center RX 3 Display the screen Display the E mail Settings screen From the Function Settings menu click E mail 1 2...

Page 101: ...s POP3 POP3 Protocol You don t need to set the following items when you only enable the function of sending e mail from the machine Set the following items if you want to enable the function of receiv...

Page 102: ...s 3 Log in with administrator privileges The factory default setting for the default user with administrator privileges is shown below Upper case and lower case letters are distinguished case sensitiv...

Page 103: ...igrating the Address Book The Address Book registered on the machine can be backed up or migrated using the KYOCERA Net Viewer on the included DVD For details on operating the KYOCERA Net Viewer refer...

Page 104: ...ng Data from Our Other Products 3 Select destination device group and click Next 4 Select Device Address Book and click Next 5 Select Create from device and remove the checkmark from Overwrite setting...

Page 105: ...cify the location to save the file enter the file name and then click Save For Save as type make sure to select XML File NOTE If the Admin Login screen appears enter the Admin Login and Login Password...

Page 106: ...Please note that selecting Finish will write the data to the machine s Address Book Writing Address Book Data to the Machine 1 Launch the KYOCERA Net Viewer 2 Load the Address Book data 1 Right click...

Page 107: ...ce group and click Next 4 Select Device Address Book and click Next 5 Select Create from file and remove the checkmark from Overwrite settings on target device and then click Next Selecting the Overwr...

Page 108: ...ine Transferring Data from Our Other Products 6 Click Browse and select the backup Address Book file and then click Next 7 Click Finish The write process of the Address Book data starts 8 Once the wri...

Page 109: ...aper 3 9 Paper Stopper 3 9 Preparation for Sending a Document to a Shared Folder in a PC 3 10 Making a note of the computer name and full computer name 3 10 Making a note of the user name and domain n...

Page 110: ...dampness can be a cause of problems Seal any remaining paper after loading in the multipurpose tray or cassettes back in the paper storage bag If the machine will not be used for a prolonged period p...

Page 111: ...io 16K 216mm 340mm B5 ISO Custom Plain Preprinted Bond Recycled Rough Letterhead Color Prepunched Thick High Quality Custom 1 to 8 250 sheets 80 g m2 page 3 4 2 Cassette 2 page 3 7 NOTE The number of...

Page 112: ...1 1 Pull the Cassette 1 completely out of the machine 2 Adjust the paper length guide to the paper size required When using Folio Oficio II or Legal NOTE In some regions the cassette comes with a cove...

Page 113: ...fter removing new paper from its packaging fan the paper before loading it in the multipurpose tray Precaution for Loading Paper page 3 2 Before loading the paper be sure that it is not curled or fold...

Page 114: ...e screen System Menu Counter key key Common Settings OK key key Orig Paper Set OK key key Cassette 1 Set OK key 7 Configure the function Select the paper size and paper type NOTE When Folio Oficio II...

Page 115: ...Loading in the Cassette 2 1 Pull the Cassette 2 completely out of the machine 2 Adjust the paper length guide to the paper size required 3 Adjust the position of the paper width guides located on the...

Page 116: ...print side facing up After removing new paper from its packaging fan the paper before loading it in the multipurpose tray Precaution for Loading Paper page 3 2 Before loading the paper be sure that i...

Page 117: ...3 9 Preparation before Use Precautions for Outputting Paper Precautions for Outputting Paper Paper Stopper When using paper large than B5 Letter open the paper stopper shown in the figure...

Page 118: ...and full computer name Check the name of the computer name and full computer name 1 Display the screen Click Start button on the Windows and then select Windows System Control Panel System and Securi...

Page 119: ...rt button on the Windows and then select Windows System and Command Prompt In Windows 8 1 click Search in charms and enter Command Prompt in the search box Select Command Prompt in the search list The...

Page 120: ...the name scannerdata on the desktop NOTE If there is a workgroup in System Properties configure the settings below to limit folder access to a specific user or group 1 Open up a window in File Explore...

Page 121: ...Folder in a PC 2 Configure permission settings 1 Right click the scannerdata folder select Property and click Sharing and Advanced Sharing 2 Select the Share this folder checkbox and click the Permiss...

Page 122: ...ain name If the text after the first dot in the full computer name that you made a note of does not appear in From this location click the Locations button select the text after the dot and click the...

Page 123: ...p through Windows Firewall NOTE Log on to Windows with administrator privileges NOTE In Windows 8 1 in charms on Desktop click Settings Control Panel System and Security and then Windows Firewall If t...

Page 124: ...a Shared Folder in a PC 2 Select the File and Printer Sharing checkbox 2 Add a port 1 Click Start button on the Windows and then select Windows System Control Panel System and Security and Check firew...

Page 125: ...re Use Preparation for Sending a Document to a Shared Folder in a PC 4 Select New Rules 5 Select Port 6 Select TCP as the port to apply the rule to Then select Specific local ports and enter 445 then...

Page 126: ...ation for Sending a Document to a Shared Folder in a PC 7 Select Allow the connection and click the Next button 8 Make sure all checkboxes are selected and click the Next button 9 Enter Scan to SMB in...

Page 127: ...n a PC In Windows 8 1 1 In Windows 8 1 select Settings in charms on Desktop and select Control Panel System and Security and then Windows Firewall If the User Account Control dialog box appears click...

Page 128: ...th computer folder path and FAX No 1 Display the screen System Menu Counter key key Edit Destination OK key key Address Book OK key Menu key Add Address OK key key Contact OK key 2 Add the name 1 key...

Page 129: ...Document to a Shared Folder in a PC page 3 10 Item Description Max No of Characters Host Name SMB 1 1 To specify a port number different from the default 445 enter using the format Host name port numb...

Page 130: ...1 If you specify a port number other than the default 21 use the Host name port number Example FTPhostname 140 To enter the IPv6 address enclose the address in brackets Example 3ae3 9a0 cd05 b1d2 28a...

Page 131: ...s destinations 1 key Group Member Edit Menu key Add Member OK key 2 Select the member you want to add and select the OK key 3 Select the destination to be registered in the group from the destinations...

Page 132: ...elect the OK key The group is added to the Address Book NOTE You can set any value between 1 and 120 Use the numeric keys or select the or key to enter a number Address Number is an ID for a destinati...

Page 133: ...changes OK key Yes Register the changed destination Editing a Group 1 Select the group to edit and select the OK key 2 Change Group Name and Address Number 3 key Group Member Edit 4 To delete the des...

Page 134: ...leting Address Book Entries Delete the destinations contacts you added to the Address Book 1 Display the screen System Menu Counter key Address Book One Touch Address Book 2 Delete the destination Sel...

Page 135: ...destinations Select the destination to be registered to the One touch key from the destinations registered in the addresses and select the OK key The destination will be added to the One Touch Key NOT...

Page 136: ...y Edit OK key 2 Select the new destination and select the OK key Yes Register the changed destination Deleting One Touch Key 1 Select the One Touch Key to delete 1 Press the One Touch Key to delete an...

Page 137: ...Storing the Job 4 10 Printing Documents from Private Print Box 4 11 Deleting the Documents Stored in the Private Print Box 4 11 Printing Document from Stored Job Box 4 12 Deleting the Documents Stored...

Page 138: ...ng Imaging tab This tab lets you configure settings related to the quality of the print results Publishing tab This tab lets you create covers and inserts for print jobs and put inserts between sheets...

Page 139: ...ng For the settings refer to the following Printer Driver User Guide 1 Click Start button on the Windows and then select Windows System Control Panel and Devices and Printers 2 Right click the printer...

Page 140: ...he settings 1 Select the machine from the Printer menu and click the Properties button NOTE To print the document from applications install the printer driver on your computer from the supplied DVD Pr...

Page 141: ...s not included in print sizes of the machine such as cardstock or envelopes the paper size needs to be registered To print on the special paper such as thick paper or transparency click Media type men...

Page 142: ...s and then select Windows System Control Panel and View devices and printers 2 Right click the printer driver icon of the machine and click the Printer properties menu of the printer driver 3 Click th...

Page 143: ...button 7 Click the OK button 8 Click the OK button 3 Display the screen Click File and select Print in the application 4 Select the paper size and type of non standard size paper 1 Select the machine...

Page 144: ...ling Printing from a Computer To cancel a print job executed using the printer driver before the printer begins printing do the following 1 Double click the printer icon displayed on the taskbar at th...

Page 145: ...d on printing function included in Android 4 4 or later products Mopria Print Service needs to be installed and enabled in advance For details on how to use refer to a Web site of Mopria Alliance Prin...

Page 146: ...ting it You can print the documents from the following boxes Printing Documents from Private Print Box page 4 11 Printing Document from Stored Job Box page 4 12 Printing Document from Quick Copy Box p...

Page 147: ...document and select the OK key 2 Print the document 1 Select the document to print and Select OK key The file is selected A checkmark will be placed on the right of the selected file Select the checkm...

Page 148: ...nt Box USB key key Job Box OK key key Private Stored OK key 2 Select the creator of the document and select the OK key 2 Print the document 1 Select the document to print and Select OK key The file is...

Page 149: ...ct OK key The file is selected A checkmark will be placed on the right of the selected file Select the checkmarked file and select Select again to cancel the selection 2 key Delete OK key Yes The docu...

Page 150: ...lect the document to print and Select OK key The file is selected A checkmark will be placed on the right of the selected file Select the checkmarked file and select Select again to cancel the selecti...

Page 151: ...copies use the operation panel You can change the number of copies to print 1 Display the screen 1 Document Box USB key key Job Box OK key key Quick Proof OK key 2 Select the creator of the document a...

Page 152: ...ey 2 Delete the document 1 Select the document to delete and Select OK key The file is selected A checkmark will be placed on the right of the selected file Select the checkmarked file and select Sele...

Page 153: ...t Exit in the menu to exit the Status Monitor Exit automatically The Status Monitor automatically shuts down after 7 minutes if it is not being used Quick View State The status of the machine is displ...

Page 154: ...is displayed Select a job on the job list and it can be canceled using the menu displayed with a right click Paper Tray Status Tab Information is displayed about the paper in the printer and about th...

Page 155: ...and Center RX If the printer is connected to a TCP IP network and has its own IP address use a web browser to access the Command Center RX to modify or confirm the network settings This menu is not di...

Page 156: ...list occurs 1 Select Enable event notification If this setting is set to Off then the Status Monitor will not start up even when printing is executed 2 Select an event to use with the text to speech...

Page 157: ...ring Settings before Sending 5 21 Sending Document to Folder on an FTP Server 5 21 Scanning using TWAIN or WIA 5 23 Configuring Settings before Sending 5 23 Scanning Document Using Application 5 23 Us...

Page 158: ...For the procedure for feeding envelopes or cardstock refer to the following When you load envelopes or cardstock in the multipurpose tray page 5 7 CAUTION Do not leave the document processor open as t...

Page 159: ...nals with adhesive tape or glue Originals with cut out sections Curled original Originals with folds Straighten the folds before loading Failure to do so may cause the originals to jam Carbon paper Cr...

Page 160: ...entation refer to the following Original Orientation page 6 15 IMPORTANT Confirm that the original width guides exactly fit the originals If there is a gap readjust the original width guides The gap m...

Page 161: ...2 50 sheets Hagaki Cardstock 15 sheets Envelope DL Envelope C5 Envelope 10 Envelope 9 Envelope 6 3 4 Envelope Monarch Youkei 4 Youkei 2 5 sheets OHP film 1 sheet Coated 30 sheets 1 Open the multipurpo...

Page 162: ...eep the print side facing down Curled paper must be uncurled before use When loading paper into the multipurpose tray check that there is no paper left over in the tray from a previous job before load...

Page 163: ...Return postcard 2 Hagaki Cardstocks 3 Portrait form envelopes 4 Landscape form envelopes IMPORTANT Use unfolded Oufuku hagaki Return postcard How to load envelopes orientation and facing will differ d...

Page 164: ...can register the same settings using the Function Menu key Paper Selection Cassette 1 Same size Combine 2 in 1 Original size A5 Statement Continuous scanning ON Registering Programs 1 Configure the se...

Page 165: ...gs and hold it 2 seconds or more The current settings are registered to the selected program key Recalling Program Select the one of the Program I to Program IV keys where the settings you want to rec...

Page 166: ...ram I to Program IV keys to change and hold it 2 seconds or more 2 key Overwrite OK key Yes Register the changed program Deleting Program 1 Display the screen Press the one of the Program I to Program...

Page 167: ...t Key Settings Commonly used functions can be registered to the Select key Functions can be easily configured by selecting the Select key Functions can be registered in Select keys from the system men...

Page 168: ...ect the Copy key 2 Place the originals Check the original size and the paper size Loading Originals page 5 2 NOTE For selecting the original size refer to the following Original Size page 6 15 For sel...

Page 169: ...y Copying begins Canceling Jobs 1 Select the Stop key with the copy screen displayed 2 Cancel a job 1 key Cancel Print Job OK key 2 Select the job to cancel and Menu 3 key Cancel Job OK key 4 Select Y...

Page 170: ...options are available Send as E mail E mail Addr Entry Sends a scanned original image as an E mail attachment Sending Document via E mail page 5 15 Send to Folder SMB Stores a scanned original image...

Page 171: ...Document via E mail 1 Select the Send key 2 Place the originals 3 key E mail OK key 4 Enter destination E mail address OK key Up to 128 characters can be entered To enter multiple destinations select...

Page 172: ...der and make a note of a shared folder Configure the Windows firewall Sending Document to Desired Shared Folder on a Computer 1 Select the Send key 2 Place the originals 3 key Folder SMB OK key 4 Ente...

Page 173: ...1 You can also specify the port number Enter the following format separated by a colon Host name port number or IP address port number To enter the IPv6 address enclose the address in brackets Exampl...

Page 174: ...n operation from the computer Installing Software in Windows Download and install a software from our website 1 Download a software from the website 1 Launch a web browser 2 Enter https kyocera info t...

Page 175: ...om Install 6 Click to add the printer you want to install 7 Select Kyocera TWAIN Driver on the Driver tab 8 Select KYOCERA Quick Scan on the Utility tab 9 Click Install 10Click Completed when installa...

Page 176: ...layed In KYOCERA Quick Scan three profiles namely Scan to PDF Scan to folder and Scan to email are registered beforehand The user can register scan profile settings according to his her need from Add...

Page 177: ...o Folder on an FTP Server Scan to FTP Configuring Settings before Sending Before sending an document configure the FTP Client Transmission ProtocolSettings page 8 11 Sending Document to Folder on an F...

Page 178: ...ethod page 11 8 Item Data to be entered Max characters Host Name 1 1 You can also specify the port number Enter the following format separated by a colon Host name port number or IP address port numbe...

Page 179: ...scan an original using TWAIN The WIA driver is used in the same way 1 Display the screen 1 Activate the TWAIN compatible application software 2 Select the machine using the application and display th...

Page 180: ...as files on a WSD compatible computer WSD Scan page 5 25 Sending to different types of destinations Multi sending Sends to different types of destination E mail addresses folders etc in a single opera...

Page 181: ...s screen the installation is completed In Windows 8 1 and Microsoft Windows Server 2012 1 Click Search in charms Control Panel and then View devices and printers 2 Install the driver Click Add a devic...

Page 182: ...5 26 Operation on the Machine WSD Scan WSD scan 1 Select the Send key 2 Place the originals 3 Display the screen key WSD Scan OK key Loading Originals page 5 2...

Page 183: ...ey You can view information on the selected computer by selecting Detail 3 Select the Function Menu key to set the type of original file format etc as desired 4 Press the Start key Sending begins and...

Page 184: ...ail addresses folders etc in a single operation No of broadcast items Up to 100 However number of items are restricted for the following sending options Folders SMP FTP Total of 5 SMB and FTP Procedur...

Page 185: ...creen for sending select key Me E mail OK key NOTE To use this function user control must be set to network authentication and the e mail address of the user must be registered in the network authenti...

Page 186: ...n for sending select key Me Folder OK key NOTE To use this function user control must be set to network authentication and the folder of the user must be registered in the network authentication serve...

Page 187: ...key Cancel Send Job OK key 2 Select the job to cancel and Menu 3 key Cancel Job OK key 4 Select Yes The job is canceled NOTE Selecting the Stop key will not temporarily stop a job that you have alrea...

Page 188: ...in the Address Book page 3 20 1 In the basic screen for sending select the Address Book key 2 Select the destinations 1 key Address Book OK key 2 Select the destination Choosing from the Address Book...

Page 189: ...ns can be changed later Choosing from the External Address Book 1 Display the screen 1 In the basic screen for sending select Address Book key Menu key Switch Addr Book OK key 2 key Select external ad...

Page 190: ...r sending select the One Touch Keys where the destination is registered When selecting One Touch Key numbers 12 to 22 the One touch Key needs to be selected after switching on the Shift Lock indicator...

Page 191: ...ions OK key Delete the destination 1 Select the destination you want to delete and select the OK key 2 key Delete OK key Yes 3 Select Exit Specifying Destination page 5 32 Specifying Destination page...

Page 192: ...select the Address Recall Pause key and you can call the destination you sent on the destination list 1 Select the Address Recall Pause key The destination you sent is displayed on the destination lis...

Page 193: ...5 37 Operation on the Machine How to use the FAX Function How to use the FAX Function It is possible to use the FAX function FAX Operation Guide...

Page 194: ...to USB drive in the PDF TIFF JPEG XPS OpenXPS or high compression PDF format Scan to USB What is Sub Address Box Polling Box Sub Address Box Polling Box store the fax data FAX Operation Guide NOTE To...

Page 195: ...mage files in USB drive connected to the machine The following file types can be stored PDF file format TIFF file format JPEG file format XPS file format OpenXPS file format High compression PDF file...

Page 196: ...the selection 3 OK key key Print OK key 4 Change the number of copies duplex printing etc as desired For the features that can be selected refer to the following 5 Press the Start key Printing of the...

Page 197: ...Saving Documents to USB Drive Scan to USB 1 Place the originals 2 Plug the USB drive Plug the USB drive into the USB Port 3 Display the screen Document Box USB key key USB Drive OK key NOTE The maximu...

Page 198: ...x USB key key USB Drive OK key Menu key Memory Detail OK key 2 Check the information Select the key to view the next screen Select the key to return to the previous screen Once you confirm the informa...

Page 199: ...tation 6 15 Mixed Size Originals 6 16 Original Image 6 16 Density 6 17 EcoPrint 6 17 Continuous Scan 6 17 File Name Entry 6 18 Job Finish Notice 6 18 Priority Override 6 18 Color Selection 6 19 Color...

Page 200: ...des the various functions available How to Select Functions To configure the settings for functions select the Function Menu key 1 Displays the function menu 2 Selects the item displayed or changes th...

Page 201: ...mage type for best results page 6 16 Density Adjust density page 6 17 EcoPrint EcoPrint saves toner when printing page 6 17 Continuous Scan Scans a large number of originals in separate batches and th...

Page 202: ...ge 6 24 File Name Entry Adds a file name page 6 18 Subject Body Adds subject and body when sending a document page 6 28 JobFinish Notice Sends E mail notice when a job is complete page 6 18 FAX Resolu...

Page 203: ...f different sizes that are set in the document processor all at once page 6 16 Continuous Scan Scans a large number of originals in separate batches and then produce as one job page 6 17 File Format S...

Page 204: ...toner when printing page 6 17 File Name Entry Adds a file name page 6 18 JobFinish Notice Sends E mail notice when a job is complete page 6 18 Priority Override Suspends the current job and gives a n...

Page 205: ...arious Functions Functions Functions On pages that explain a convenient function the modes in which that function can be used are indicated by icons Printing Sending Storing Copy Print from USB Send S...

Page 206: ...SO B5 Envelope 10 Envelope 9 Envelope 6 Envelope Monarch Envelope DL Envelope C5 Hagaki Cardstock Oufuku Hagaki Return postcard Youkei 4 Youkei 2 Custom 2 2 For instructions on how to specify the cust...

Page 207: ...ltipurpose tray a confirmation screen appears Load the required paper in the multipurpose tray and select OK to start copying Produces two sided copies from one sided originals In case of an odd numbe...

Page 208: ...nction Defaults page 8 28 Finish Binding Left Right Top Select Detail to display the Finish Binding screen Select the binding orientation of copies and select the OK key Orig Orientation Top Edge on T...

Page 209: ...ges at magnifications other than the Standard Zoom 1 1 LTR Letter LGL Legal STMT Statement FOL Folio Model Zoom Level Original Copy Model Zoom Level Original Copy Metric Models 400 200 141 A5 A4 115 B...

Page 210: ...numeric keys or select or to enter the any magnification Sending Storing Item Description 100 Reproduces the original size Auto Reduces or enlarges original to sending storing size NOTE To reduce or...

Page 211: ...g Orientation Top Edge on Top Top Edge on Left Select the orientation of the original document top edge to scan correct direction Choose orientation of the originals either Top Edge on Top or Top Edge...

Page 212: ...B R to L B to T 4 in 1 Right then Down Left then Down Down then Right Down then Left NOTE The paper sizes supported in Combine mode A4 A5 R B5 Folio 216 340 mm Letter Legal Statement Oficio II 16K Wh...

Page 213: ...velope 6 Envelope Monarch Envelope DL Envelope C5 Hagaki Cardstock Oufuku Hagaki Return postcard Youkei 4 Youkei 2 Custom 2 1 This function is displayed when Auto Detect in Detect Orig DP is set to On...

Page 214: ...ts Photo Best for photos taken with a camera Text Best for documents that are mostly text Graphic Map Best for graphics and maps Printed Document Best for documents printed on this machine originally...

Page 215: ...test prints or any other occasion when high quality print is not required Value Off On Continuous Scan Scans a large number of originals in separate batches and then produce as one job Originals will...

Page 216: ...top priority The suspended job resumes after the other job is finished Value Off On NOTE PC should be configured in advance so that E mail can be used Command Center RX page 2 48 E mail can be sent t...

Page 217: ...Color Scans the document in full color Grayscale Scans the document in grayscale Produces a smooth detailed image Black White Scans the document in black and white Item Value Description Off On Cyan 5...

Page 218: ...ning of the moire effect can be obtained by setting the sharpness toward Blur Contrast You can adjust the contrast between light and dark areas of the image Item Description 1 to 3 Sharpen Emphasizes...

Page 219: ...Adjust the color saturation of the image Item Description Off Does not adjust the ground color Manual Select 1 to 5 Lighter Darker to adjust the background density manually NOTE This feature is used...

Page 220: ...to check for blank pages in the document Select On Level and then Low Middle or High Scan Resolution Select fineness of scanning resolution Value 200 100dpi Norm 200 200dpi Fine 200 400dpi S Fin 300...

Page 221: ...icio II 16K ISO B5 Envelope 10 Envelope 9 Envelope 6 Envelope Monarch Envelope DL Envelope C5 Hagaki Cardstock Oufuku Hagaki Return postcard Youkei 4 Youkei 2 Select from standard sizes Original size...

Page 222: ...PDF A Off PDF A 1a PDF A 1b Select PDF A 1 format type and select the OK key TIFF Select the OK key to save or send a TIFF file The Image Quality settings will be the default values For the default s...

Page 223: ...Comp PDF file The image quality and PDF A settings will be the default settings For the default settings refer to the following Function Defaults page 8 28 Image Quality Comp Priority Standard Qualit...

Page 224: ...ey Edit Print Doc Off On Enter the password to edit the PDF file Select On and select the OK key Enter a password up to 256 characters and then select the OK key Enter the password again for confirmat...

Page 225: ...llowed Restricts printing of the PDF file Select from the following restrictions then select the OK key Not Allowed Disables the printing of PDF file Allowed Low Res Can print the PDF file only in low...

Page 226: ...by page and sends the files Value Off Each Page Select Each Page to set File Separation NOTE The subject can include up to 60 characters and the body can include up to 500 characters NOTE Click Securi...

Page 227: ...ISO B5 Envelope 10 Envelope 9 Envelope 6 Envelope Monarch Envelope DL Envelope C5 Hagaki Cardstock Oufuku Hagaki Return postcard Youkei 4 Youkei 2 Select from standard sizes Original Size and the siz...

Page 228: ...olution XPS Fit to Page Reduces or enlarges the image size to fit to the selected paper size when printing XPS file Value Off On Item Description Paper Size Fits the image size to the selected paper s...

Page 229: ...the following functions Counter You can view and export print scan and copy counter information Remote FAX You can send and view fax documents remotely through fax enabled printers in your workplace L...

Page 230: ...Job Status 7 2 Details of the Status Screens 7 4 Checking Job History 7 8 Sending the Log History 7 12 Job Operation 7 13 Pause and Resumption of Jobs 7 13 Canceling of Jobs 7 13 Device Communication...

Page 231: ...g job statuses are available Displaying Status Screens 1 Display the screen Status Job Cancel key key Print Job Status Send Job Status Store Job Status or Scheduled Job OK key Status Display Job statu...

Page 232: ...eturn to the previous screen NOTE If a FAX job is selected in Send Job Status then PriorityOverride is displayed Select PriorityOverride and select the OK key to suspend the current job and gives the...

Page 233: ...Copy Copy job FAX FAX reception Box Job from Document Box Printer Printer job Report Report List E mail E mail reception USB Data from removable memory User Name User Name for the executed job If user...

Page 234: ...ecuted job If user login administration is disabled appears Original Pages Number of original pages Color B W Color mode Color B W Full Color Black White Grayscale Mixed Destination The destination is...

Page 235: ...ame User Name for the executed job If user login administration is disabled appears Original Pages Number of original pages Color B W Color mode Color B W Full Color Black White Grayscale Mixed Sender...

Page 236: ...name in Job Name is displayed in a short form select Detail to see the complete job name Select the OK key to return to the previous screen Job Type FAX is displayed User Name User Name for the execut...

Page 237: ...ommand Center RX User Guide KYOCERA Net Viewer User Guide You can show the job log of all users or only your own job log Disp Status Log page 8 31 This setting can also be changed from Command Center...

Page 238: ...of each job The job has been completed An error has occurred The job has been canceled 3 Check the job history Select the key to view the next screen Select the key to return to the previous screen N...

Page 239: ...ect the OK key to return to the previous screen Job Type Copy Copy job FAX FAX reception Box Job from Document Box Printer Printer job Report Report List E mail E mail reception USB Data from removabl...

Page 240: ...Sending Job E mail Folder Sending Job Folder SMB FTP FAX Sending Job FAX Application Sending Job Application Multi Multi Sending User Name User Name for the executed job If user login administration i...

Page 241: ...eled Accepted Time Accepted Time of job End Time Completed time of job Job Name When the job name in Job Name is displayed in a short form select Detail to see the complete job name Select the OK key...

Page 242: ...he job to be canceled and Menu 2 key Cancel Job OK key Yes Send Job Status Store Job Status or Scheduled Job Status 1 Select the job to be canceled and Cancel 2 Select Yes NOTE If the Back key or othe...

Page 243: ...splayed Printer Statuses such as waiting and printing are displayed FAX The information such as sending receiving and dialing is displayed Select Line Off to cancel a fax in sending receiving USB Driv...

Page 244: ...nd paper on the message display 1 Display the screen Select the Status Job Cancel key 2 Check the status key Toner Status or Paper Status OK key The items you can check are described below Toner Statu...

Page 245: ...llowing topics System Menu 8 2 Operation Method 8 2 System Menu Settings 8 3 Report 8 5 System Network 8 7 User Job Account 8 18 User Property 8 19 Common Settings 8 19 Copy 8 32 Printer 8 33 Send 8 3...

Page 246: ...order to change settings that require administer privileges you must log in with administrator privileges The factory default login user name and login password are set as shown below Login User Name...

Page 247: ...r data stored in the SSD and machine s memory page 8 17 Restart Restart the machine without turning the power switch off Use this to deal with any unstable operation by the machine Same as the compute...

Page 248: ...olorToner Empty Select whether printing is prohibited or the Print in Black and White setting is used for printing once the color toner runs out page 8 31 Show PowerOffMsg Set the mode whether display...

Page 249: ...key key Report Print OK key Item Description Menu Map Prints Menu Map to check the settings of the machine Status Page Prints the status page allowing you to check the information including current se...

Page 250: ...ing sent Value Off On Dest Info 1 Select the Recipient Format for the send result report Value Dest or Name Dest and Name FAX RX Result FAX Operation Guide JobFinish Notice Attaches sent images to job...

Page 251: ...is available on the machine Item Description Wi Fi Direct Select whether to use Wi Fi Direct Value Off On Device Name Specify the device name NOTE Up to 32 characters can be entered This function is d...

Page 252: ...ss point NOTE The push button method supports only the WPS PIN Device Starts connection using the machine s PIN code Enter the PIN code into the access point The PIN code of the machine is automatical...

Page 253: ...to use Auto IP Value Off On IP Address Set the IP address Value NOTE When DHCP is set to On this item is displayed only and cannot be entered Subnet Mask Set the IP subnet mask Value NOTE When DHCP i...

Page 254: ...n is displayed when IPv6 Setting is set to On To enter Default Gateway set RA Stateless to Off RA Stateless Select whether to use RA Stateless Value Off On NOTE This function is displayed when IPv6 Se...

Page 255: ...ect 2 Set whether to enable this function for each network Value Disable Enable NOTE This function is displayed when NetBEUI is set to On Wi Fi 2 Wired Network SNMPv3 Select whether to communicate usi...

Page 256: ...e Off On Wi Fi Direct 2 Set whether to enable this function for each network Value Disable Enable NOTE This function is displayed when RAW Port is set to On Wi Fi 2 Wired Network LPD Selects whether t...

Page 257: ...i Fi Direct 2 Set whether to enable this function for each network Value Disable Enable NOTE This function is displayed when HTTPS is set to On Wi Fi 2 Wired Network LDAP Select whether to use LDAP Va...

Page 258: ...On NOTE Selecting Off will disable the functionality of WIA TWAIN and Network FAX driver Wi Fi Direct 2 Set whether to enable this function for each network Value Disable Enable NOTE This function is...

Page 259: ...Remote Operation 1 The default port number is 9062 Value Off On 1 to 32767 Port Number Wi Fi Direct 2 Wi Fi 2 Wired Network EnhncdVNC ov SSL This is set when starting up Command Center RX to use Remo...

Page 260: ...the network authentication and connecting to external address book Value Wi Fi Wired Network Item Description USB Host This locks and protects the USB host Value Unblock Block USB Device This locks an...

Page 261: ...is function set all interface block settings to Unblock I F Block Set page 8 xx Do not turn the power off while sanitizing the data If the power is turned off during data erasing erasing will be execu...

Page 262: ...tract with our company Please contact our sales office or our authorized dealer purchase source for the details Item Description Managed by Admin In the settings if you select this setting to No you c...

Page 263: ...key key Sound OK key Item Description Language Select the language displayed on the message display Item Description Default Screen Select the screen appearing right after start up default screen Valu...

Page 264: ...ments Inch X 1 97 to 14 02 in 0 01 increments Y 1 97 to 8 50 in 0 01 increments X Length Y Width Detect Orig DP Select whether to automatically detect originals of the document processor Auto Detect S...

Page 265: ...Length Y Width Cassette 1 2 Set Select the paper size and media type for cassettes 1 2 Cassette 1 2 Set Cassette 1 2 Settings page 8 23 MP Tray Set Select the paper size and media type for the multipu...

Page 266: ...combination of copying functions In such a case select Adj PrintDirect to adjust the print direction When paper orientation is not important select Speed Priority If Adj PrintDirect is selected load...

Page 267: ...Value Plain 60 to 105 g m2 Rough Recycled Preprinted 2 Bond Color Prepunched 2 Letterhead 2 Thick 106 to 163 g m2 High Quality Custom 1 to 8 2 To print on preprinted or prepunched paper or on letterh...

Page 268: ...g m to 220 g m Normal 3 91 g m to 105 g m Extra Heavy 1 Transparencies Media Type Default Media Type Default Plain Normal 2 Color Normal 2 Rough Normal 3 Prepunched Normal 2 Vellum Heavy 1 Letterhead...

Page 269: ...e tray Value Ignore The setting is ignored and the job is printed Display Error Message to cancel printing is displayed Item Description Date Time Set the date and time for the location where you use...

Page 270: ...in 5 second increments NOTE This function is displayed when Auto Panel Reset is set to On Sleep Level models except for Europe Select the Sleep level Set the Energy Saver mode to reduce power consump...

Page 271: ...rs 5 hours 6 hours 9 hours 12 hours 1 day 2 days 3 days 4 days 5 days 6 days 1 week Auto Err Clear If an error occurs during processing processing stops to wait for the next step to be taken by the us...

Page 272: ...om Select the enlarged reduced default when paper size sending size changed after the originals set Value 100 Auto Collate Set the defaults for Collate Value Off On Original Orientation Set the origin...

Page 273: ...efault for the 4 in 1 layout of Combine copies Value Right then Down Down then Right Left then Down Down then Left Border Line Set the default for the border line of Combine copies Value None Solid Li...

Page 274: ...racter Item Description RAM Disk Mode A RAM disk can be created and its size can be set Creating a RAM disk makes it possible to print from a Job Box Value RAM Disk Mode Off On RAM Disk Size The setti...

Page 275: ...e Show All My Jobs Only Hide All FAX Log Value Show All Hide All Item Description USB KeyboardType Select the type of USB keyboard that you want to use Value US Europe US France Germany Item Descripti...

Page 276: ...bleSize Select paper based on the current zoom and the size of the original Same as OrigSize Select paper that matches the size of the original regardless the zoom Auto Priority When a paper source of...

Page 277: ...h are similar in size as the same size when printing Value Off A4 and Letter are not regarded as the same in size On A4 and Letter are regarded as the same in size The machine will use whichever size...

Page 278: ...iven to that multipurpose tray in the paper feed Value Off The printer driver settings are followed Auto Feed If Auto is selected in the printer driver and there is paper in the multipurpose tray then...

Page 279: ...tion which regarded as a job termination if the print job could not be processed until the end due to your environment and the other reason Value EOJ The command recognized as a termination of the job...

Page 280: ...tinations after pressing the Start key when performing sending jobs Value Off On Check New Dest When adding new destination select whether to display the entry check screen to check the entered destin...

Page 281: ...valid for documents saved after the function is set Regardless of this function setting temporary documents are deleted when the power switch is turned off Polling Box FAX Operation Guide Select Key S...

Page 282: ...Destination OK key key Print List OK key FAX Operation Guide AddBookDefaults System Menu Counter key key Edit Destination OK key key AddBookDefaults OK key Item Description Edit Restriction Restrict...

Page 283: ...compensate for changes that occur over time due to variations in the ambient temperature and humidity This function can be used for fine adjustment of tone and color drift to print in the optimum col...

Page 284: ...rd Settings 9 19 PIN Login Settings 9 20 Using User Login Administration 9 21 Login Logout 9 21 Overview of Job Accounting 9 22 To Manage the Number of Sheets Used on Jobs Printed from a PC 9 22 Enabl...

Page 285: ...to manage the users that print on the machine from PCs Managing the Users to Use TWAIN for Scanning TWAIN driver settings on the PC are necessary to manage the users that use TWAIN for scanning Manag...

Page 286: ...lect the OK key then enter the domain name in 256 characters or less Select the OK key and the domain will be registered To edit or delete a domain name that has already been registered select that do...

Page 287: ...NOTE If the login user name and password are rejected check the following settings Network Authentication setting of the machine User property of the Authentication Server Date and time setting of the...

Page 288: ...in For this you need to login with administrator privileges The factory default login user name and login password are set as shown below Login User Name 2100 Login Password 2100 Item Descriptions Loc...

Page 289: ...ties are Machine Administrator User Name DeviceAdmin Login User Name 2100 Login Password 2100 Access Level Machine Administrator Administrator User Name Admin Login User Name Admin Login Password Admi...

Page 290: ...following Character Entry Method page 11 8 NOTE The same login user name cannot be registered Item Descriptions User Name 1 1 Mandatory at user registration Enter the name displayed on the user list u...

Page 291: ...property 3 OK key Yes The user information is changed Deleting a user 1 Select the user whose properties you wish to delete and Menu 2 key Delete OK key Yes The selected user will be deleted NOTE To c...

Page 292: ...Adding a User Local User List page 9 6 Item Description User Name Changes the name shown on the user list Up to 32 characters can be entered Login User Name Displays the login user name that is enter...

Page 293: ...se the same User login for every print job If this option is selected the user does not have to type the name and password for each print job Prompt for name A screen for entering the user name and pa...

Page 294: ...Click the search box in the taskbar and type TWAIN Driver Setting in there Select TWAIN Driver Setting in the search list TWAIN Driver screen is displayed 2 Select the machine and click Edit 2 Config...

Page 295: ...n the Windows and then select Windows System Control Panel Click the search box in the Control Panel and type Scanner in there Select View scanners and cameras in the search list The Scanners and Came...

Page 296: ...d click the Printer properties menu of the printer driver 3 Click FAX TX Setting on the Printing Preferences window 2 Configure the settings 1 Select User Login on the Authentication tab 2 Set the Use...

Page 297: ...Netwk Authentic must be selected for the authentication method in Enabling User Login Administration Select On for LDAP in Protocol Settings Enabling User Login Administration page 9 3 ProtocolSettin...

Page 298: ...Administration must be enabled in Enabling User Login Administration Enabling User Login Administration page 9 3 NOTE If the login user name entry screen appears during operations enter a login user n...

Page 299: ...e print function of the printer is prohibited Print Restrict Printer Full Color Select whether or not use of the print function color of the printer is prohibited Print Restrict Copy Select whether or...

Page 300: ...nctions that are restricted Select Edit Change or Detail on each item enter the information and then select the OK key Select the key to view the next screen Select the key to return to the previous s...

Page 301: ...ork user property from the LDAP server Netwk Authentic must be selected for the authentication method in Enabling User Login Administration Select On for LDAP in ProtocolSettings Enabling User Login A...

Page 302: ...a login user name and password and select Login For this you need to login with administrator privileges The factory default login user name and login password are set as shown below Login User Name 2...

Page 303: ...s setting is only displayed when Network Authentication must be selected for the authentication method and the server type is set to Ext in Network Authentication Enabling User Login Administration pa...

Page 304: ...ogout If user login administration is enabled the login user name and login password entry screen appears each time you use this machine Login If the login user name entry screen appears during operat...

Page 305: ...age 9 31 Managing the Scan Job Account by Using WIA To manage the scan job account by using WIA you need to configure the WIA driver settings on the computer connected to the machine Job Accounting fo...

Page 306: ...ser name entry screen appears during operations enter a login user name and password and select Login For this you need to login with administrator privileges The factory default login user name and l...

Page 307: ...Account Set OK key 2 Configure the settings key AccountingAccess OK key key Local or Network OK key NOTE If the login user name entry screen appears during operations enter a login user name and passw...

Page 308: ...e operation select key Exit OK key Item Descriptions Account Name Enter the account name up to 32 characters Account ID Enter the account ID as many as eight digits between 0 and 99999999 Restriction...

Page 309: ...count ID and set the use restrictions To change the details select Edit enter the information and then select the OK key Select the key to view the next screen Select the key to return to the previous...

Page 310: ...Total Limits the number of sheets used for printing Print Restrict Printer Full Color Limits the number of pages used for color printing Scan Restrict Others Limits the number of sheets scanned exclud...

Page 311: ...f the Machine to change account information 3 OK key Yes The account information is changed NOTE If the login user name entry screen appears during operations enter a login user name and password and...

Page 312: ...st OK key 2 Delete an account 1 Select the account you want to delete and Menu 2 key Delete OK key Yes The account is deleted NOTE If the login user name entry screen appears during operations enter a...

Page 313: ...he PC Instructions are based on interface elements as they appear in Windows 10 1 Display the screen 1 Click Start button on the Windows and then select Windows System Control Panel and View devices a...

Page 314: ...n printing the Windows user name is searched in the Account IDs and printing is possible if the name is registered If the Account ID is not registered the screen for entering the Account ID will appea...

Page 315: ...s as they appear in Windows 10 1 Display the screen 1 Click Start button on the Windows and then select Windows System Control Panel Click the search box in the Control Panel and type Scanner in there...

Page 316: ...puter Instructions are based on interface elements as they appear in Windows 10 1 Display the screen 1 Click Start button on the Windows and then select Windows System Control Panel and View devices a...

Page 317: ...used to specify an account ID to use the same Account ID for every FAX job If this option is selected the user does not have to enter the Account ID for each FAX job Prompt for Account ID A screen for...

Page 318: ...the Machine page 9 27 Print Accounting Report page 9 37 Counter Limit When you add a new account you can change the default restrictions on the number of sheets used You can set any number from 1 to 9...

Page 319: ...r of pages used Copy Print Pages Displays the number of pages copied and printed and the total number of pages used Select the key to view the next screen Select the key to return to the previous scre...

Page 320: ...1 Prepare paper Check that A4 or Letter paper is loaded in the cassette 2 Display the screen 1 System Menu Counter key key User Job Account OK key 2 key Job Account Set OK key 3 Print the report key...

Page 321: ...d the screen to enter the login user name and password appears Enter a login user name and password to login If the user has already registered the account information the account ID entry would be sk...

Page 322: ...ows 1 Display the screen 1 System Menu Counter key key User Job Account OK key 2 key Unknown User key OK key 2 Configure the settings key Unknown ID Job OK key key Reject or Permit OK key Item Descrip...

Page 323: ...and select Login For this you need to login with administrator privileges The factory default login user name and login password are set as shown below Login User Name 2100 Login Password 2100 Item De...

Page 324: ...Printed Image Trouble 10 12 Color printing trouble 10 15 Remote Operation 10 16 Responding to Messages 10 19 Adjustment Maintenance 10 30 Overview of Adjustment Maintenance 10 30 ColorCalibration 10 3...

Page 325: ...ure optimum printing quality Cleaning Glass Platen Wipe the inside of the document processor and the glass platen with a soft cloth dampened with alcohol or mild detergent CAUTION For safety always un...

Page 326: ...s When using the document processor clean the slit glass surface and the reading guide with the dry cloth IMPORTANT Do not use water soap or solvents for cleaning NOTE Dirt on the slit glass or the re...

Page 327: ...ced Print problems such as soiling of the reverse side of printed pages may occur if the paper transfer unit becomes dirty Wipe away the paper dust on the registration roller and the paper ramp using...

Page 328: ...here are 2 types of toner containers with different amounts of toner Replacing the Toner Container Installation procedures of the toner container is same for every color Here we ll explain the yellow...

Page 329: ...10 6 Troubleshooting Regular Maintenance 2 Unlock the toner container 3 Remove the toner container 4 Put used toner containers into the plastic waste bag...

Page 330: ...10 7 Troubleshooting Regular Maintenance 5 Remove the new toner container from the box 6 Shake the toner container 7 Install the toner container IMPORTANT Do not touch the points shown below 5 6 5 6...

Page 331: ...cover does not close check that the new toner container is installed correctly Return the exhausted toner container to your dealer or service representative The collected toner container will be recyc...

Page 332: ...there a message on the screen Determine the appropriate response to the message and respond accordingly page 10 19 Is the machine in Sleep mode Select the Energy Saver key page 2 29 Blank sheets are e...

Page 333: ...in Plug the power cable into an AC outlet Is the machine powered on Turn on the power switch page 2 10 Are the USB cable and network cable connected Connect the correct USB cable and network cable sec...

Page 334: ...3 15 Do the time settings for the equipment domain server and data destination computer differ Set the equipment domain server and data destination computer to the same time Is the screen displaying S...

Page 335: ...even though the background of the scanned original is white Have you changed the density Select appropriate density level page 6 17 page 8 39 Select the System Menu Counter key Adjust Maint Service S...

Page 336: ...etting to the original value Select the System Menu Counter key Adjust Maint Service Setting DEV CLN and then select Yes Printed images are fuzzy Is the machine being used in conditions of very humid...

Page 337: ...the System Menu Counter key Adjust Maint Service Setting LaserScanner Cln and then select Yes Dirt on the top edge or back of the paper Is the interior of the machine dirty Clean the interior of the m...

Page 338: ...mptom Checkpoints Corrective Actions Reference Page Skewed color printout Run ColorCalibration page 10 30 Run Color Regist page 10 31 Colors appear different than you anticipated Did you choose approp...

Page 339: ...splay the screen System Menu Counter key key System Network OK key key Network Setting OK key key ProtocolSetting OK key 2 Set EnhancedVNC ov SSL to On ProtocolSettings page 8 11 3 Configure settings...

Page 340: ...Enter the following format separated by a colon to start up the remote operation IP address port number Disconnecting Remote Operation 1 Display the screen Status Job Cancel key key Rmt Op Status OK k...

Page 341: ...10 18 Troubleshooting Troubleshooting 2 key Discon Yes...

Page 342: ...rective Actions Reference Page Calibrating The machine is under the adjustment to maintain its quality Please wait Cannot connect to Authentication Server Check the connection with the server Check th...

Page 343: ...y Close cover Is there any cover which is open Close the cover indicated on the screen Are the toner containers installed correctly Is a toner container out of place Make sure all 4 colors of toner co...

Page 344: ...ob is canceled Select the OK key Inner tray is full of paper Remove the paper Remove paper from the inner tray Select Continue to resume printing Select Cancel to cancel the job Insufficient memory Ca...

Page 345: ...rint on the paper in the currently selected paper source page 3 2 Load paper in MP tray Displayed alternately Set selected size paper and press OK Is the paper of the selected size loaded in the multi...

Page 346: ...30 1 When Auto Error Clear is set to On processing resumes automatically after a set amount of time elapses For details on Auto Error Clear refer to the following Auto Err Clear page 8 27 Message Che...

Page 347: ...ing Select Cancel to cancel the job Message Checkpoints Corrective Actions Reference Page RAM disk error Press OK An error has occurred on the RAM disk Job is canceled Select the OK key The possible e...

Page 348: ...or 1 1 When Auto Error Clear is set to On processing resumes automatically after a set amount of time elapses For details on Auto Error Clear refer to the following Auto Err Clear page 8 27 An error h...

Page 349: ...rror Job is canceled Is writing to a removable memory prohibited An error occurred in the removable memory The job stopped Select the OK key The error code is as follows 01 Connect a removable memory...

Page 350: ...ommand Center RX SMTP login user name and login password POP3 login user name and login password E mail size limit page 2 54 Failed to send via FTP Check the FTP settings Login user name and login pas...

Page 351: ...able Refer to the Command Center RX User Guide Failed to send via FTP Check the following of the FTP server Is FTPS available Is the encryption available 2101 Failed to send via SMB Check the network...

Page 352: ...roperly 2204 Failed to send the e mail Check the e mail size limit of the SMTP settings on the Command Center RX page 2 54 3101 Failed to send the e mail Check the authentication methods of both the s...

Page 353: ...ntained this color calibration operation is carried out automatically each time the power to the machine is turned on If color tone does not improve or color drift does not improve after executing thi...

Page 354: ...olor drift remains perform color registration By performing color registration without performing ColorCalibration the color drift will be resolved once however it may cause the serious color drift la...

Page 355: ...mple 4 Perform the color registration 1 As shown in the illustration place the printed side down on the platen with the edge with the arrows toward the back 2 Select OK to scan the chart When scanning...

Page 356: ...rn to the advanced menu for color printing position correction IMPORTANT Load the paper with the print side facing up After removing new paper from its packaging fan the paper before loading it in the...

Page 357: ...lues from V 3 center 2 Select the or key to change the H 1 to H 5 and V 3 items select the or key to enter the values read from the chart and select the OK key Magenta correction is performed After a...

Page 358: ...ine will warm up again and the error message will be cleared The machine resumes with the page that was printing when the jam occurred 1 Shows the location of a paper jam 2 Displays the Help screen NO...

Page 359: ...tte 1 out toward you until it stops 2 Remove any jammed paper 3 Push Cassette 1 back in CAUTION Do not reuse jammed papers If the paper tears during removal be sure to remove any loose scraps of paper...

Page 360: ...te 2 1 Open Rear Cover 2 2 Remove any jammed paper 3 Push Rear Cover 2 CAUTION Do not reuse jammed papers If the paper tears during removal be sure to remove any loose scraps of paper from inside the...

Page 361: ...10 38 Troubleshooting Clearing Paper Jams 4 Pull Cassette 2 out toward you until it stops 5 Remove any jammed paper 6 Push Cassette 2 back in...

Page 362: ...Tray 1 Remove any jammed paper 2 Remove all the paper 3 Push the multipurpose tray CAUTION Do not reuse jammed papers If the paper tears during removal be sure to remove any loose scraps of paper from...

Page 363: ...10 40 Troubleshooting Clearing Paper Jams 4 Pull Cassette 1 out toward you until it stops 5 Open Feed Cover 6 Remove any jammed paper 7 Push Feed Cover back in...

Page 364: ...10 41 Troubleshooting Clearing Paper Jams 8 Push Cassette 1 back in 9 Open the multipurpose tray 10Reload the paper...

Page 365: ...ams Remove any jammed paper in Rear Cover 1 1 Open Rear Cover 1 2 Remove any jammed paper 3 Open the cover A CAUTION The fixing unit is extremely hot Take sufficient care when working in this area as...

Page 366: ...10 43 Troubleshooting Clearing Paper Jams 4 Remove any jammed paper 5 Open the feed cover B 6 Remove any jammed paper 7 Open the duplex unit C B C...

Page 367: ...10 44 Troubleshooting Clearing Paper Jams 8 Remove any jammed paper 9 Push Rear Cover 1...

Page 368: ...he Original Table 2 Open the front cover and remove any jammed paper 3 Remove originals inside the document processor CAUTION Do not reuse jammed papers If the paper tears during removal be sure to re...

Page 369: ...10 46 Troubleshooting Clearing Paper Jams 4 Push the cover...

Page 370: ...8 Selecting Type of Characters 11 9 Characters That Can be Entered Using the Numeric Keys 11 9 Entering Symbols 11 10 Entering Characters 11 10 Entering Using the Character Selection Screen 11 12 Pape...

Page 371: ...t Optional Equipment Overview of Optional Equipment The following optional equipment is available for the machine 1 Expansion Memory Software option 4 UG 33 5 SD SDHC Memory Card 6 USB Keyboard 3 Card...

Page 372: ...wrist strap if possible when you install the memory modules If you do not have a wristband touch a metal object to discharge static electricity before inserting the memory Installing the Memory Module...

Page 373: ...SDHC Memory Card An SD SDHC memory card is useful for storing fonts macros and overlays The machine is equipped with a slot for an SDHC memory card with a maximum size of 32 GB and an SD memory card...

Page 374: ...yboard USB Keyboard A USB keyboard can be used to enter information into the text fields on the operation panel A special mount is also available to install the keyboard on the machine Please contact...

Page 375: ...hinPrint Option 1 1 This can be used on a trial basis for a limited time NOTE Restrictions such as the number of times the application can be used during the trial period differ depending on the appli...

Page 376: ...the next screen Select the key to return to the previous screen The table below lists the item you can view Extend the trial period key Date of Trial Extend Yes The trial period is extended NOTE If t...

Page 377: ...sition of the cursor 3 Right Select key Select to select the type of characters you want to enter When Text is displayed 4 OK key Select to finalize entry and return to the screen before the entry To...

Page 378: ...key changes the character in the order from left to right _ 1 Repeats from the first character on the left 1 During number entry a b c A B C 2 Repeats from the first character on the left 2 During nu...

Page 379: ...rom the first character on the left 9 During number entry _ space 0 Repeats from the first character on the left 0 During number entry Select to change the character in the cursor position between upp...

Page 380: ...he key Displays the symbol list 5 Select the or key to move the cursor and select 6 Select the OK key is entered 7 Select the 3 key four times D is entered 8 Select the key Account Name Text ABC R Acc...

Page 381: ...he following Function Defaults page 8 28 1 Select the or key to move the cursor and select the character to be entered 2 Select the OK key The selected character is entered You can go back one charact...

Page 382: ...Poor quality paper may result in unsatisfactory output Basic Paper Specifications that can be Used with This Machine The following table lists the specifications of paper that is supported with this...

Page 383: ...grade of paper Paper that is too heavy or too light may be supplied incorrectly or cause paper jams which may cause excessive wear of the machine Mixed paper weight i e thickness may cause several she...

Page 384: ...ss Paper whiteness affects print contrast Use whiter paper for sharper brighter copies Quality Machine problems may occur if sheet sizes are not uniform or if corners are not square edges are rough sh...

Page 385: ...velope Monarch 3 7 8 7 1 2 Envelope 10 4 1 8 9 1 2 Envelope DL 110 220 mm Envelope C5 162 229 mm Envelope 9 3 7 8 8 7 8 Envelope 6 3 4 3 5 8 6 1 2 Statement Youkei 4 105 235 mm Youkei 2 114 162 mm Cus...

Page 386: ...ial paper Thus special paper is more likely than regular paper to cause printing problems Before purchasing special paper in volume try testing a sample to ensure the print quality is satisfactory Gen...

Page 387: ...by the force applied in the machine The carrier sheet bears the top sheet until the label is used This composition of labels may cause more problems The label surface must be covered completely with...

Page 388: ...m Keep the following points in mind Do not use envelopes with exposed adhesive In addition do not use the type of envelope in which the adhesive is exposed after the top layer is peeled off Serious da...

Page 389: ...a coating that provides higher printing quality than plain paper Coated paper is used for particularly high quality printing The surface of high quality or medium quality paper is coated with special...

Page 390: ...Oficio II Folio 216 340 mm 16K B5 ISO Custom 105 148 mm to 216 356 mm Multipurpose Tray A4 A5 R A5 A6 B5 B6 Folio 216 340 mm Letter Legal Statement R Statement Executive Oficio II 16K B5 ISO Envelope...

Page 391: ...andby If all network ports are connected 2 2W Options Optional Equipment page 11 2 Item Description Copy Speed Black and White Copying Full Color Copying A4 A5 21 sheets min 21 sheets min Letter 22 sh...

Page 392: ...x Page Description Language PRESCRIBE Emulations PCL6 PCL XL PCL5c KPDL3 PostScript3 compatible PDF XPS OpenXPS Item Description Resolution 300 300 dpi 200 200 dpi 200 100 dpi 600 600 dpi 400 400 dpi...

Page 393: ...ment processor Item Description Paper Supply Method Friction retard feeder No Sheets 250 80 g m2 1 cassette Paper Size A4 A5 R A5 B5 A6 B6 Letter Legal Folio 216 340 mm Statement R Executive Oficio II...

Page 394: ...nown as zero configuration networking is a service that automatically detects computers devices and services on an IP network Bonjour because an industry standard IP protocol is used allows devices to...

Page 395: ...on the Internet Grayscale A computer color expression Displayed images of this sort are typically composed of shades of gray varying from black at the weakest intensity to white at the strongest with...

Page 396: ...cify the font size in steps of 0 25 points up to 999 75 points PDF A This is ISO 19005 1 Document management Electronic document file format for long term preservation Part 1 Use of PDF PDF A and is a...

Page 397: ...hen an IP address is written the length of the network address is indicated by the prefix length after a forward slash For example 24 in the address 133 210 2 0 24 In this way 133 210 2 0 24 denotes t...

Page 398: ...as a part of Windows functions and improves ease of operation so that you import images directly to My Computer without using any application WPS Wi Fi Protected Setup WPS is a network security standa...

Page 399: ...Calibration 8 39 Combine 6 13 Command Center RX 2 47 Common Settings 8 19 ColorToner Empty 8 31 Date Setting 8 25 Default Screen 8 19 Display Brightness 8 20 Display Status Log 8 31 Error Handling 8 2...

Page 400: ...Body 6 28 Default 8 28 Emulation 11 26 Selection 8 33 Encrypted PDF 6 29 Energy Saver Recovery Level 8 32 Energy Saving Control Function 1 14 Energy Star ENERGY STAR Program 1 14 Enhanced WSD 11 26 P...

Page 401: ...x 4 11 Proof and Hold Box 4 15 Quick Copy Box 4 14 Quick Copy Jobs 8 37 Specifying the Job Box from a Computer and Storing the Job 4 10 Stored Job Box 4 12 Job Finish Notice 6 18 JPEG TIFF Print 6 30...

Page 402: ...11 13 Weight 8 24 Paper Feed Mode 8 34 Paper Feeder 500 sheet 11 4 Paper Jams 10 35 Cassette 1 10 36 Cassette 2 10 36 Document Processor 10 45 Jam Location Indicators 10 35 Multipurpose Tray 10 39 Re...

Page 403: ...end Box Density 8 39 Sending 5 14 Preparation for Sending a Document to a PC 3 10 Sending Size 6 23 Service Setting 8 39 Setting Date and Time 2 17 Sharpness 6 20 Skip Blank Page 6 22 Sleep 2 28 Sleep...

Page 404: ...e 2 7 USB Interface Connector 2 4 USB Keyboard 11 5 USB Keyboard Type 8 31 USB Port 2 2 User Login Administration 9 2 Adding a User 9 6 Changing User Properties 9 8 Enabling User Login Administration...

Page 405: ......

Page 406: ...akapuna Auckland New Zealand Phone 64 9 415 4517 Fax 64 9 415 4597 KYOCERA Document Solutions Asia Limited Unit 3 5 16 F Mita Centre 552 566 Castle Peak Road Tsuen Wan New Territories Hong Kong Phone...

Page 407: ...6 Mecidiyek y 34394 i li stanbul Turkey Phone 90 212 356 7000 Fax 90 212 356 6725 is a trademark of KYOCERA Corporation KYOCERA Document Solutions Deutschland GmbH Otto Hahn Strasse 12 40670 Meerbusch...

Page 408: ...2022 1 C0AKDENEN100 is a trademark of KYOCERA Corporation 2022 KYOCERA Document Solutions Inc...

Reviews: