


TRITON Training Guide
36
Tip:
Controlling the effects in real-time is a great feature! And remember - the changes you make in real-
time can also be recorded to TRITON's internal - or an external sequencer!
More examples of Dynamic Modulation:
8. Press the
EXIT
key, then select Program
B005 Fingertips Guitar
(BANK B >5 >ENTER).
9. Press the
MENU
key, then press
P8: Edit - Insert Effect
.
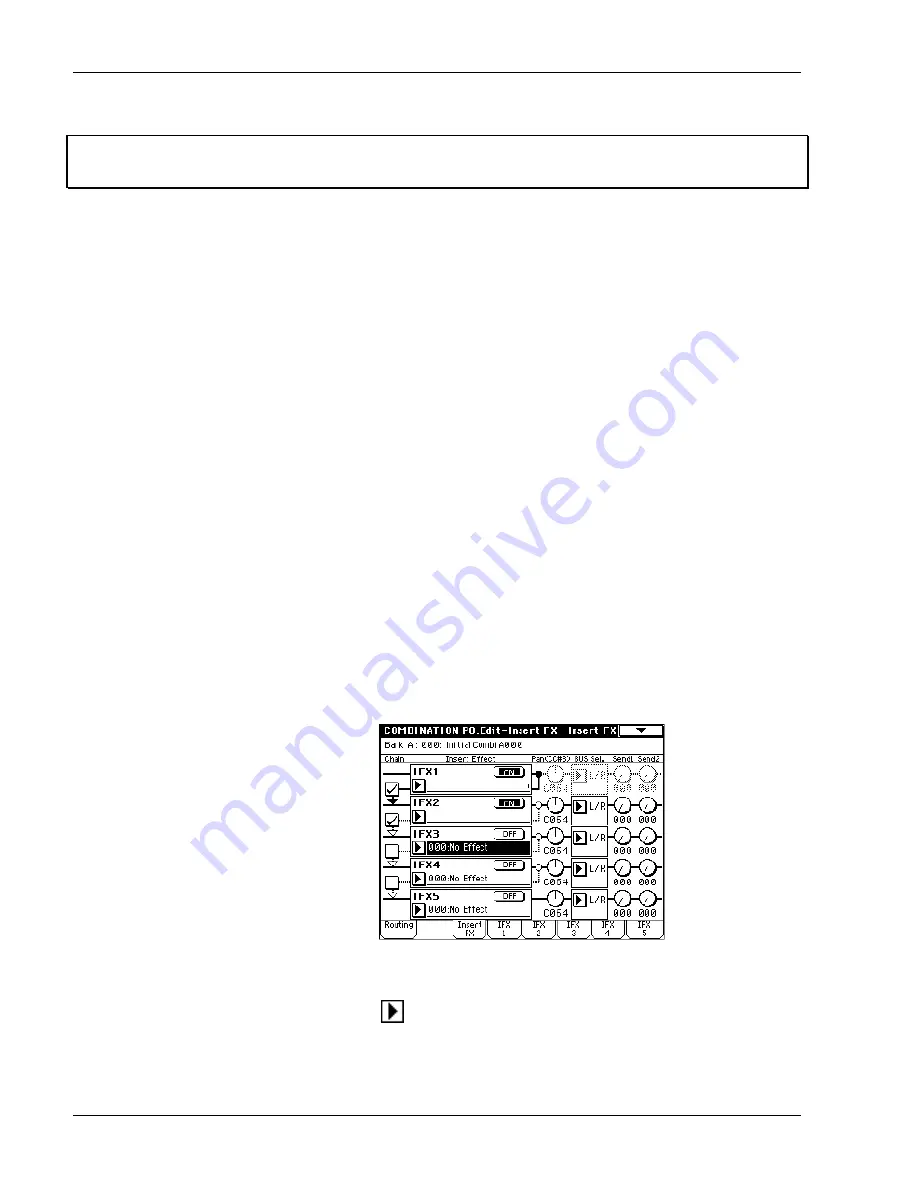
10. Press the
Routing
tab to view the insert effect setup and BUS select - note that all oscillators are bussed
to IFX1 (BUS Select setting and arrow to IFX1). Also note the insert effect names and chaining from
IFX1 >2 >3 (arrows: upper-right).
11. Press the
IFX2
tab to view the settings for the
Stereo Phaser
.
12. Locate the
Src:
setting for the
Wet/Dry
mix of this effect - set to the Joystick -Y (
JS-Y
) at an amount
(
Amt
) of
+53
. While you
play
, move the joystick in the
-Y
(towards you) position to hear the Stereo
Phaser wet / dry mix being controlled.
13. Press the
IFX3
tab, and view the
Wet/Dry Src:
JS-Y
- note that the Joystick -Y controls the wet/dry mix
for IFX2 and IFX3.
Play
and use
JS-Y
to hear both insert effects being Dynamically - controlled.
14. Press to highlight
Band 7
(or anywhere on the
16kHz
line to it's right). Rotate the
DIAL
to the right to
increase the
16kHz
gain value of
+13.0
. Now
play
again, and use
JS-Y
- you'll hear more of the stereo
graphic EQ effect being applied, especially the 16kHz frequency.
Apply a new Insert effect:
15. Press the
Insert FX
tab, then press the
OFF
toggle button in the
IFX4
box - it will change to
ON
.
16. Press the
Chain
checkbox to the left of
IFX3
, to chain IFX3 to IFX4.
17.
In the
IFX4
box on this page, press the
popup button to the left of
000: No Effect
. A center popup
menu lists 16 available effects from the Filter / Dynamic (noted in the display, upper -right) category.


