16
back speed will change in sync with the BPM. (
☞
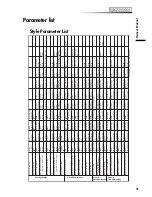
p.31: Style parameter list, p.19: Style edit)
3 Select the clip that you want to play. Change the BPM. The clip playback speed will change
according to the BPM.
Synchronized playback using an audio trigger
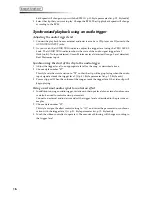
Adjusting the audio trigger level
1 Connect the playback from as external audio device such as a CD player or a DJ mixer to the
AUDIO TRIG INPUT jacks.
2 As you watch the AUDIO TRIG indicator, adjust the trigger level using the TRIG LEVEL
knob. The AUDIO TRIG indicator shows the state of the audio signal trigger level.
Dark (unlit): No input detected, Green: Minimum level detected, Orange: Level detected,
Red: Maximum input
Synchronizing the start of the clip to the audio trigger
1 Adjust the trigger level to an appropriate level for the song, as described above.
2 Choose style number “87”.
This style sets the start variation to “T3” so that the clip will begin playing when the audio
input signal exceeds the trigger level. (
☞
p.31: Style parameter list, p.19: Style edit)
3 Press a clip pad. When the volume of the song exceeds the trigger level, the video clip will
begin playing.
Using an external audio signal to control an effect
1 In addition to using an audio trigger, variations in the input level of an external audio source
can also be used to control certain parameters.
Connect an external audio device and set the trigger level as described in the previous ex-
amples.
2 Choose style number “02”.
This style assigns the effect control setting to “A1,” and varies the parameter in synchroni-
zation with the trigger level. (
☞
p.31: Style parameter list, p.19: Style edit)
3 Touch the ribbon controller to operate it. The amount of blurring will change according to
the trigger level.
Summary of Contents for Kaptivator KTV1
Page 1: ...OWNER S MANUAL ...

