background image

10

4. Basic concepts and operation

Concepts

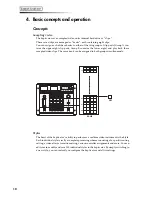
Sampling video

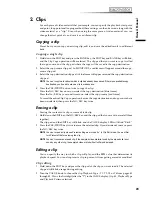
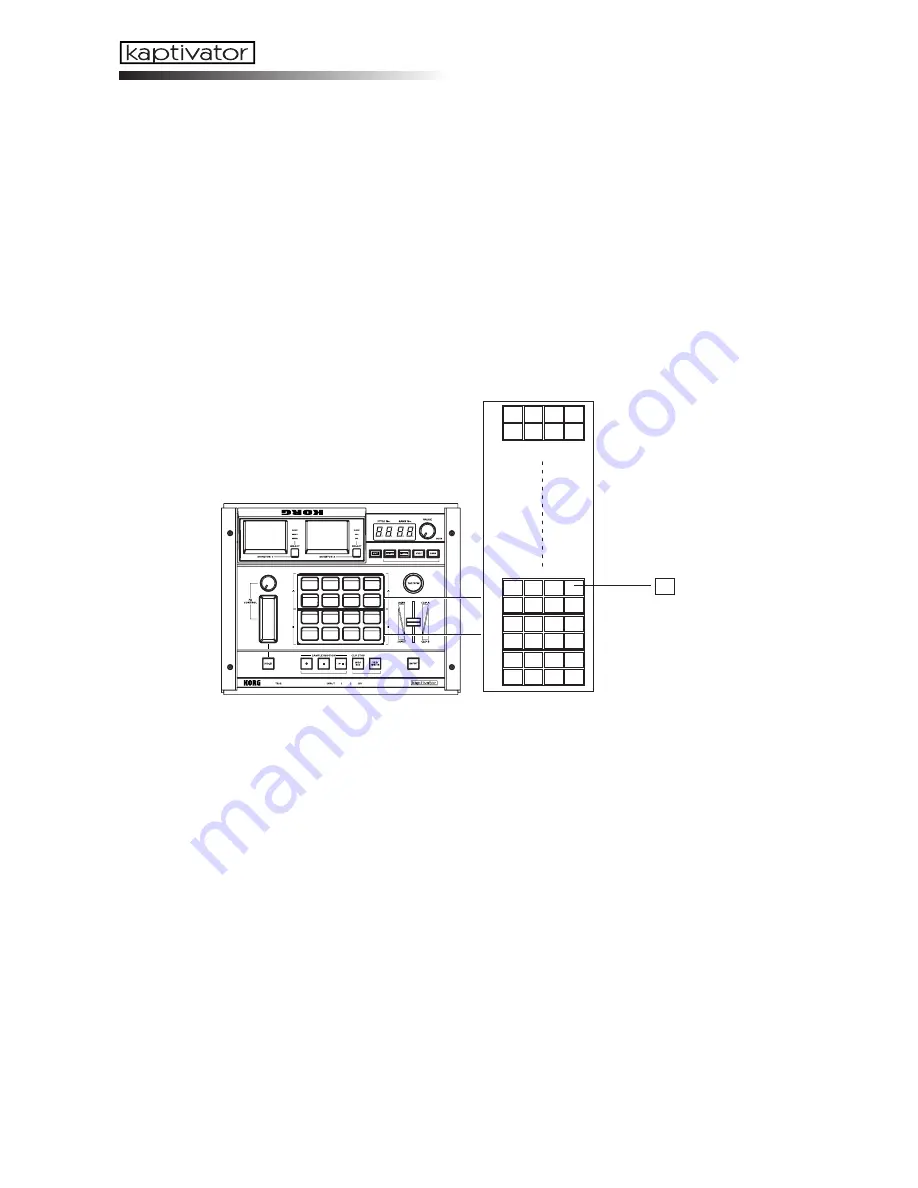
The kaptivator saves sampled video on its internal hard drive as “clips.”
These saved clips are managed as “banks”, each containing eight clips.
You can assign each of these banks to either of the two groups of clip pads (Group A con-
tains the upper eight clip pads; Group B contains the lower eight) and play back these
sampled video clips. The same bank can be assigned to both groups simultaneously.

BANK

CLIP

02

01

00

99

Styles

The heart of the kaptivator’s ability to perform as a realtime video instrument is the Style.
Each individual style is really a complete processing scheme consisting of a specific routing
setting; a video effect; a transition setting; various controller assignments and more.  You can
edit, create, modify and save 100 individual styles in the kaptivator. By simply switching to
a new style, you can instantly re-configure the kaptivator and all its settings.

Summary of Contents for Kaptivator KTV1

Page 1: ...OWNER S MANUAL ...

Page 2: ...y with the limits for a Class B digital device pursuant to Part 15 of the FCC Rules These limits are designed to provide reasonable protection against harmful interference in a residential installation This equipment generates uses and can radiate radio frequency energy and if not installed and used in accordance with the instructions may cause harmful interference to radio communications However ...

Page 3: ...rn the power on off This may damage the kaptivator This device begins to access the hard disk immediately after the power is turned on Never turn off the power while the BUSY indicator is lit or blinking Doing so can cause all or part of the data on hard disk to be lost or may cause malfunctions such as hard disk damage If the hard disk has been damaged due to incorrect operation power failure or ...

Page 4: ...g Motion Sequences 17 Customizing a Style Style Editing 19 1 Editing a style 19 Creating a clip Sampling and Quick Editing 21 1 Sampling 21 2 Clips 23 3 Banks 25 Utility mode 26 1 Operations in Utility mode 26 2 Utility menu items and procedures 27 Parameter list 31 Style Parameter List 31 Routing list 34 Transition list 38 Effect list 39 Clip parameter list 40 Appendix 44 Tips for working with th...

Page 5: ...ith minimal compression allows smooth video effects such as speed change reverse random playback or scratching during playback The rotary knob ribbon and slider provide performance control over mixing effects and play back speed Any one of the fifteen video effects can be applied to any video source clip or mix One hundred programmable styles can be saved and quickly recalled each one memorizes sp...

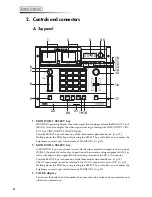
Page 6: ...lance of MONITOR 1 p 12 2 MONITOR 2 SELECT key In MONITOR 2 you can choose to view all the clips currently assigned to the clip pads BANK the playback status of each position of the current routing assignment ALL as well as the digital video signal DV that is being received at the DV I O connector Press the SELECT key to choose one of the three modes described above p 12 The DV input image cannot ...

Page 7: ... you to assign the knob to a variety of different functions 8 FX CONTROL ribbon controller The ribbon controller is mainly used to provide realtime control of the effects Two param eters can be assigned to the ribbon touching the ribbon regardless of position can be as signed to one parameter position on the ribbon to another The parameters being adjusted by the ribbon controller will depend on th...

Page 8: ...ecting the Manual mode where the tempo is set by the kaptivator s internal clock to tap in a tempo in the Tap Tempo mode or to arm the kaptivator to detect an external audio tempo source in the Auto BPM mode This key will flash red on each beat and flash green on the first beat of the measure every four beats While the tempo is being edited this key will flash orange until the new tempo is entered...

Page 9: ...o signal that is being re ceived via the rear panel AUDIO TRIG INPUT jacks 2 PHONES volume knob This adjusts the volume level of the headphone output 3 TRIG LEVEL knob This knob adjusts the audio trigger effect control auto BPM level To set a reliable or stable trigger level you can adjust this knob while watching the AUDIO TRIG indicator 4 DV I O connector The DV connector of your DV camera or th...

Page 10: ...ut of the kaptivator after all the internal process ing mixing etc This is the same image that is displayed when you ve set the MONITOR 1 SELECT setting to MAIN VIDEO Transmits a composite video signal S VIDEO Transmits an S video signal 5 PAL NTSC switch This switches the video signal format NTSC or PAL You must turn off the power before changing the setting of this switch 6 MIDI IN MIDI OUT conn...

Page 11: ... The kaptivator supports both the NTSC and PAL video signal formats NTSC is the format used in the United States and Japan while PAL is the format used in the United Kingdom and Europe Set the NTSC PAL switch according to the video signal format of the equipment you re us ing The kaptivator will not operate correctly if the video signal format is incorrect Also the kaptivator will not operate corr...

Page 12: ... these sampled video clips The same bank can be assigned to both groups simultaneously BANK CLIP 02 01 00 99 Styles The heart of the kaptivator s ability to perform as a realtime video instrument is the Style Each individual style is really a complete processing scheme consisting of a specific routing setting a video effect a transition setting various controller assignments and more You can edit ...

Page 13: ... the lower eight Each bank of clips can be assigned to either group or both The settings saved in a style will apply to the entire group Routing The kaptivator is extremely flexible in that many of the elements of a style can be arranged into different routing scenarios For example a routing setting can specify the number of video sources Group A Group B DV Camera in etc which sources will be mixe...

Page 14: ... the video material as sociated with a style inputs output transition etc or the DV input Changing the content of the monitors Pressing the MONITOR SELECT key will change the information being displayed in the monitor associated with that key The content of the monitors can also be set to change automatically when you select a style p 30 Style Parameter List Monitor select setting Adjusting the mo...

Page 15: ...NK indicator light is lit 4 As you watch MONITOR 2 rotate the VALUE knob to select a different bank Selecting a style 1 If you want to switch styles press the STYLE key to enter Style mode Each time you press this key you will alternate between selecting a style the STYLE key will blink green and changing the effect assigned to the current style the STYLE key will blink orange 2 With the STYLE key...

Page 16: ...nection or wrong signal format Blinking slowly Copy protected signal was detected DV Input Lit red Currently selected DV set to input Blinking rapidly No connection Blinking slowly Copy protected signal was detected Green Indicates that the DV connector is set to Out dark unlit Input is off black screen or Main Out Capture is selected Mixing an external video source with a clip 1 Press the STYLE k...

Page 17: ... TAP BPM key for three seconds or longer and the kaptivator will automatically detect the BPM of the song You may have to adjust the TRIG LEVELknob to get the best results While the BPM is being detected the decimal point will blink and the TAP BPM key will flash orange NOTE The BPM cannot be detected if the music does not have a clear sense of beat 2 Press the YES WRITE key to confirm the setting...

Page 18: ...an appropriate level for the song as described above 2 Choose style number 87 This style sets the start variation to T3 so that the clip will begin playing when the audio input signal exceeds the trigger level p 31 Style parameter list p 19 Style edit 3 Press a clip pad When the volume of the song exceeds the trigger level the video clip will begin playing Using an external audio signal to control...

Page 19: ...quence mode unless the motion sequence is stopped Looping the playback of a motion sequence 1 When the MOTION key is blinking hold down the EDIT key and press the MOTION key the EDIT key and MOTION key will blink 2 Use the VALUE knob to make the VALUE display read LOOP Choose ONCE if you don t want the motion sequence to loop Play repeatedly Play once 3 Press the YES WRITE key twice to confirm the...

Page 20: ...ode 2 Use the VALUE knob to select the motion sequence number shown in the VALUE dis play that you want to erase and then press the YES WRITE key 3 Hold down the EDIT key the NO ESC key and the MOTION key all simultaneously Of the motion sequence number only the numerical portion will blink 4 Press the YES WRITE key twice to erase the recorded motion sequence If you decide not to erase the motion ...

Page 21: ... routing See pages 33 through 37 for illustrations of the various routings available After you ve selected the appropriate routing for your situation you can assign the function of each controller and specify the effect and type variation Style editing 1 Select the style that you want to edit 2 Hold down the EDIT key and press the STYLE key The display will indicate A1 and the EDIT key will blink ...

Page 22: ...ose style number 11 2 Hold down the EDIT key and press the STYLE key The display will indicate A1 and the EDIT key will blink 3 Press the EDIT key several times to choose parameter A2 This parameter specifies the type of transition Choosing 00 will specify a fade In this ex ample let s select 03 to produce a wipe that changes the position of the images 4 Press the EDIT key to select parameter A3 T...

Page 23: ...apply an effect to the input video while sampling it If you want to do this press the STYLE key at this point turn the value knob to select an effect and press the YES WRITE key NOTE The effect selected in this case is only applied to the image being sampled This will not change the effect setting of the style that was selected before you entered SAMPLE mode 5 Press the REC key to begin sampling P...

Page 24: ...resampled and saved to a clip The Main Out Capture function can accommodate a maximum of approximately eight seconds Capturing video and using it as an input source 1 Hold down the EDIT key and press the YES WRITE key to enter Utility mode In Utility mode enable the Main Out Capture function p 27 NOTE Any existing Main Out Capture data will be erased when you enter Utility mode NOTE The bank displ...

Page 25: ...ss the No ESC key a second time to un select the copy source red frame To cancel the entire Clip Copy operation be sure the copy destination and copy source have been un selected then press the NO ESC key twice Erasing a clip Erasing the contents of a clip to create a blank clip 1 Hold down the EDIT key the NO ESC key and the clip pad that you want to erase all three together The clip pad and the ...

Page 26: ...otate the VALUE knob to specify the BPM b 000 value The BPM you specify here is used only if you select a style that includes a BPM synchroni zation function You can also use the TAP BPM key to enter the BPM value p 14 Set the BPM value to match the sense of beat of the clip s video material b Press the EDIT key and specify the start point using seconds S 000 and frames S F 00 NOTE Use the slider ...

Page 27: ...ource and the other as the copy destination Copying an entire bank of clips 1 Hold down the EDIT key and press the BANK key the EDIT key and BANK key will blink and you ll be ready to copy clips 2 Use the VALUE knob to select the copy source bank and press any clip pad twice in the copy source bank The eight copy source clips shown in MONITOR 2 will be indicated by a red frame The BANK key will no...

Page 28: ...EDIT key to choose a utility function Each time you press the EDIT key the next lower item will be selected After you ve selected the item you want to execute press the YES WRITE key to display the options for the selected function Many utility functions have sub menus that operate the same way Once you have selected an individual feature use the VALUE knob to adjust the parameter Press the YES WR...

Page 29: ...e function Leaving it set to Enable while this function is not being used will slow down the bank list display MIDI setting Here you can adjust the kaptivator s MIDI settings such as transmitting or receiving MIDI clock MIDI channel and control change settings The kaptivator cannot send and receive MIDI clock information at the same time Setting the control change number The kaptivator can receive...

Page 30: ...acked up to a DV camera or other ex ternal DV storage device Global settings style data and motion sequences individually or in blocks of ten can be backed up to a MIDI filer sequencer or other MIDI storage device The MIDI device must be able to initiate and send a dump request message Backing up video data to an external device Sampled video together with its management data and clip data can be ...

Page 31: ...approximately 5 6 the time Restoring video data Sampled video and clip data can be restored in a single operation 1 Enter Utility mode 2 Press the EDIT key to select Backup and press the YES WRITE key 3 Select Video data and press the YES WRITE key 4 Select Restore and press the YES WRITE key From your external device play back the backup video into the kaptivator 5 When the first clip data screen...

Page 32: ...on sequence data You can restore the global data style data a single motion sequence or block of ten motion sequences that you saved as a backup file 1 Enter Utility mode 2 Press the EDIT key to select Backup and press the YES WRITE key 3 Press the EDIT key to select MIDI exclusive and press the YES WRITE key Transmit the backup data from your external device NOTE Since the restore operation will ...

Page 33: ...B3 B4 C1 C2 C3 C4 D1 D2 D3 D4 E1 E2 E3 E4 F1 F2 F3 F4 G1 G2 G3 G4 H1 H2 H3 H4 00 99 B4 On Off 1 2 conditions Either Both 00 99 B5 VFX parameter 1 Audio Beat Ribbon touch HOLD Ext value Slider Ribbon value Knob Fixed value A1 A2 A3 A4 B1 B2 B3 B4 C1 C2 C3 C4 D1 D2 D3 D4 E1 E2 E3 E4 F1 F2 F3 F4 G1 G2 G3 G4 H1 H2 H3 H4 00 99 B6 VFX parameter 2 Audio Beat Ribbon touch HOLD Ext value Slider Ribbon valu...

Page 34: ...ion Audio Beat Ribbon touch HOLD Ext value Slider Ribbon value Knob Always Off Always On A1 A2 A3 A4 B1 B2 B3 B4 C1 C2 C3 C4 D1 D2 D3 D4 E1 E2 E3 E4 F1 F2 F3 F4 G1 G2 G3 G4 H1 H2 H3 H4 00 99 F4 On Off 1 2 conditions Either Both 00 99 F5 Parameter 1 controller selection Audio Beat Ribbon touch HOLD Ext value Slider Ribbon value Knob Fixed value A1 A2 A3 A4 B1 B2 B3 B4 C1 C2 C3 C4 D1 D2 D3 D4 E1 E2 ...

Page 35: ...Beat 99 00 99 in two beats C1 FX control ribbon touch 00 release 99 touch C2 FX control ribbon touch 99 release 00 touch C3 FX control ribbon touch 99 C4 FX control ribbon touch 00 D1 HOLD key 00 off 99 on D2 HOLD key 99 off 00 on D3 HOLD key 99 D4 HOLD key 00 E1 Ext value 00 min 99 max E2 Ext value 1 99 min 00 max E3 Ext value 1 99 min 00 middle 99 max E4 Ext value 1 00 min 99 min 00 max F1 Slide...

Page 36: ...ies an effect to a bank clip and mixes it with an external input source B A MAIN OUT 1 1 3 2 3 2 Routing 12 This applies an effect to an external input source and mixes it with a bank clip B A MAIN OUT 1 1 3 2 3 2 Routing 13 This mixes a bank clip with an external input source and then applies an effect B A MAIN OUT 1 1 2 3 2 3 2 Dual Routings These routings play back two clips simultaneously and ...

Page 37: ...input NOTE You can also exchange the B group playback with the external input Routing 31 This applies an effect to a clip from Group A mixes it with a clip from Group B and then mixes this with an external input The MAIN OUT is not displayed in MONITOR 2 when using this routing MAIN OUT 1 3 2 4 4 3 A B 1 2 Routing 32 This applies an effect to a clip from Group B mixes it with a clip from Group A a...

Page 38: ...en using this routing MAIN OUT 3 4 1 4 3 2 A B 1 2 Routing 35 This mixes clips A and B mixes this with the external input and then applies an effect MAIN OUT 3 4 1 4 3 2 A B 1 2 4 Separate output Routings Use these routings when you ve connected MONITOR OUT 2 as an independent output connector to a device such as the KPE1 These routings give you two separate outputs MAIN OUT and MONITOR OUT 2 Rout...

Page 39: ...MAIN OUT MONITOR OUT 2 1 1 A B Routing 43 MONITOR OUT 2 will simply output the clip from Group B The Group Aclip will be mixed with the external input then processed by the effect and sent from MAIN OUT MAIN OUT MONITOR OUT 2 1 1 A B Routing 44 MONITOR OUT 2 will output the clip from Group B processed by the effect The Group A clip will be mixed with the external input and sent from MAIN OUT MAIN ...

Page 40: ...unction Values A3 A6 Selects the controller for the Wipe effect A1 H4 Fixed value 00 99 A4 A7 00 99 Selects the transition type 1st digit and the controller range 2nd digit A1 H4 If a controller value is selected this controller will determine the range of the controller set by parameter A3 NOTE These values are identical for 01 Wipe 1 02 Wipe 2 and 03 Wipe 3 00 09 10 19 20 29 30 39 40 49 50 59 60...

Page 41: ...ect100 00 0 99 90 11 Blur Mix G1 RIBBON Depth 85 00 effect0 99 effect100 00 50 99 98 12 Monotone Mix G1 RIBBON color 85 Depth 85 00 effect0 99 effect100 00 180degrees 99 180degrees 00 black and white 99 color 13 Line drawing Mix G1 RIBBON Threshold 50 85 00 effect0 99 effect100 00 min 99 max 00 White line 99 Black line 14 Binarize Mix G1 RIBBON Threshold 50 85 00 effect0 99 effect100 00 min 99 max...

Page 42: ...value specifies the playback pattern NOTE Once you ve specified the playback type you won t be able to change this setting unless you exit Clip Edit mode and begin editing again NOTE If you press the Play key while performing clip editing playback will occur between the Start Point and End Point you specified You are free to specify an Index Point that is outside the range of the Start End Points ...

Page 43: ...art Point Sampling Data This pattern is similar to Pattern 3 except the data is played in reverse This pattern plays from the Start Point to the End Point only once and then stops freezes at the End Point Type 2 Tempo and Beat Specified End Point Patterns of this type let you specify the End Point in terms of BPM and a number of beats Eb and are appropriate when you want to synchronize video with ...

Page 44: ... Sampling Data This pattern plays once to the End Point and then con tinues playing alternately forward and backward be tween the Loop Point and End Point Pattern 3 Reverse Normal Loop End Point Start Point Loop Point Sampling Data This pattern is similar to Pattern 1 except the data is played in reverse This pattern plays once from the Start Point to the End Point and then plays back repeatedly f...

Page 45: ...and the number of beats Eb the End Point will automati cally be set to the appropriate time when playing at that BPM from the Loop Point If you select a style in which the clip playback speed is synchronized to the BPM and enter the appropriate BPM value the video loop will play back in synchronization to the beat The playback patterns are the same as for Type 3 If you change the Start Point you l...

Page 46: ... to 120 2 Creating a BPM synchronized playback style 1 Select the style that you want to edit 2 Hold down the EDIT key and press the STYLE key 3 Press the EDIT key several times to select parameter C3 C3 is the parameter that specifies the normal speed for Group A 4 Use the VALUE knob to set the value to r2 so that BPM synchronized playback will oc cur If you also want to perform BPM synchronized ...

Page 47: ...lication software you re using on your computer error messages may appear in response to operation com mands that the kaptivator does not support such as REC STOP NOTE For details on how to operate your video editing application software contact the manufacturer of your software 3 Managing data on the hard drive You can make efficient use of the internal hard drive s recording capacity by taking a...

Page 48: ...igned to the clip pads The corre sponding Note on message is transmitted when you press a clip pad Using a MIDI keyboard to play clips You can use Note messages sent from a MIDI keyboard connected to the MIDI IN connec tor not only to play back the clips selected for the clip pad but also to play back as many clips as there are keys on your keyboard without having to switch banks How Note messages...

Page 49: ...input setting for the kaptivator Is MONITOR SELECT set correctly If there is a problem with the display try adjusting the monitor p 12 Clip does not play back Is the style setting correct Could you have selected a style in which playback is synchronized to an audio trigger or in which the ribbon controller adjusts the playback speed Can t delete or edit a clip Could the clip protect setting be On ...

Page 50: ...Start variations Style numbers 92 97 Time Effect variations Use the ribbon to control the playback speed Specifications Video sampling rate 13 5 MHz 4 2 2 8 bit Input output connectors VIDEO INPUT 1 Composite VIDEO INPUT 2 S Video AUDIO TRIG INPUT L R RCA connector MAIN OUT Composite S Video one each MONITOR OUT 1 Composite MONITOR OUT 2 Composite PHONES Stereo 1 4 DV I O digital Video input outpu...

Page 51: ...3 B4 B5 B6 B7 C1 C2 C3 C4 D1 D2 D3 D4 D5 D6 E1 E2 E3 E4 F1 F2 F3 F4 F5 F6 G1 G2 G3 G4 G5 H1 H2 H3 23 Dual 00 Fade F1 Slider 00 range 02 Rotate 180 A1 Audio 99 Always On 00 Either A1 Audio r1 x1 00 Enabled 00 Scratch D1 HOLD C1 Ribbon Touch 00 Either G1 Ribbon value H1 Knob Unspecified Unspecified Same as GroupA T1 Start when pressed E1 Ext value Unspecified Unspecified Unspecified 00 BANK 00 ALL F...

Page 52: ... H3 23 Dual 00 Fade F1 Slider 00 range 07 Emboss D1 HOLD C1 Ribbon touch 00 Either G1 Ribbon value H1 Knob r2 BPM 00 Enabled 05 Reverse x1 A1 Audio 99 Always On 99 Fixed value A1 Audio 50 Fixed value Unspecified Unspecified Same as GroupA T1 Start when pressed E1 Ext value Unspecified Unspecified Unspecified 00 BANK 00 ALL Fade mix between A and B The video effect is applied after mixing Operating...

Page 53: ...F6 G1 G2 G3 G4 G5 H1 H2 H3 23 Dual 00 Fade F1 Slider 99 range 14 Binarize 99 Audio 99 Always On 00 Either 00 Fixed Value 99 Fixed Value F4 Audio r1 x1 00 Enabled 00 Invert top bottom D1 HOLD C1 Ribbon Touch 00 Either G1 Ribbon value H1 Knob Unspecified Unspecified Same as GroupA T1 Start when pressed E1 Ext value Unspecified Unspecified Unspecified 00 BANK 00 ALL Switch between A and B Black out b...

Page 54: ...ngs Group B Operation settings Controller default value settings Group A Time Effect settings Group B Time Effect settings Monitor selection settings A1 A2 A3 A4 A5 A6 A7 A8 B1 B2 B3 B4 B5 B6 B7 C1 C2 C3 C4 D1 D2 D3 D4 D5 D6 E1 E2 E3 E4 F1 F2 F3 F4 F5 F6 G1 G2 G3 G4 G5 H1 H2 H3 Routing settings Remarks Style No Video Effect settings Group A Operation settings Group B Operation settings Controller ...

Page 55: ...hird Description ENA Hex H D H D 8n kk kk vv vv Note Off A 9n kk kk 00 00 Note off A 9n kk kk vv vv Note On A Bn cc cc dd dd Control Change C Cn pp pp Program Change P En bb bb bb bb Bender Change C ENA A Recognized when Note On Off Enable C Recognized when Control Change Enable P Recognized when Program Change Enable nn MIDI Channel No 0 15 Usually Global Channel kk Note Number 48 71 vv Verocity ...

Page 56: ...pppp 0p Dump Motion Page Number 0p 00h 09h 0ddd dddd dd Data NOTE4 TABLE3 1111 0111 F7 EOX When this message is received at the MIDI dump page the DATA PROCESS LOAD COMPLETED Function 23h message or the DATA PROCESS LOAD ERROR Function 24h message will be transmitted The DATA PROCESS LOAD ERROR Function 24h message will be transmitted in other cases 9 DATA PROCESS LOAD COMPLETED T Byte Hex Descrip...

Page 57: ... 0 1 0 Assign 1 not Assign bit6 Group B Time FX Switch Type OR AND 0 Or 1 And bit5 0 Group B Time FX Number 0 2 23 Group B Time FX Switch 1 CONT 24 Group B Time FX Switch 2 CONT 25 Group B Time FX Controller 1 CONT 26 Group B Time FX Controller 2 CONT 27 Initial Value H INIT 28 Initial Value G INIT 29 Initial Value F INIT 30 Initial Value E INIT 31 bit7 6 Initial Value D Off On 0 off 1 on 3 not in...

Page 58: ...clusive System Common Song Position Song Select Tune Request System Real Time Clock Commands Local On Off All Notes Off Active Sensing System Reset Aux Messages Memorized MIDI Implementation Chart Remarks Transmitted received when control numbers or pitch bend are selected and are enabled Transmitted received when program changes are enabled Transmitted received when timing clock is enabled Mode 1...

Page 59: ... If you have purchased this product via the internet through mail order and or via a telephone sale you must verify that this product is intended to be used in the country in which you reside WARNING Use of this product in any country other than that for which it is intended could be dangerous and could invalidate the manufacturer s or distributor s warranty Please also retain your receipt as proo...

Reviews: