COLLECTING THE TILLER
5
COULTER (
COULTER (for models
for models
KS 7HP-850A, KS 7HP-950A, KS 7HP-950S)
KS 7HP-850A, KS 7HP-950A, KS 7HP-950S)
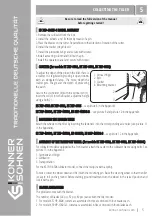
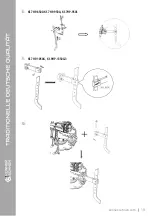
To adjust the depth of the plow in the tiller there is
a coulter. It is regulated by moving it up and down
with an elongated clamp. The more depth the
coulter gets, the greater the depth of processing
the earth.
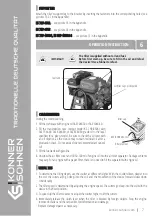
Secure the coil holder (4) with the vertical pin (1),
insert the coil (3) into the bracket, adjust the height
using a bolt (2).
KS 7HP-600RT-G
KS 7HP-600RT-G
MODEL
MODEL ASSEMBLY
ASSEMBLY
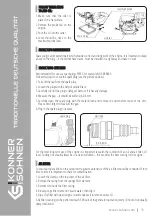
1. Remove the cultivator from the box.
2. Install the wheels and fix them by means of a pin.
3. Place the blades on the cutter. Pay attention to the direction of rotation of the cutter.
4. Install the coulter (depth level).
5. Install the protective wings and secure with screws.
6.Install a steering column and fix it with a pin.
7.Install the operator panel and secure with screws.
MOUNTING THE RUBBER WHEE
MOUNTING THE RUBBER WHEE
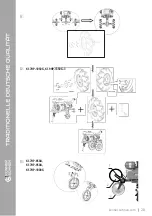
Attach the wheels to the tiller by inserting the fasteners into the corresponding axle holes (see picture 11
in the Appendix).
ASSEMBLY OF THE TRANSPORT WHEEL
ASSEMBLY OF THE TRANSPORT WHEEL ( (for models
for models
KS 7HP-850A, KS 7HP-950A,
KS 7HP-850A, KS 7HP-950A, KS 7HP-1000G
KS 7HP-1000G
))
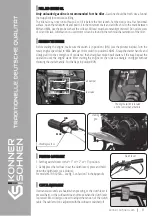
For cultivator models equipped with a front caster, attach the caster to the cultivator frame using bolts. See
picture 13 in the Appendix:
For the KS 7HP-850A cultivator model, connect the two pins with a spring.
1
1. Vertical finger
2. Bolt
3. Сoulter
4. Mounting bracket
2
3
4
KS 7HP-850A KS 7HP-950A, KS 7HP-950S
KS 7HP-850A KS 7HP-950A, KS 7HP-950S
– see picture 8 in the Appendix.
KS 7HP-1000G, KS 7HP-1050G, KS 600RTG, KS 9HP-1350G-3
KS 7HP-1000G, KS 7HP-1050G, KS 600RTG, KS 9HP-1350G-3
– see picture 12 in the Appendix.
KS 7HP-1000G, KS 7HP-1050G, KS 9HP-1350G-3
KS 7HP-1000G, KS 7HP-1050G, KS 9HP-1350G-3
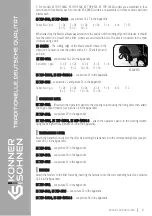
– see picture 9 and picture 10 in the Appendix.
Be sure to read the full version of the manual
before getting started!
1. Spinnette and finger
2. Cultivation
3. Transportation
BLADES ASSEMBLING
BLADES ASSEMBLING
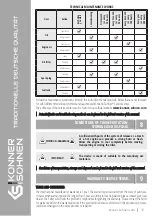
The product comes with the blades.
The number of blades (24 pcs, 32 pcs, 40 pcs) varies with the tiller model.
1. For model KS 7HP-850A, cutters are assembled in three sections with four blades each.
2. For model KS 9HP-1350G-3, cutters are assembled in five sections with four blades each.
To move, lower the wheel down and fix it with the mounting pin. Raise the steering wheel so that the tiller
is easy to roll on the ground. Before starting ground treatment turn the wheel in the raised position and
lock it with a pin.
konner-sohnen.com
|
5
Summary of Contents for KS 600RTG
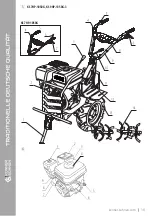
Page 15: ...6 ANWENDUNG ANNEX L ANNEXE ATA AMENT ANEKS 1 2 1 2 5 3 4 KS 7HP 850A konner sohnen com 14...
Page 17: ...7 6 1 2 3 4 5 6 9 8 7 5 4 KS 7HP 1050G KS 9HP 1350G 3 KS 7HP 1050G 3 1 konner sohnen com 16...
Page 18: ...1 2 3 4 5 6 9 8 7 6 4 KS 7HP 1000G 1 4 3 5 6 7 8 9 11 10 2 konner sohnen com 17...
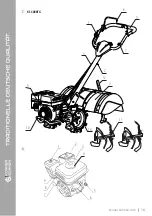
Page 19: ...4 11 1 2 3 4 5 6 9 8 7 7 KS 600RTG 1 6 11 3 9 10 2 14 7 4 12 konner sohnen com 18...
Page 20: ...2 8 9 10 KS 7HP 850A KS 7HP 950A KS 7HP 950S KS 7HP 1050G KS 9HP 1350G 3 konner sohnen com 19...
Page 22: ...B A B A 14 15 16 17 KS 7HP 850A konner sohnen com 21...
Page 23: ...18 19 KS 7HP 950A konner sohnen com 22...
Page 24: ...20 21 KS 7HP 1050G KS 9HP 1350G 3 konner sohnen com 23...
Page 25: ...22 23 KS 7HP 950S konner sohnen com 24...
Page 30: ......


