


15
It is also used to turn audio on/off in the Playback mode.
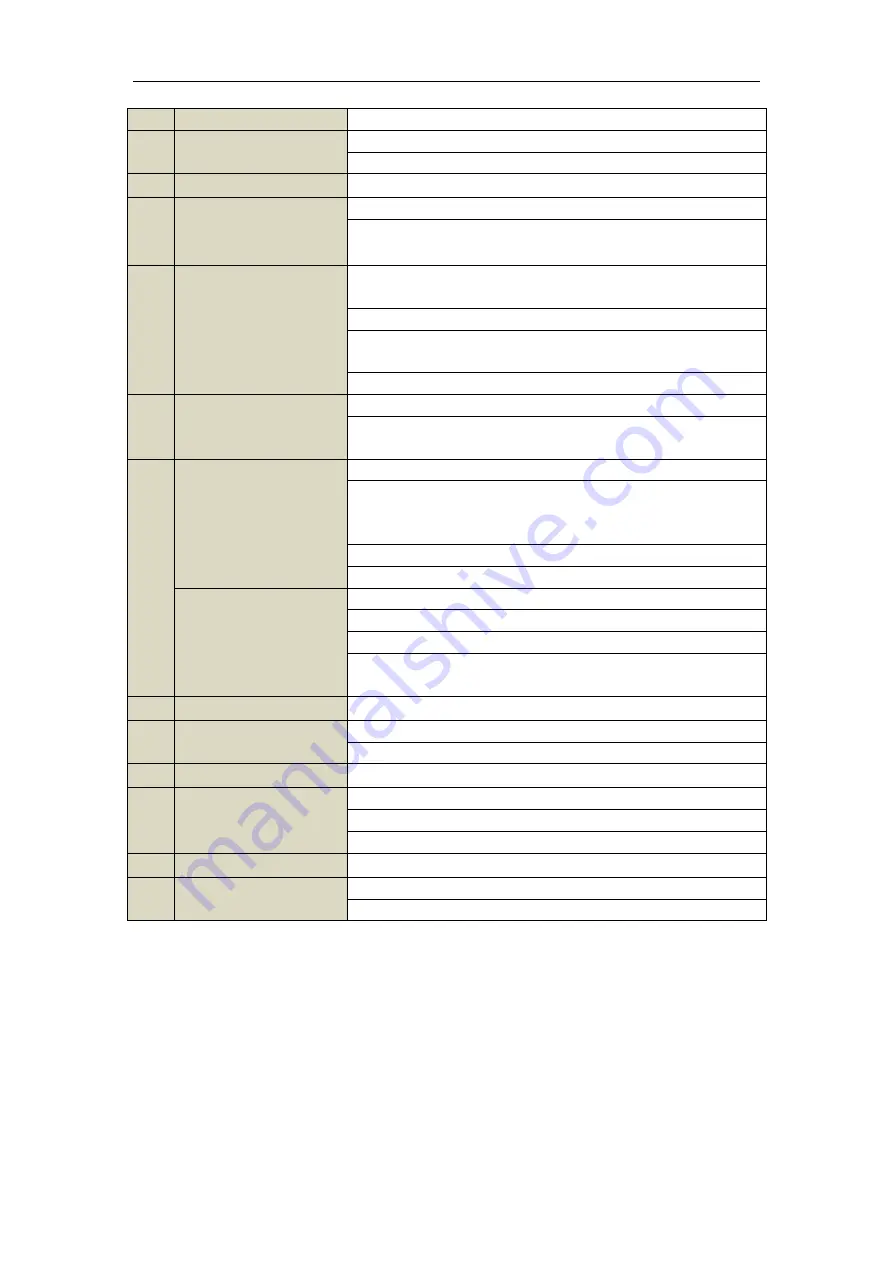
7
PLAY Button
The button is used to enter the All-day Playback mode.
It is also used to
auto scan in the PTZ Control menu.
8
INFO Button
Reserved.
9
VOIP Button
Switch between main and spot output.
In PTZ Control mode, it can be used to zoom out the image.
10
MENU Button
Press the button will help you return to the Main menu (after successful
login).
Press and hold the button for 5 seconds will turn off audible key beep.
In PTZ Control mode, the MENU/WIPER button will start wiper (if
applicable).
In Playback mode, it is used to show/hide the control interface.
11
PREV Button
Switch between single screen and multi-screen mode.
In PTZ Control mode, it is used to adjust the focus in conjunction with the
A/FOCUS+ button.
12
DIRECTION Button
Navigate between different fields and items in menus.
In the Playback mode, the Up and Down button is used to speed up and
slow down recorded video. The Left and Right button will select the next
and previous record files
.
In Live View mode, these buttons can be used to cycle through channels.
In PTZ control mode, it can control the movement of the PTZ camera.
ENTER Button
Confirm selection in any of the menu modes.
It can also be used to
tick
checkbox fields.
In Playback mode, it can be used to play or pause the video.
In single-frame Playback mode, pressing the button will advance the
video by a single frame.
13
PTZ Button
In Auto-switch mode, it can be used to stop /start auto switch.
14
ESC Button
Back to the previous menu.
Press for Arming/disarming the device in Live View mode.
15
RESERVED
Reserved for future usage.
16
F1 Button
Select all items on the list when used in a list field.
In PTZ Control mode, it will turn on/off PTZ light
(if applicable).
In Playback mode, it is used to switch between play and reverse play.
17
PTZ Control Buttons
Buttons to adjust the iris, focus and zoom of a PTZ camera.
18
F2 Button
Cycle through tab pages.
In synchronous playback mode, it is used to switch between channels.
Troubleshooting Remote Control:
Note:
Make sure you have installed batteries properly in the remote control. And you have to aim the remote
control at the IR receiver in the front panel.
If there is no response after you press any button on the remote, follow the procedure below to troubleshoot.
Steps:
1.
Go to Menu > Settings > General > More Settings by operating the front control panel or the mouse.
2.
Check and remember NVR ID#. The default ID# is 255. This ID# is valid for all the IR remote controls.
3.
Press the DEV button on the remote control.
4.
Enter the NVR ID# you set in step 2.
Summary of Contents for NET-KOBI-IP-16CH
Page 1: ...Network Video Recorder User Manual UD 6L0202D1132A02 ...
Page 11: ...11 Summary of Changes 180 ...
Page 12: ...12 Chapter 1 Introduction ...
Page 41: ...41 Chapter 4 PTZ Controls ...
Page 50: ...50 Chapter 5 Record Settings ...
Page 68: ...68 Chapter 6 Playback ...
Page 80: ...80 Figure 6 21 Interface of External File Playback ...
Page 86: ...86 Chapter 7 Backup ...
Page 100: ...100 Figure 7 31 USB Writer Management ...
Page 101: ...101 Chapter 8 Alarm Settings ...
Page 106: ...106 Figure 8 8 Copy Settings of Alarm Input ...
Page 115: ...115 Chapter 9 Network Settings ...
Page 133: ...133 Chapter 10 HDD Management ...
Page 144: ...144 Figure 10 19 View HDD Status 2 ...
Page 148: ...148 Chapter 11 Camera Settings ...
Page 152: ...152 Chapter 12 NVR Management and Maintenance ...
Page 163: ...163 Chapter 13 Others ...
Page 172: ...172 Appendix ...
Page 181: ...181 ...


