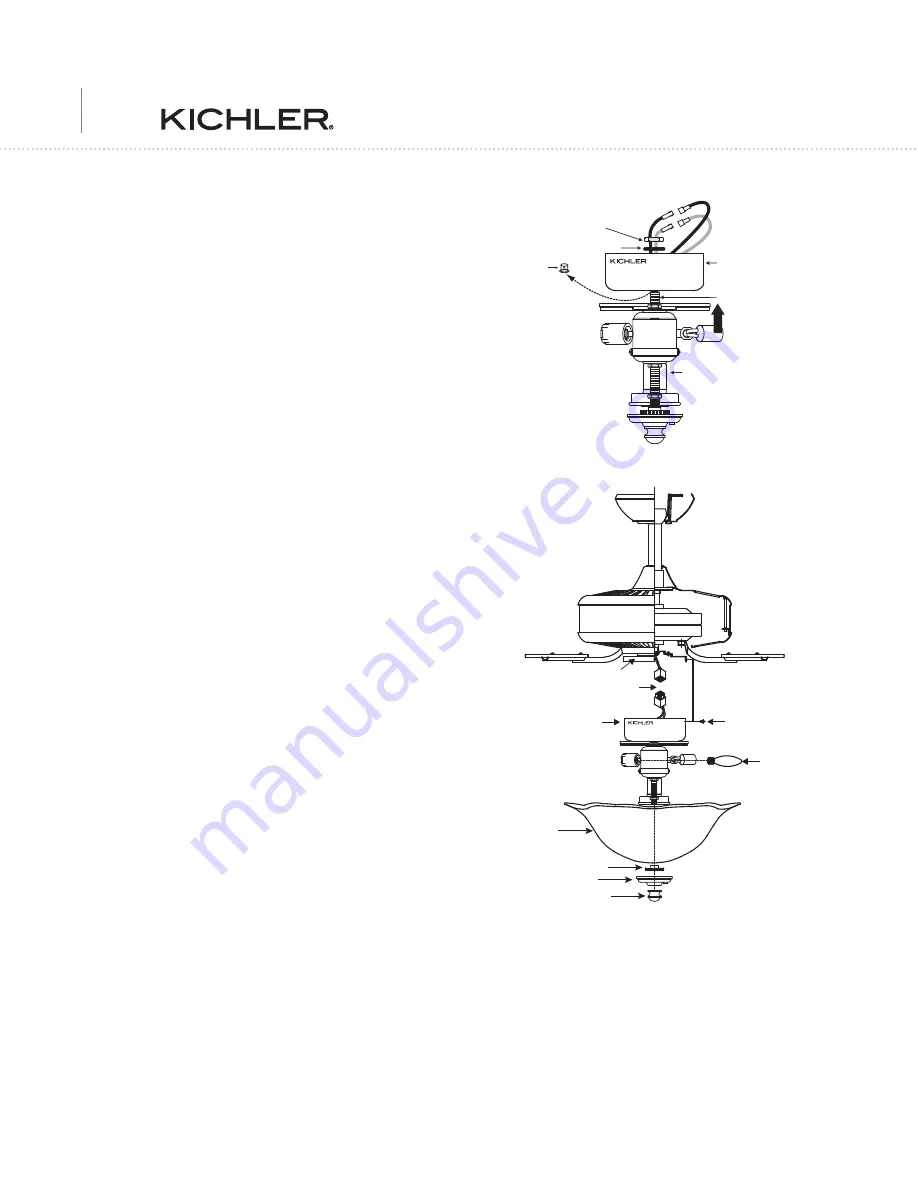
Fig. J
Light kit
assembly
Wire connector
Screws
Mounting plate
Glass
shade
Glass cap
Metal nut
Decorative nut
Bulbs
4. INSTALLING A OPTIONAL DOWNLIGHT
FIXTURE:
NOTE:
If your ceiling fan is equipped with a down light, follow the
instructions below. The illustrations here are for general reference
ONLY. You should refer to the specific assembly instructions that
came with your Light Kit.
1. Remove the plastic Center Plug from the switch housing. (Fig. I)
2. Attach the light fixture to the switch housing by feeding the light
fixture wires one at a time (black and white) through the hole in
the center of the switch housing.
3. Screw the threaded pipe on the light fixture into the center hole
on the switch housing. Place a lock washer and retainer nut on
the threaded pipe from the inside of the switch housing and
tighten securely making sure it is tight enough to prevent the light
fixture from coming loose during fan operation. (Fig. I)
4. Inside the switch housing, locate the Blue and White wires on the
wiring harness marked FOR LIGHT. Connect these wires to the
light fixture wires by pushing them together until they click.
White Fixture wire to White Fan wire
Black Fixture wire to Blue Fan wire.
5. Raise and hold the light kit assembly close to the mounting plate on
the ceiling fan. Push the square wire connectors together. (Fig. J)
NOTE:
The square connectors are color coded. Match the color
coded sides of each plug and push. They will attach ONLY when
matched correctly.
6. Carefully push all wires back into the switch housing, then attach
the light kit assembly to the mounting plate by aligning the key
holes on the switch housing with the screw heads on the mounting
plate.
Rotate the light kit assembly until the screw heads are at the narrow
end of the key holes and tighten each screw.
7. Install all necessary lamps and glass shade(s) for your specific
light kit.
Fig. I
Nut
Lock washer
Light kit
Switch housing
Threaded Pipe
Center
plug
3


