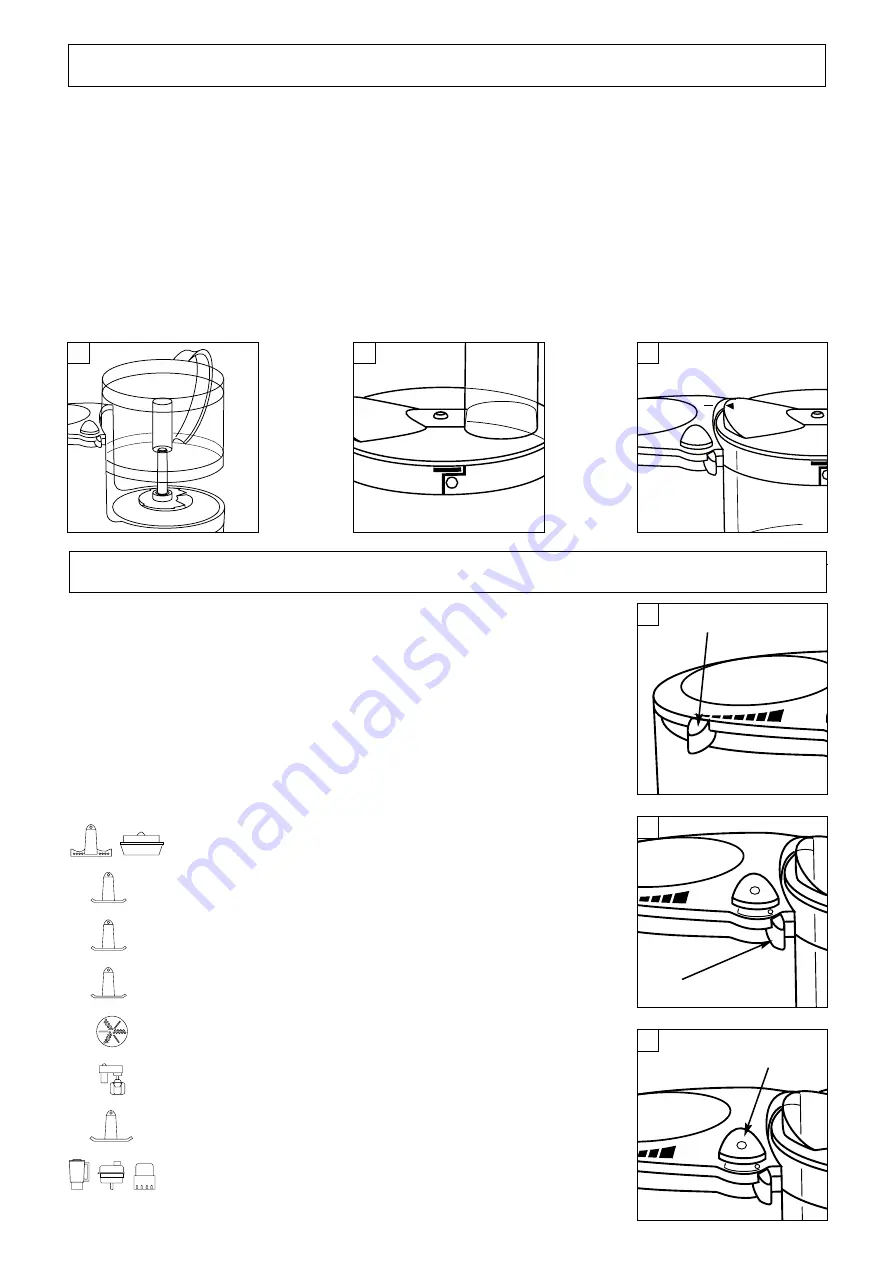
Assembling the Processor Bowl and Lid
1.
Place the clear plastic bowl over the processor drive, positioning the handle towards the back of the appliance(fig 1 ). Lower the bowl onto
the power unit and turn in a clockwise direction so that it locks firmly into place.
2.
Once the bowl is locked in place you can add an attachment to the food processor (see below). Always fit the appropriate attachment in
the bowl before adding the ingredients.
3.
Place the lid onto the processor bowl with the feed tube towards the back of the appliance. Turn the lid clockwise until the tabs on the lid
lock against the tabs on the bowl and the feed tube is in line with the handle (fig 2). Ensure that the mark on the lid aligns with the mark
on the processor body (fig 3).
Your processor incorporates a sophisticated safety interlock feature. FAILURE TO CORRECTLY FIT THE LID WILL PREVENT YOUR
FOOD PROCESSOR FROM OPERATING.
4.
Reverse the above procedure to remove the bowl and lid. It is only possible to remove the lid when the control is in the off (0) position.
Use the control knob 'A' to select the desired speed (fig 4).
Switch on the food processor by moving control knob 'B ' from 0 to I (fig 5).
Switch off the food processor by returning control knob 'B' back to position 0.
IMPORTANT
If the control knob ‘B’ or the pulse button ‘C’ (fig. 6) cannot be operated readily then check that the bowl
and lid are correctly fitted as described under
‘Assembling the Processor Bowl and Lid.’
Pulse
- This feature allows the attachment fitted to the processor to be manually operated in a start stop
action to control the texture of various foods. Pulse is obtained by simply depressing control knob 'C' .
The pulse switch operates the motor and keeps it running constantly for as long as the button is held
down. This can be carried out at any speed.
Use these speeds for the following operations:-
1.
Paddle Egg Whisk and Citrus Juicer.
1 - 5
Adding water to combine pastry ingredients together.
5-8
Yeasted Mixtures, rubbing fat into flour for pastry, scones etc.
1-8
Cake Making.
1-8
Slicing, shredding and chipping.
5-8
Twin Beater Geared Whisk.
6-8
Chopping, Pureeing, Pâtés.
8
Liquidiser, Multi-Mill and Centrifugal Juicer.
Operating Controls and speeds
Using Your Kenwood Food Processor
6
1
2
3
1
2
4
3
6
5
7
8
4
4
6
5
7
8
P
5
6
5
7
8
P
6
A
B
C


