96
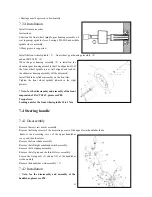
Install it in reverse order.
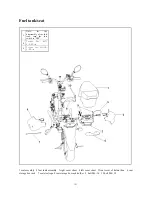
Fixing bolt of handlebar weld assembly
Torque force: 40-60 N·m
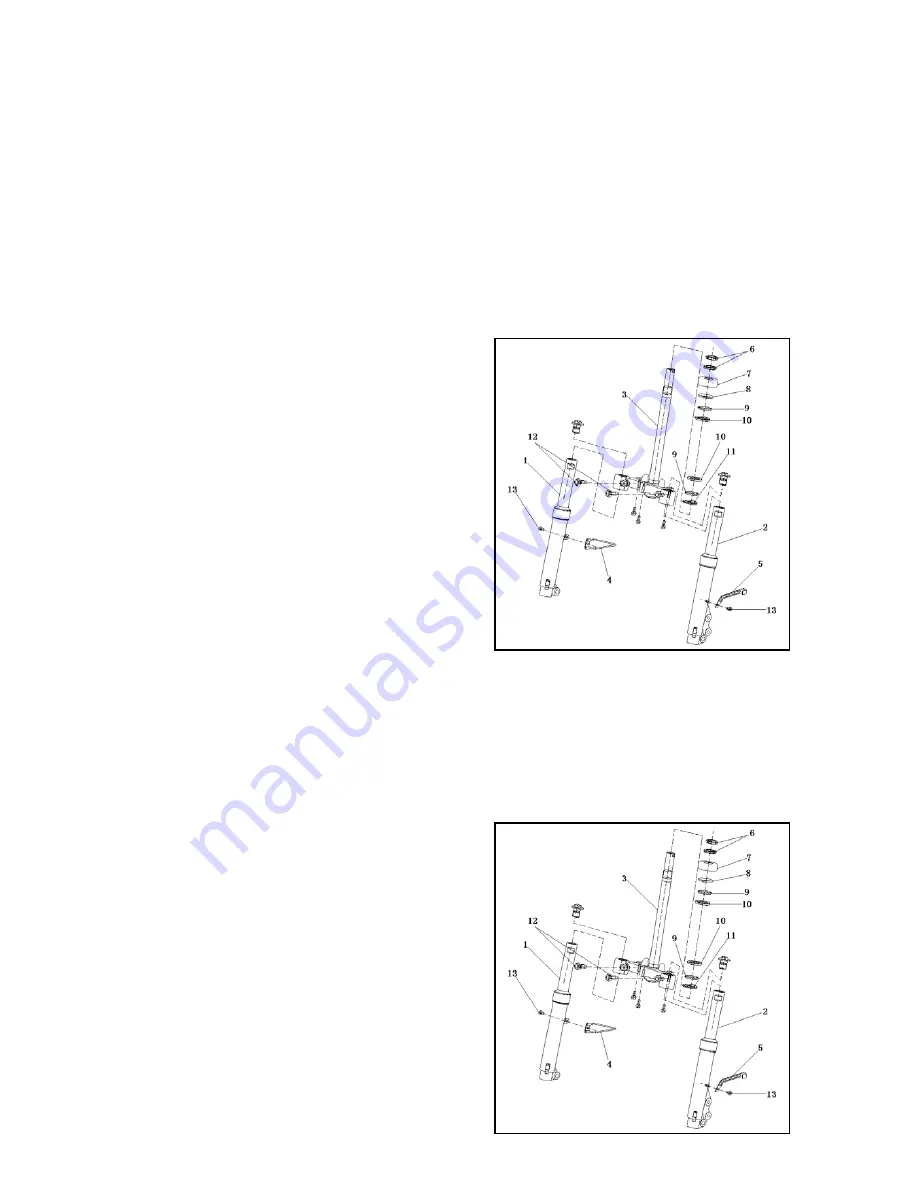
7.5 Front fork
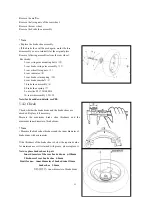
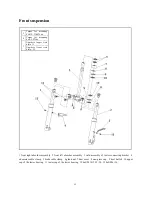
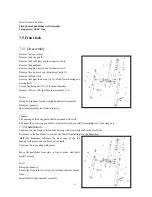
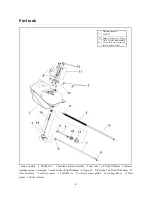
7.5.1 Disassembly
Remove the front wheel.
Remove the body guard.
Remove the brake hose and the odometer cable.
Remove the handlebar.
Remove the gland nut (6) and the dust cover (7).
Remove the one-piece cup (8) and steel balls (9).
Remove the front fork.
Remove the upper/lower cup (10,11) of the lower bearing and
steel balls (9).
Loosen the fixing bolt (12) of the front absorber.
Remove the front left/right absorber assembly (1,2).
Tools:
Fixing bolt spanner for the steering handle weld assembly.
Fixing nut spanner.
Special disassembly tool for bearing cup.
* Note:
The opening of the body guard shall be cleaned with cloth.
The upper/lower bearing cup shall be dismantled with a special disassembly tool for bearing cup.
7.5.3 Installation
Lubricate the steel cups of the bottom bearing with grease and confirm 21 steel balls.
Do not move the handlebar (to prevent steel balls from falling into the handlebar).
Hold the handlebar; lubricate the steel cups of the top
bearing with grease and confirm 21 steel balls.
Lubricate the top seating with grease.
Move the handlebar from side to side to make steel balls
contact closely.
Tools:
Fixing nut spanner.
Ensure the front fork is not loose by left and right movement.
Steps:
Install the left/right absorber assembly.


