background image

Care instructions ESTETICA E70 Vision / E80 Vision

2 Setup methods according to ISO 17664 | 2.2 General instructions for the reprocessing of KaVo treatment units

8 / 48

2.2.1 Overview of ESTETICA E70 Vision / E80 Vision
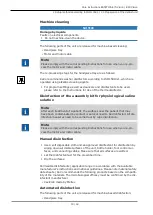
reprocessing

Reprocessing items/medical
devices

Cleaning

Disinfection

Sterilisa-
tion

manual

automatic manual

automatic automatic

Surfaces

Equipment

Cushion

Gripping sleeve, white

Gripping sleeve, grey

Light

Monitor

Dentist element

Handpiece sleeve of the three-func-
tion or multifunctional handpiece

Cannula of the three-function or mul-
tifunctional handpiece

Holder pad/anti-slip mat

Handpiece holder

Swing-arm S-table

Instrument tray for surgery assembly
kit

Intraoral camera

Assistant element

Connection parts of the suction hose

Patient element 

Tumbler support

Tumbler filler

Glass spittoon bowl

Porcelain spittoon bowl

Handpiece holder of the hygiene
centre

Summary of Contents for ESTETICA E70 Vision

Page 1: ...Care instructions ESTETICA E70 Vision E80 Vision...

Page 2: ...ributed by KaVo Dental Technologies LLC 11727 Fruehauf Drive Charlotte NC 28273 USA Tel 847 550 6800 Fax 847 550 6825 Manufacturer Kaltenbach Voigt GmbH Bismarckring 39 88400 Biberach Germany www kavo...

Page 3: ...ing the instrument holder 23 2 5 2 Preparing the connector for the suction hose 24 2 5 3 Reprocessing of sieve inserts and suction hoses 25 2 5 4 Preparation of the sleeve of the Aquamat device 26 2 6...

Page 4: ...mbly instructions TI Technician s instructions SC Safety checks IEC International Electrotechnical Commission RI Repair instructions EMC Electromagnetic compatibility Scaler Scaler ZEG IR Infrared IrD...

Page 5: ...the device off NOTICE Product damage due to improper disinfection Malfunctions Use the disinfectant according to the specifications of the manufacturer No spray disinfection perform wipe disinfection...

Page 6: ...disposable cloth pa per towel Storage and transport KaVo recommends reprocessing as soon as possible after use Preparations for cleaning Comply with product specific reprocessing instructions Manual c...

Page 7: ...utomatic drying Usually automatic drying is part of the cleaning disinfection cycle of the washer disinfector and should not be carried out above 95 C Servicing Discard damaged products Control and fu...

Page 8: ...atic Surfaces Equipment Cushion Gripping sleeve white Gripping sleeve grey Light Monitor Dentist element Handpiece sleeve of the three func tion or multifunctional handpiece Cannula of the three funct...

Page 9: ...air into the cleaning position See also 2 Instructions for use of the treatment centre Locking the touchscreen Tap the Lock screen button on the dentist element or the KaVo Logo on the assistant eleme...

Page 10: ...s CaviCide CaviWipes Metrex NOTICE Damage caused by spray disinfection Disinfectant gets into cracks and loosens the paint Do not use spray disinfection Only disinfect by wiping Cleaning and disinfect...

Page 11: ...push button and pull off the handle Clean the handle under flowing water Disinfect the white and grey handle by wiping or thermodisinfection minor discolouration may occur Sterilise the holder pad an...

Page 12: ...removed for easier cleaning Cleaning and disinfection of the instrument holder NOTICE Damage caused by treatment in a washer disinfector Do not treat the instrument holder in a washer disinfector Plac...

Page 13: ...facilitate cleaning Cleaning and disinfection of the instrument arm S table NOTICE Damage caused by treatment in a washer disinfector Do not sterilise the instrument arm S table in a washer disinfect...

Page 14: ...t the air exiting during treatment is dry Cleaning the triple function and multifunction handpiece Automatic cleaning Not applicable NOTICE Damage caused by improper cleaning disinfection Do not wash...

Page 15: ...soft cloth and water NOTICE Damage caused by using a nozzle needle that is too long Damage to the internal hoses of the cannula Use a short nozzle needle Mat no 1 004 4986 to clean the media exit hol...

Page 16: ...d multifunctional handpiece Requirement The multifunctional handpiece has been reprocessed Apply KaVo silicone grease Mat no 1 000 6403 or KaVo Rota Spray 2 Mat no 0 411 7510 to the O rings of the joi...

Page 17: ...sterilisation cycle is completed Storage Reprocessed products should be stored protected from dust with minimum exposure to germs in a dry dark and cool place 2 4 5 Preparation of the instrument hose...

Page 18: ...gical saline solution and surgery motor are optional Note The reprocessing steps for surgical motors with motor cable and for the straight and contra angle handpieces are described in the correspondin...

Page 19: ...surfaces near the patient that may have been contaminated by contact or aerosol need to be disinfected All dis infection measures need to be carried out by wipe disinfection Note Please comply with t...

Page 20: ...he cleaning program of the thermod isinfector Please observe the instructions for use of the thermodisinfector Service inspection and testing after preparation Note It is essential to comply with the...

Page 21: ...ications and reports If possible use suitable disposable devices to avoid the transmission of critical pathogens This concerns the protection of the user patients and all participants in the surgery A...

Page 22: ...One Note The camera handle cannot be sterilised or disinfected with heat Cleaning Note Disinfect the camera before cleaning Disinfect after cleaning if necessary Manual Exterior Cleaning NOTICE Damage...

Page 23: ...ch off Allow the camera to cool down Remove the camera Disinfect the surface using a soft wipe and disinfectant Approved disinfectants Metrex CaviCide manufacturer Metrex Note The exterior of the came...

Page 24: ...ed places of the hygiene centre during the cleaning and germ reduction of the handpiece holder Pull the latches evenly outward and carefully remove the handpiece holder Clean the handpiece holder unde...

Page 25: ...r NOTICE Damage caused by sterilisation Do not sterilise the suction hose connector Note Sterilise the suction cannulas according to the manufacturer s instructions 2 5 3 Reprocessing of sieve inserts...

Page 26: ...rt Mat no 07633423 into the seat Wipe the suction tubes with disinfectant 2 5 4 Preparation of the sleeve of the Aquamat device Cleaning and disinfecting the sleeve of the Aquamat device Disinfect the...

Page 27: ...unit Cleaning and disinfection of the tumbler holder and filler Note When assembling make sure that the O ring is present on the tumbler filler Note Inspect the O ring Mat no 0 200 6128 for damage and...

Page 28: ...umbler filler or the spittoon bowl Always check the correct seating of tumbler filler and spittoon bowl before turning on the unit Cleaning and disinfection of the spittoon bowl NOTICE Damage caused b...

Page 29: ...ll water ducts of the treatment centre to which the patient may be exposed This includes the handpieces on the dent ist element and assistant element as well as the tumbler filler on the spittoon bowl...

Page 30: ...are shown on the touchscreen and can be run in sequence Placing the handpieces in the hygiene centre The cannulas of the three function and multifunctional handpieces must be re moved for the cleaning...

Page 31: ...e three function or multifunctional handpiece on the adapter between hose and handpiece and take off the cannula and the gripping sleeve Place the three function or multifunctional handpieces without...

Page 32: ...six holders of the hygiene centre Place the COMFORTbase in the seat adapter 2 7 2 Discontinuing a cleaning programme Tap the x button to discontinue a cleaning programme Tap the Confirm icon to disco...

Page 33: ...systems The cleaning process is carried out by supplying fresh clear water and cleaning agent The water is sucked out of the Aquamat through the extraction point and suction handpiece to the separati...

Page 34: ...ment and Even ing is 20 seconds per instrument The default value for the Morning cleaning programme is 2 minutes per in strument Note The default value is based on the RKI guideline Tap the correspond...

Page 35: ...times weekends public holidays vacation etc Weekly cleaning needed For x days If the OXYGENAL 6 needs to be replenished the display of the dentist element shows a status message Oxygenal empty See als...

Page 36: ...the period of non use Before the period of non use Start the Weekly cleaning programme and switch it off during the active phase after an acoustical signal within the dwell time of 30 minutes To prev...

Page 37: ...tion handpiece to the separation system Carrying out the manual inner cleaning After each treatment Hold all the suction hoses in sequence tightly to the extraction point to pre vent the ingress of am...

Page 38: ...8 Reprocessing of the handpiece holder 38 48 Lift the handpiece holder up and take it out Check the drain Clean the handpiece holder under running water and insert it The handpiece holder can be disin...

Page 39: ...am separator Replacing the amalgam container Turn off the treatment centre Remove the cover Replace the amalgam container according to the instructions for use of the amalgam separator 2 10 Reprocessi...

Page 40: ...isinfectant gets into cracks and loosens the paint Do not use spray disinfection Only disinfect by wiping Note The handle on the service table can be taken off to improve the cleaning properties Push...

Page 41: ...s 3 1 Replace the DEKAPURE Gel cleaner Requirement The device must be turned on when changing the DEKAPURE Gel bottle Turn the device on Remove the cover from the unit base Unscrewing the lid off a ne...

Page 42: ...ps can be done Putting the cover back on the unit base Note Completely empty packages can be disposed of at recycling facilities See also Safety data sheet 3 2 Replace the OXYGENAL 6 cleaner Only KaVo...

Page 43: ...us message tap first the arrow and then the status message Then the required steps can be done Press the new bottle onto the adapter and swing the bottle into the unit base Putting the cover back on t...

Page 44: ...3 Replacing and checking cleaning and germ reduction agents 3 3 Check the OXYGENAL 6 concentration 44 48 Immerse a Merckoquant Peroxide Test Strip in the liquid Compare the colours and read the value...

Page 45: ...d using the following table H2O2 concentration Measuring cup Ratio water treated water Value shown on test strip 0 02 200 ppm standard concentration 40 ml 39 1 5 mg l 0 05 500 ppm 100 ml 99 1 5 mg l 0...

Page 46: ......

Page 47: ......

Page 48: ...1 012 6066 Fk 20191024 7 en...

Reviews: