


– 2
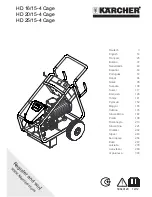
Illustrations on Page 2
1 Trigger gun
2 Lever for hand spray gun
3 Safety catch
4 Rotary coupling
(not with HD 16/15-4 Cage)
5 High pressure hose
6 Hourmeter (option)
7 Storage for spray pipe
8 Push handle
9 Hose/cable holder
10 Power switch
11 Stopper
12 Indicator lamp operation status / mal-
function
13 Power cable with plug
14 Oil filler neck (oil container with HD 25/
15-4)
15 Water connection with filter
16 Pressure/ quantity regulation
17 Accessory compartment
18 Oil drain screw
19 Oil level indicator
20 High pressure connection
21 Manometer
22 Strut for crane loading
23 Power nozzle with covering nut
24 Spray lance
25 Power press regulator
–
The operating elements for the cleaning
process are yellow.
–
The controls for the maintenance and
service are light gray.
According to the applicable regula-
tions, the appliance must never be
used on the drinking water supply
without a system separator. Use a
suitable system separator manufactured by
KÄRCHER; or, as an alternative, a system
separator as per EN 12729 Type BA. Water
flowing through a system separator is con-
sidered non-drinkable.
Caution
Always connect the system separator to
the water supply, never directly to the appli-
ance!
Danger
Risk of injury!
–
Only use original high-pressure hoses.
–
The high-pressure hose and the injec-
tion system must be suitable for the
maximum operating pressure given in
the Technical Data.
–
Avoid contact with chemicals.
–
Check the high-pressure hose daily.
Do not use hoses with kinks.
Stop using the high-pressure hose if the
external wire layer is visible.
–
Do not use the high-pressure hose any-
more if the winding is damaged.
–
Lay the high-pressure hoses in such a
way that no vehicle can drive over it.
Device elements
Colour coding
Symbols on the machine
High pressure jets can
be dangerous if improp-
erly used. The jet must
not be directed at per-
sons, animals, live elec-
trical equipment or at the
appliance itself.
Danger of damage to the
machine on account of
frozen water! Store the
appliance in a heated-
room during winter or
empty it.
Safety instructions
15
EN
Summary of Contents for HD 16/15-4 Cage
Page 2: ...2...
Page 130: ...3 30 16 15 4 130 EL...
Page 131: ...4 HD 25 15 4 16 15 4 Cage T IEC 60364 1 1 10 m 4 mm2 10 30 m 6 mm2 131 EL...
Page 133: ...6 Power 25 Power 133 EL...
Page 134: ...7 30 2 3 0 134 EL...
Page 135: ...8 135 EL...
Page 136: ...9 3 0 1x 30 30 1x 2x 0 500 136 EL...
Page 137: ...10 3x 4x 0 3 137 EL...
Page 154: ...3 30 HD 16 15 4 154 RU...
Page 155: ...4 HD 25 15 4 4 HD 16 15 4 Cage IEC 60364 1 1 10 4 2 10 30 6 2 155 RU...
Page 157: ...6 I Power 25 Power 157 RU...
Page 158: ...7 30 2 3 0 158 RU...
Page 159: ...8 159 RU...
Page 160: ...9 3 0 I 1x 30 30 1 2 0 I 500 160 RU...
Page 161: ...10 3 4 0 3 161 RU...
Page 256: ...3 30 HD 16 15 4 256 BG...
Page 257: ...4 HD 25 15 4 HD 16 15 4 Cage IEC 60364 1 1 10 4 2 10 30 6 2 257 BG...
Page 259: ...6 I 25 259 BG...
Page 260: ...7 30 2 3 0 260 BG...
Page 261: ...8 T o 261 BG...
Page 262: ...9 3 0 I 1x 30 30 1x 2x 0 I 3x 500 262 BG...
Page 263: ...10 4x 0 3 263 BG...
Page 302: ...3 EN 12729 BA 30 HD 16 15 4 302 UK...
Page 303: ...4 HD 25 15 4 4 HD 16 15 4 Cage IEC 60364 1 303 UK...
Page 305: ...6 I 25 305 UK...
Page 306: ...7 30 2 3 0 306 UK...
Page 307: ...8 307 UK...
Page 308: ...9 3 500 308 UK...
Page 309: ...10 0 I 1x 30 30 1x 2x 0 I 3 4x 0 309 UK...
Page 313: ......
Page 314: ......
Page 315: ......
Page 316: ...http www kaercher com dealersearch...


