11
NC
series
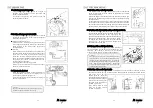
5-6 Adjusting the needle/looper setting distance
The looper set the clearance between back side of the center needle Q and the point of the
looper at 0~0.05mm. To make this adjustment, loosen screw B on the looper holder first. At
this time the looper should barely touch the right needle R. And the point of the looper at
this position, set the clearance between the left needle S at approximately 0.2~0.3mm.
If you can not make this adjustment, please change the looper’s orbit.(See below chapter)
Then see chapter 6-1 for right needle adjustment.
To change the looper's orbit, loosen screw B on eccentric A
and shift the timing mark C by moving eccentric A front or
back by referring to the illustration below.
< Note >
When adjusting the looper holder front or back, be careful
not to change the looper setting distance and don’t touch
the needle guard (rear) and needle.
< Note >
When the timing mark moves to the direction of X unnecessary, the clearance between
the point of the looper and the left needle when the looper moves to the left decreases.
Cause of occur triangle skip stitch, and improper chaining off. When the timing mark
moves to the direction of Y unnecessary, the clearance between the point of the looper
and the left needle when the looper moves to the left increases. Cause of occur needle
loop skip stitch, and easy to break the tip of the needle.
12
NC
series
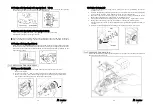
5-7 Changing the amount of the looper front-to-back movement
The clearance between the point of the left needle and
the back side of the looper when the looper moves to the
right from the extreme left end of its travel should be
0.3~0.6mm (The needle is pressed to the back). The
distance between the point of the left needle and the
center of the looper's eye on the back side of the looper
should be 3~3.5mm.
The amount of the looper front-to-back movement is
factory-set properly for needle count #11 (Nm75).
If you use needle counts Nm80~90, adjust the amount
as required.
Remove the inside cover.Loosen nut B while holding
screw A for the looper front-to-back adjusting pin with
a screwdriver.
Then move the front-to-back rod front or back.
To increase the amount, move alignment mark D on
the front-to-back rod to the front from mark C on the
looper bar guide. To decrease the amount, move
mark D to the back. Adjust according to the needle
count.
< Note >
After the above adjustment, check to make sure the chapter 5-6.
< Note >
When the amount of the looper adjusting decrease more than necessary,
easy to break the tip
of the needle. When the amount of the looper adjusting increase more than necessary, cause
of occur triangle skip stitch,
Summary of Contents for NC Series
Page 2: ......
Page 3: ......
Page 4: ......
Page 5: ......
Page 6: ......
Page 7: ......
Page 8: ......
Page 9: ......
Page 10: ......
Page 11: ......
Page 12: ......
Page 13: ......
Page 14: ......
Page 15: ......
Page 16: ......
Page 17: ......
Page 18: ......
Page 19: ......
Page 20: ......
Page 21: ......
Page 22: ......
Page 23: ......
Page 24: ......
Page 25: ......
Page 26: ......
Page 27: ......
Page 28: ......
Page 29: ......
Page 30: ......
Page 31: ......
Page 32: ......
Page 33: ......
Page 34: ......
Page 35: ......
Page 36: ......
Page 37: ......
Page 38: ......
Page 39: ......
Page 40: ......
Page 41: ......
Page 42: ......
Page 43: ......
Page 44: ......
Page 45: ......
Page 46: ......
Page 47: ......
Page 48: ......
Page 51: ...NC Series Instruction Manual NC1103 4 G series ...
Page 63: ...NC J SJ Series Instruction Manual NC1001GSJ NC1001GSJF NC1001GJ ...


