15
NC
series
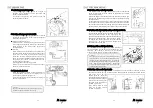
7-3 Position of the spreader thread guide
The clearance between spreader thread guide B and spreader A should be 0.5~0.8mm.
When the spreader is at the extreme right end of its travel, point (a) of the spreader thread
carrying notch should be aligned with the centerline of the slot of spreader thread guide B.
When the needle bar is at the bottom of its stroke, the clearance between the spreader
thread guide and spreader thread guide C should be 1mm and the eyelet of spreader thread
guide C should be approximately 0.5mm left to the center line of the slot of spreader thread
guide B. To make this adjustment, loosen two screws D and screw E and move each thread
guide up or down, left or right, or front or back as required.
【
8
】
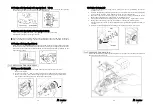
FEED DOGS & STITCH LENGTH
8-1 Feed dog height & tilt
■
Height
When the feed dogs are at the top of their stroke, the main and
differential feed dogs should be parallel with and 1~1.2mm
above the needle plate.
■
Height
Adjustment is made by loosening screws A and moving each of
the feed dogs up or down.
■
Tilt adjustment
1.
Open the front cover. Remove the cloth
plate B.
2.
Loosen screw C with a 3mm key wrench.
3.
Remove the cylinder cover.
Fit the wrench onto screw D. To tilt up the
front feed dog at its rear end, the shaft of
front side toward the front side of the
machine. To tilt down the front feed dog
at its front end, turn the shaft of front side
toward the back side of the machine.
16
NC
series
8-2 Stitch length
The stitch length can be adjusted from 1.4 to 4.2mm
with no step. The following table shows the stitch
length with the number of stitches within 1 inch
(25.4mm) and 30mm.
Stitch
Length (mm)
No. of stitches
(within 1")
No. of stitches
(within 30mm)
4.2
6.0
7.5
3.6
7.0
8.0
2.4
10.5
12.5
1.4
18.0
21.0
■
To change the stitch length
1.
To increase the stitch length, turn adjusting knob
A clockwise. To decrease the stitch length, turn
adjusting knob A counterclockwise.
2.
To adjust the stitch length with lever B, secure
lever B with nut C as required.
The range extends from the reading read by lever
B when adjusting knob A is turned to the reading
at which lever B is stopped by stopper D. To
adjust the stitch length during sewing, connect a
chain to the lever.
8-3 Differential feed
Open the front cover A. Loosen screw B.
To gather the fabric, move up screw B (maximum
normal differential feed ratio: 1:1.4).
To stretch the fabric, move down screw B (maximum
reverse differential feed ratio: 1:0.8).
When alignment mark C is aligned with the center of
screw B, the differential feed ratio is 1:1.
< Note >
Be sure to turn off the motor before changing the
stitch length.
Summary of Contents for NC Series
Page 2: ......
Page 3: ......
Page 4: ......
Page 5: ......
Page 6: ......
Page 7: ......
Page 8: ......
Page 9: ......
Page 10: ......
Page 11: ......
Page 12: ......
Page 13: ......
Page 14: ......
Page 15: ......
Page 16: ......
Page 17: ......
Page 18: ......
Page 19: ......
Page 20: ......
Page 21: ......
Page 22: ......
Page 23: ......
Page 24: ......
Page 25: ......
Page 26: ......
Page 27: ......
Page 28: ......
Page 29: ......
Page 30: ......
Page 31: ......
Page 32: ......
Page 33: ......
Page 34: ......
Page 35: ......
Page 36: ......
Page 37: ......
Page 38: ......
Page 39: ......
Page 40: ......
Page 41: ......
Page 42: ......
Page 43: ......
Page 44: ......
Page 45: ......
Page 46: ......
Page 47: ......
Page 48: ......
Page 51: ...NC Series Instruction Manual NC1103 4 G series ...
Page 63: ...NC J SJ Series Instruction Manual NC1001GSJ NC1001GSJF NC1001GJ ...


