


3. Display Description and operation Procedure
24
B)
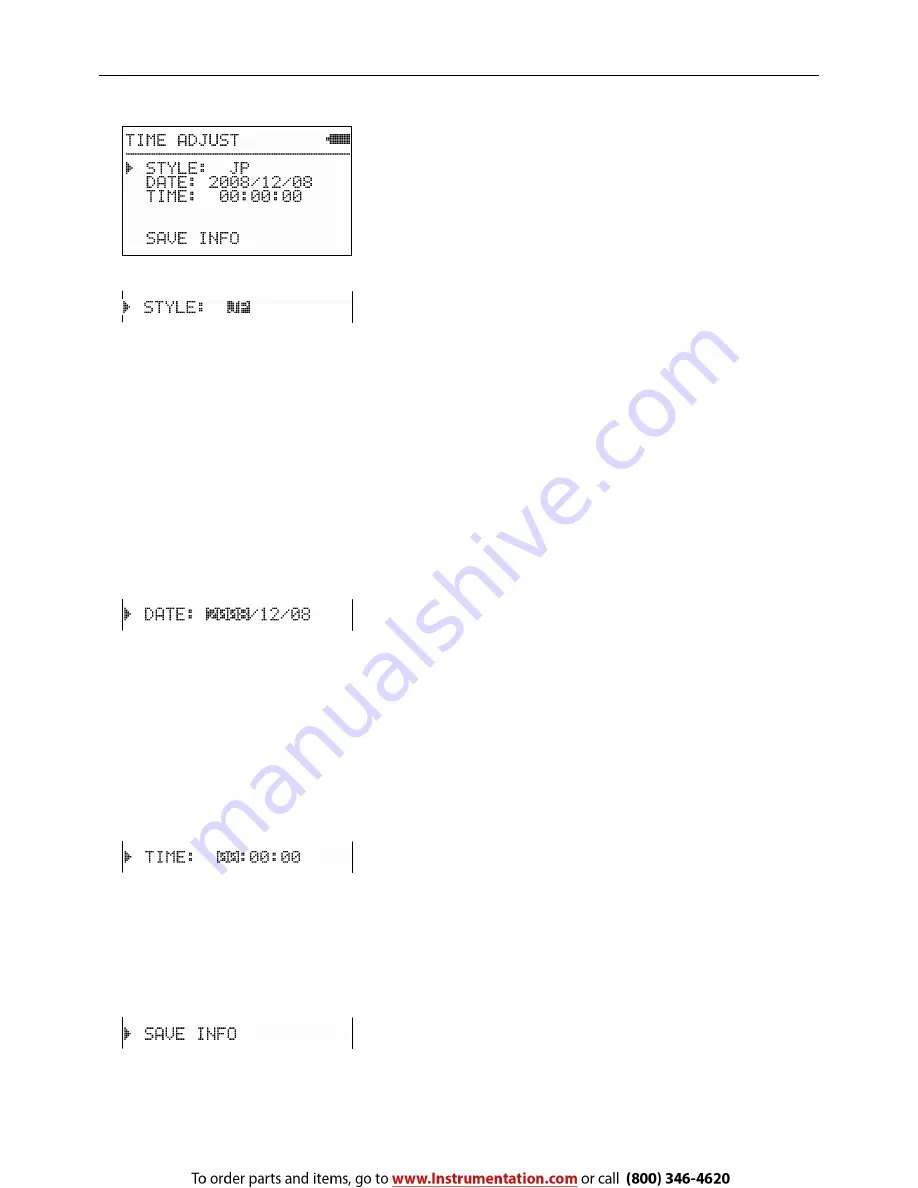
Time Adjustment
To configure the date format and time setting
STYLE: Date Format Selection
DATE:
Date
Setting
TIME:
Time
Setting
Press [
▲
] [
▼
] keys to move the cursor, and press [SET] key to select it.
Press [MENU] key to go back to the UTILITY screen.
<Date Format Selection>
For the date format select one among JP, US or EU. Each format is as
follows;
JP:
YYYY/MM/DD
US:
MM/DD/YYYY
EU:
DD/MM/YYYY
YYYY: Year, MM: Month, DD: Date
JP/US/EU will be highlighted.
Press [
▲
] [
▼
] keys to change the setting.
Press [SET] key to fix the setting and the set item will stop being
highlighted. The display will go back to the screen where you can select
the item to be configured.
To go back to the UTILITY screen, press [MENU] key.
<Date Setting>
Configure the value in the order of Year
→
Month
→
Date. (This is in
case of selecting JP for the data display format. The setting order differs
depending on the data display format.)
Use [
▲
] key to increase the figure of the highlighted item and [
▼
] key
to decrease it.
Use [SET] key to highlight the next item.
Once the date setting is complete, all items will stop being highlighted
and the display will go back to the screen where you can select the item
to be configured.
<Time Setting>
Configure the value in the order of Hour
→
Minute
→
Second.
Use [
▲
] key to increase the figure of the highlighted item and [
▼
] key
to decrease it.
Use [SET] key to highlight the next item.
After setting second, the time will stop being highlighted, and the display
will go back to the screen where you can select the item to be configured.
<To Store the Setting>
Press [SET] key to store the setting and go back to the UTILITY screen.


